Click here to read the article in German
In this article:
- What to expect on the Everest Three Passes Trek
- Route and map of the Three Passes Trek
- Stages + trip report
- About the three passes
- How difficult is the Three Passes Trek?
- Trip planning: Permits, accommodation, costs, supplies
- Gear list for the Three Passes Trek
- Climate/travel time + tips for acclimatization
- My verdict on the Three Passes Trek
Everest — the undisputed ruler of all mountains and the highest point on Earth — it’s a dream destination for hikers worldwide. One of the most iconic ways to reach it is the Everest Base Camp Trek, the classic route once taken by the first summiters. Today, it stands among the most famous hikes on the planet, drawing adventurers from around the world.
However, there is another, lesser known and more exciting route to Everest – the infamous Three Passes Trek.
This trek is longer and more demanding, some even consider it to be the most challenging teahouse trek in Nepal. Yet it’s also far more rewarding, offering a deeper glimpse into Khumbu — the legendary homeland of the Sherpa. Add in quieter, more adventurous trails and it becomes a trek that’s very hard to resist.
Hiking among the world’s highest mountains
As the name suggests, this trek crosses three Himalayan high-passes — Kongma La, Cho La, and Renjo La — each rising above 5,000 meters. Together, they link the three main valleys of the Khumbu and take you straight into the heart of the world’s highest mountains. This is a major trek by any measure: nearly three weeks walking through some of the most spectacular mountain landscapes on Earth, covering all the key highlights of the Everest region — and there are plenty of them.
The Everest Three Passes Trek had been on my bucket list for a long time — though I’ll admit it also felt a little intimidating. This was not going to be my first hike in the Himalayas. After completing the Annapurna Circuit two years ago, I knew I wanted to return to Nepal for a longer journey. And this time, I felt ready. This time, I wanted to take on the three passes.
Was it worth it? Without a doubt. In my opinion, it’s one of the most beautiful alpine treks in the world — though it can be tough in places and demands solid preparation. That’s exactly why I wrote this article. Here, you’ll find everything you need to know about the route, stages, challenges and all the essential details to prepare for the Three Passes Trek.
Ready for one of the most exciting hikes in Nepal? Then let’s get started!


At a glance:
- 🏔️ High-altitude trek: crossing three 5.000-meter passes in the world’s highest mountain range
- 📏 Length: approx. 135 km (excluding detours and acclimatization hikes)
- ⬆️ Total elevation gain: +7.500 m / –7.500 m
- 🔝 Highest point: Kongma La (5.535 m)
- 📅 Time required: 16–18 days
- ⚠️ Difficulty: difficult
- 🔥 Adventure rating: high
- ❄️ Terrain & conditions: multiple glacier crossings, challenging passes, harsh climate, low temperatures
- 🛏️ Accommodation: simple lodges; own sleeping bag recommended
About my background
Before diving into the details, a few words about my own experience. I`m a regular solo-hiker, having done 25+ self-supported high-altitude treks in the last 10 years. As pretty much always, I did this trek independently, without a guide. Regular readers of the blog will know that this is how I organize most of my trips.
On the Three Passes Trek, this approach is generally permitted and — thanks to the many lodges along the route — relatively easy to manage. If you’re considering hiking the Three Passes Trek unguided, I strongly recommend having prior experience with high-altitude trekking. You’ll find more detailed information further down in the article.
Hiking guide for the Everest region
My recommendation: Jamie McGuiness – Trekking in the Everest Region
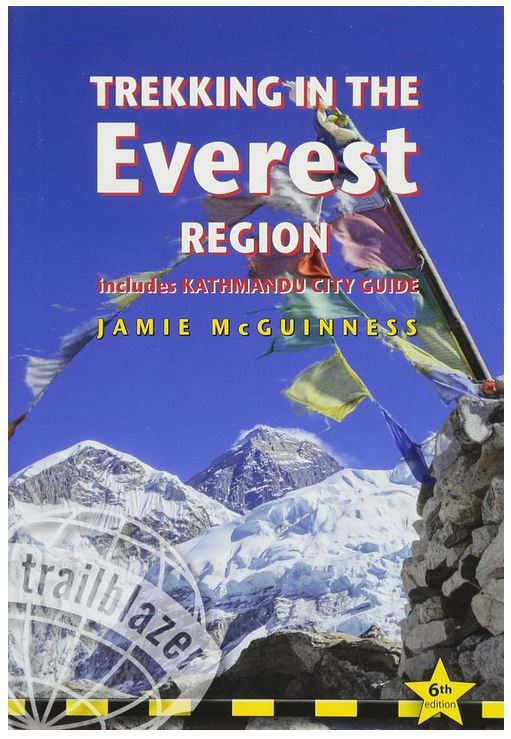
The excellent hiking guide “Trekking in the Everest Region*” from the Trailblazer series is currently the best book available for the Khumbu region and my top recommendation for hikers.
In addition to detailed information on all trekking routes, the book contains lots of suggestions for day trips and excursions. It also includes plenty of interesting background information and practical tips – all from an author who has been traveling to the Everest region for decades.
Together with a good hiking map*, this book will prepare you for any situation!
As a hiking map I used the double-sided Trekking Map Jiri to Everest Basecamp* from Map House. The 1:50,000 scale provides good details on all trails in the entire Everest region, including this trek. Alternatively, there is a map for the Three Passes Trek and the Basecamp Trek* at the same scale.
💡 Tip: If you prefer to navigate with your smartphone, the popular outdoor app Outdooractive also contains the trails and well-known trekking routes in the Everest region. Definitely worth a look if you regularly use navigation apps!
What to expect on the Everest Three Passes Trek
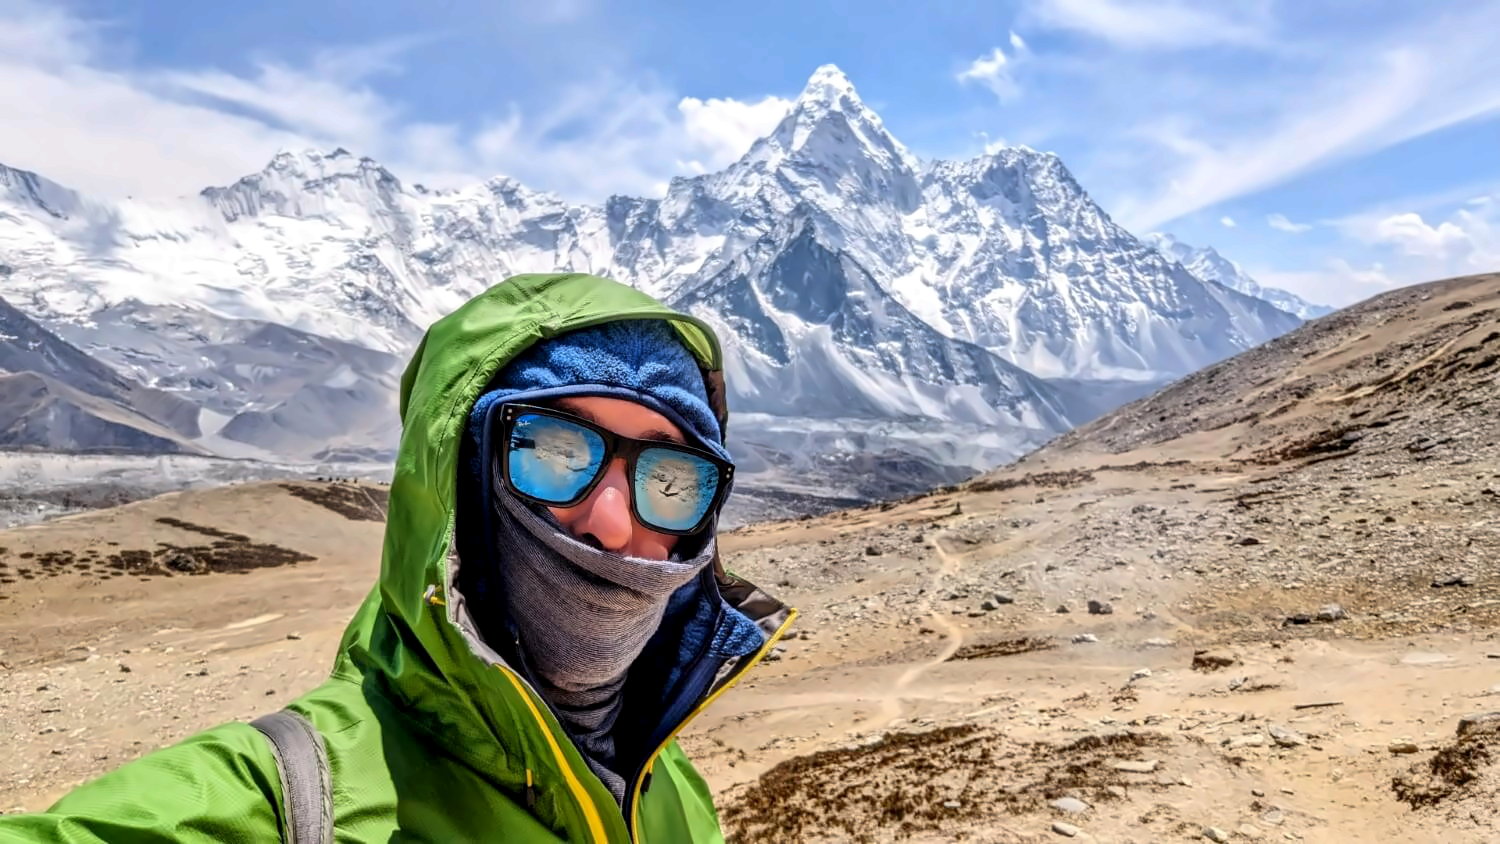
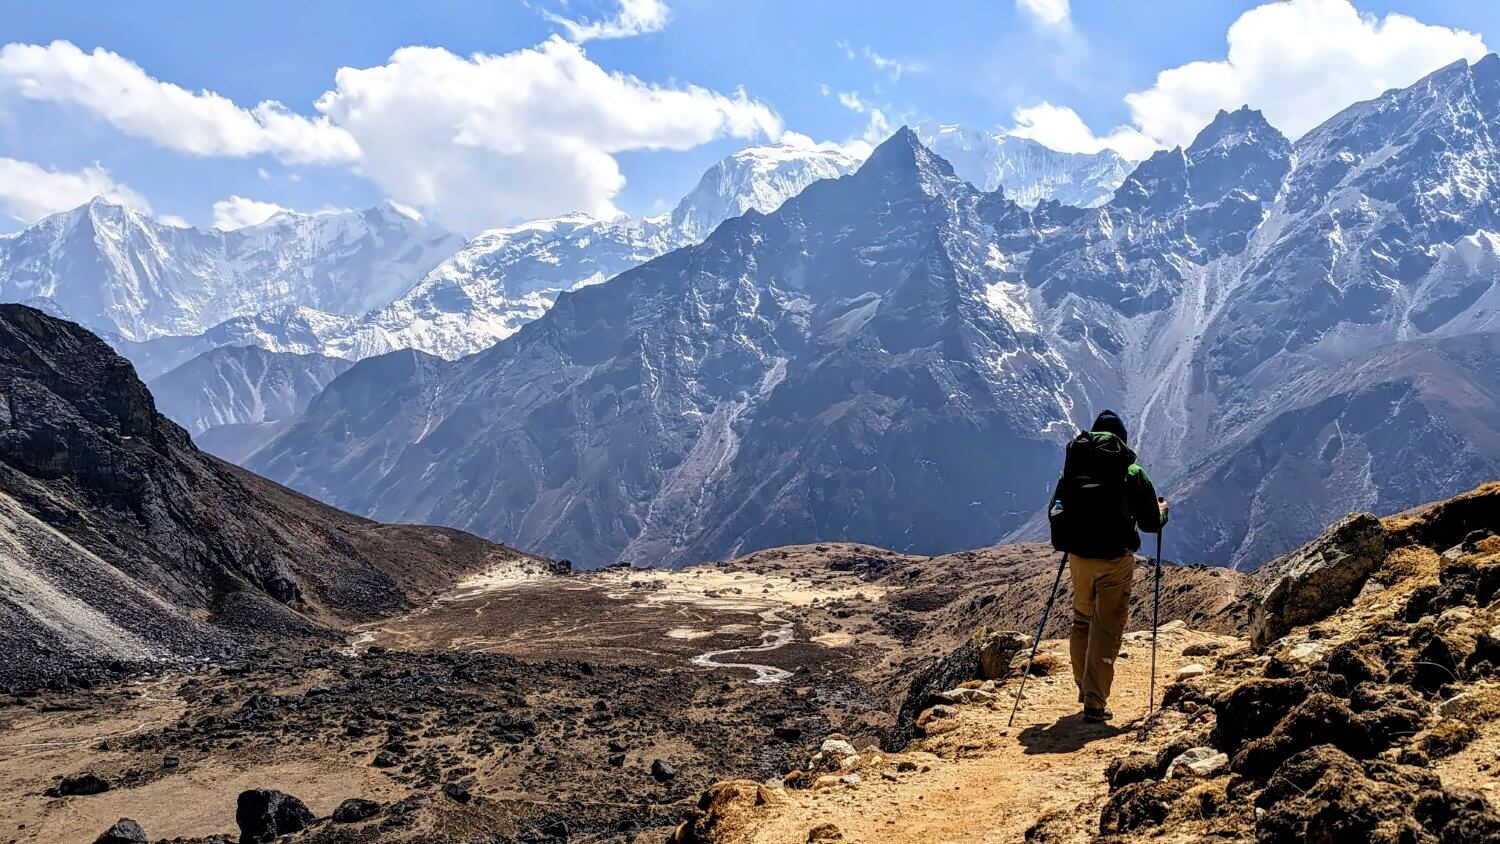
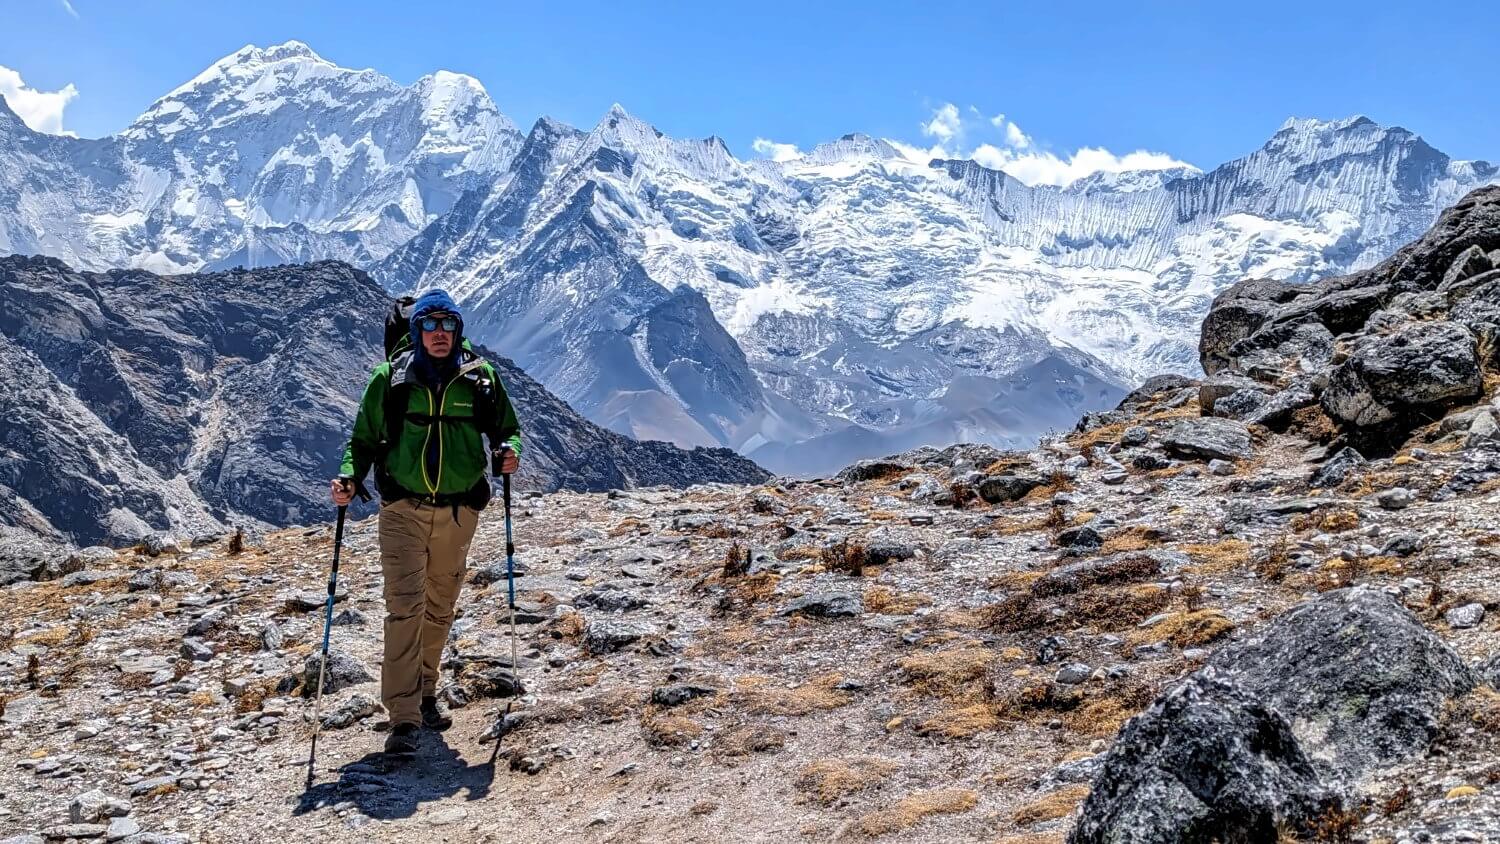
Challenging mountain trails, three Himalayan high passes rising well above 5,000 meters, numerous glacier crossings, and daily views of the world’s highest peaks — that’s the Everest Three Passes Trek in a nutshell. Everything about this hike feels big and uncompromising. It’s high-mountain terrain in its purest form.
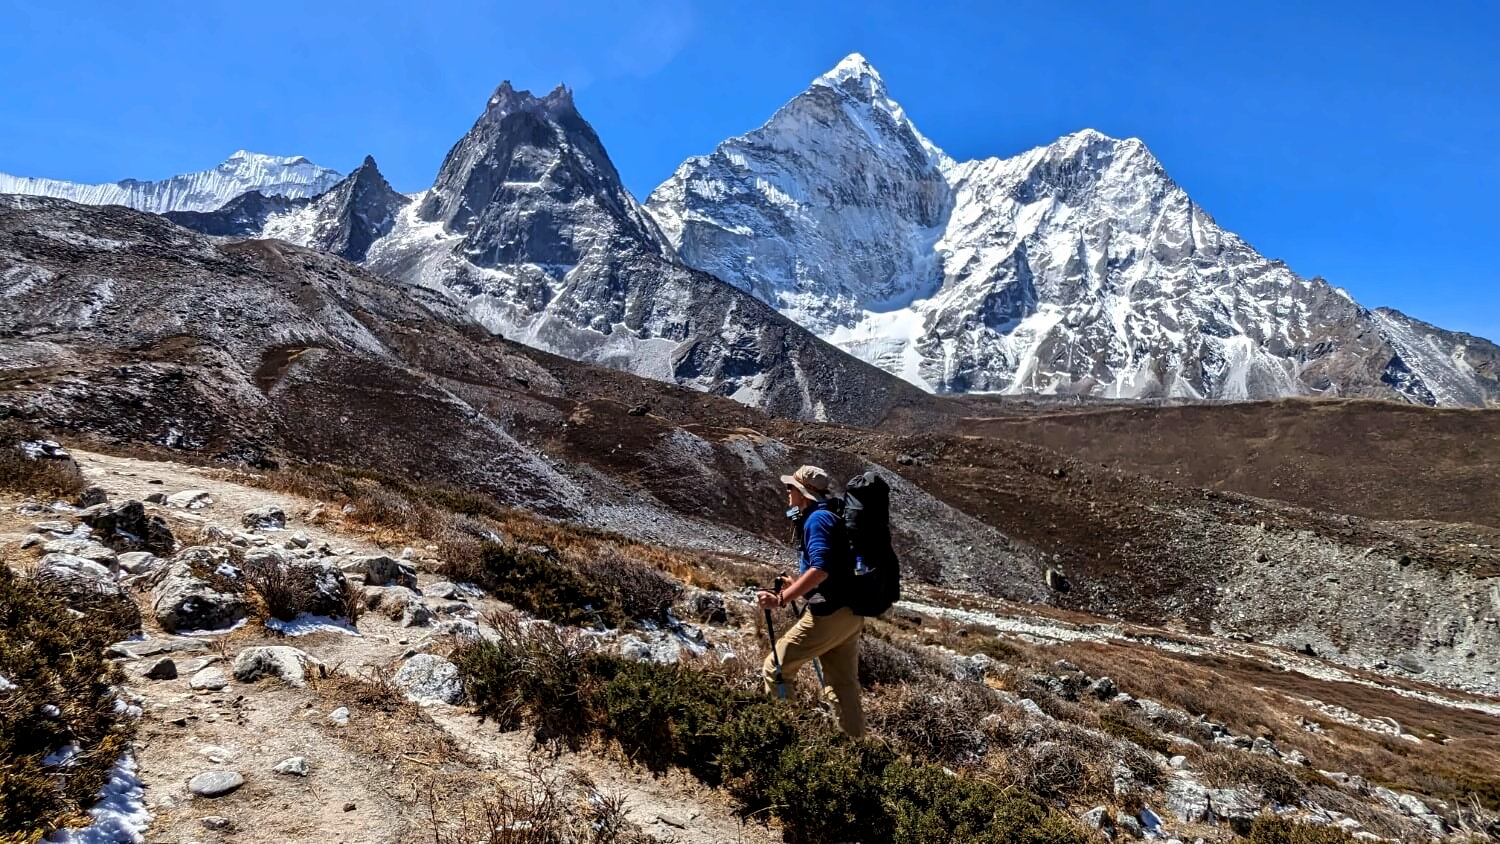
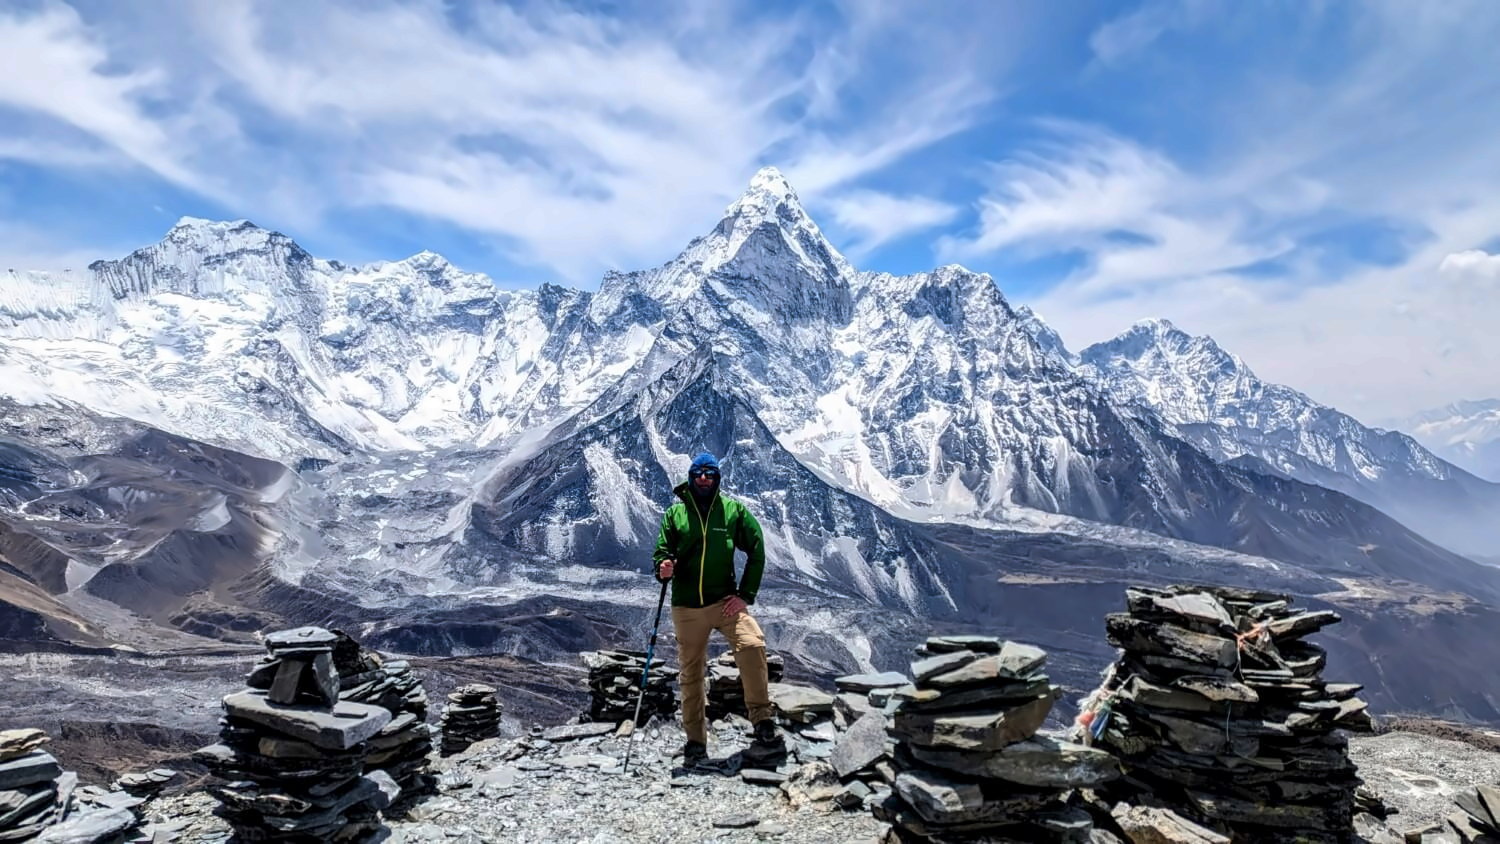
In terms of scenery, the trek never disappoints. There isn’t a single dull stage. If you want to experience the world’s highest mountains without being a mountaineer, this is very hard to beat. The scale is truly humbling: Cho Oyu, Lhotse, Nuptse, Ama Dablam, and of course Mount Everest — it’s a galaxy of peaks that towers above everything else on the planet, surrounding you day after day and constantly reminding you how small you are – in the best possible way.
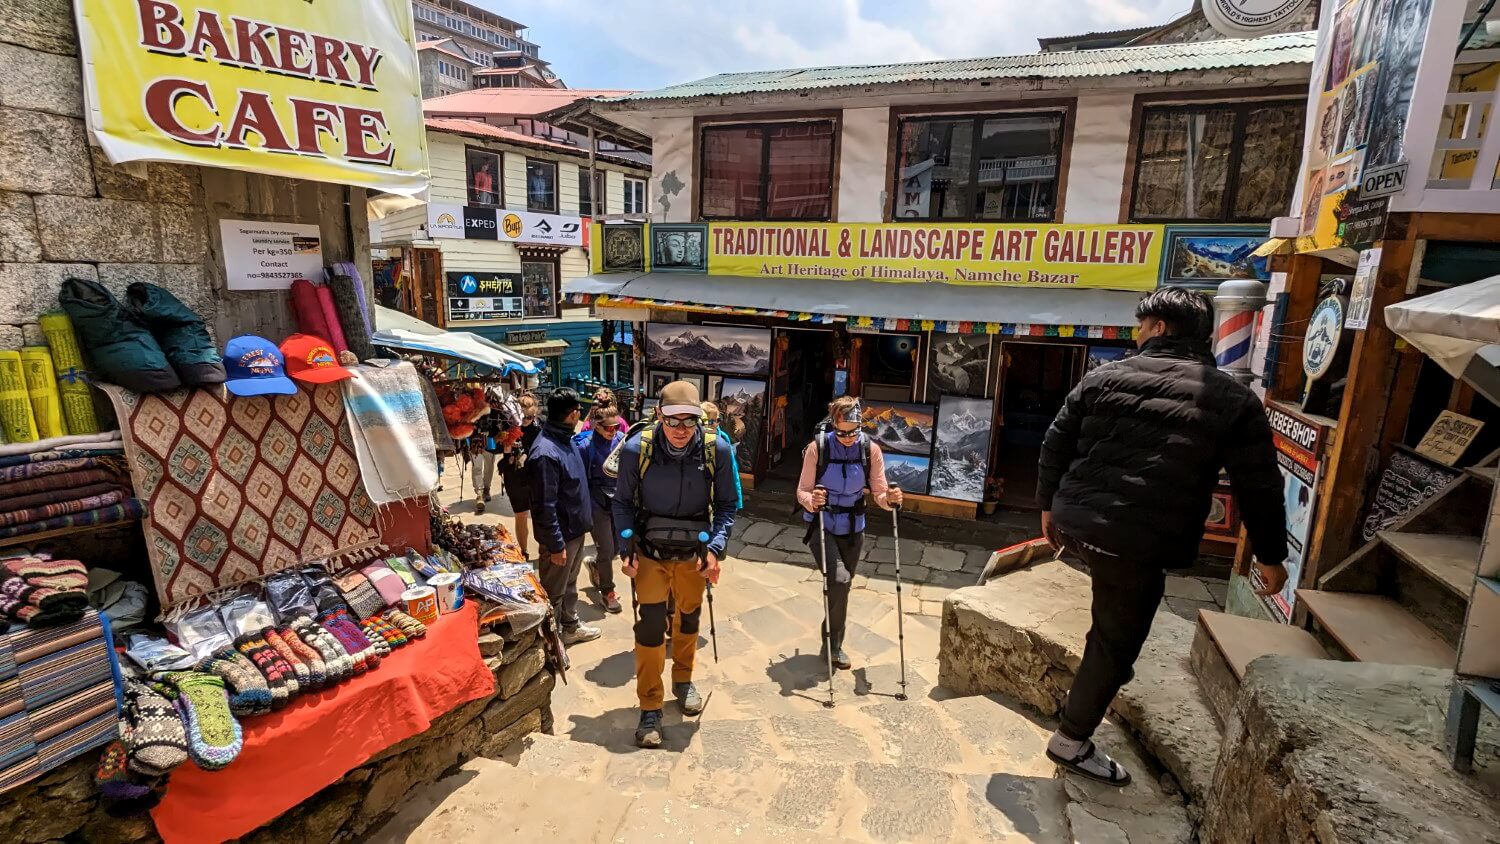
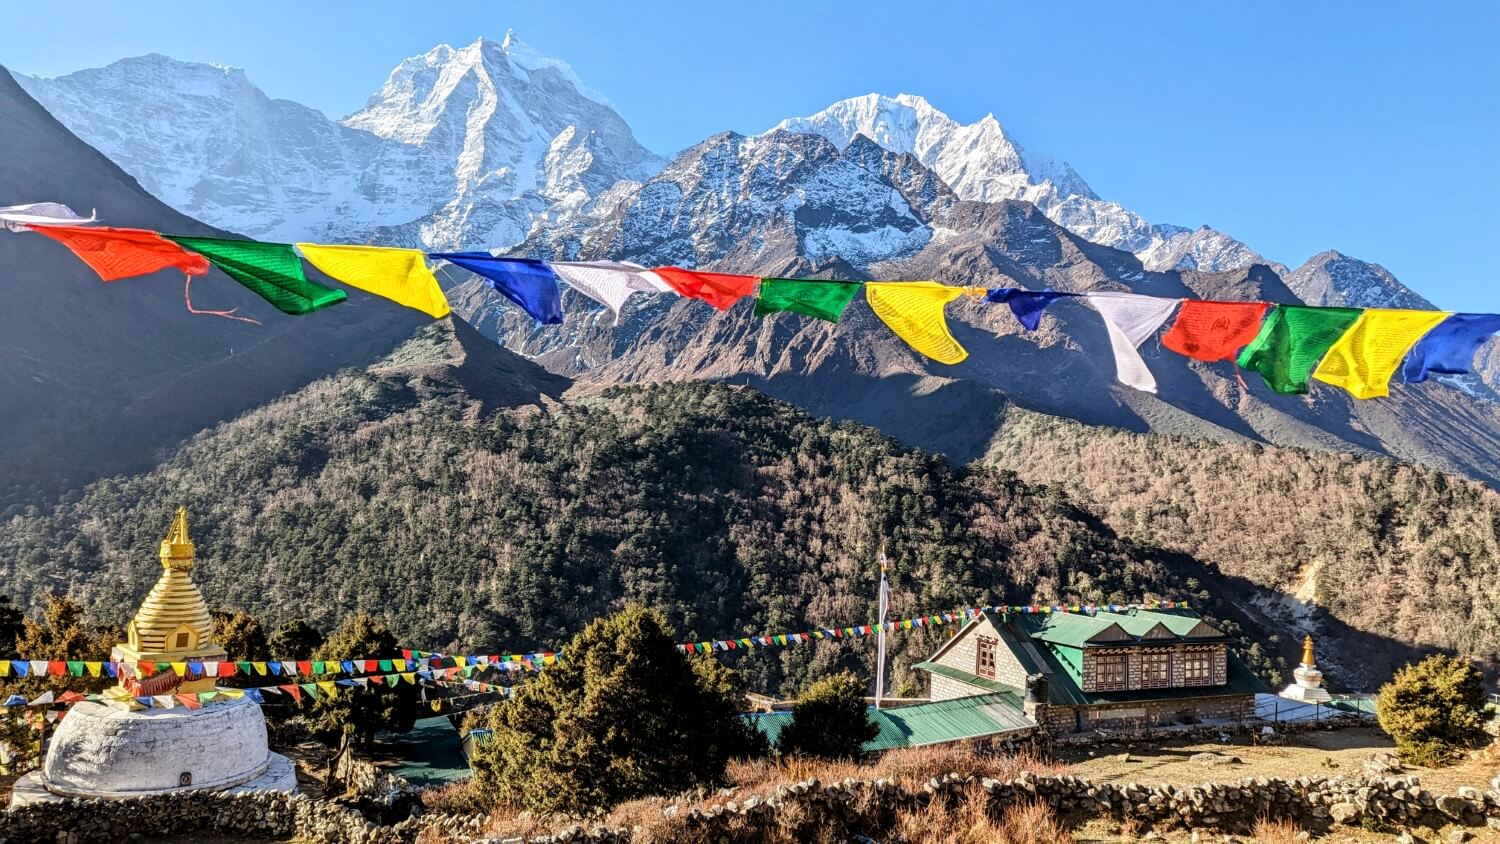
But it’s not just about the landscape. The Khumbu region is also home to the Sherpa — a culture deeply shaped by life in the high mountains. Along the trail, you pass through remote villages, centuries-old monasteries, and lively tourist hubs like Namche Bazaar. These encounters add a human dimension to the journey, grounding the vastness of the mountains in everyday life.
Why this hike is better than Everest Basecamp
The Everest Three Passes Trek has one big advantage over the more popular Everest Base Camp Trek: You get to experience a much larger part of the Khumbu in a single journey. Rather than following the same trail to Base Camp and back, this trek forms a true circuit, taking you deep into the region from multiple perspectives.
A welcome bonus is the number of worthwhile side trips along the way — to Everest Base Camp itself, the famous Gokyo Lakes, and several outstanding viewpoints. For those with enough time and ambition, there’s even the option to attempt a 6.000-meter trekking peak such as Island Peak (6,189 m) or Mera Peak (6,461 m). With sufficient energy and good conditions, the possibilities are wide open.
Finally, and perhaps most importantly: The trek is still not too crowded. While Everest — the highest mountain on Earth — draws huge numbers of visitors, the Three Passes Trek remains noticeably quieter. Most hikers focus solely on reaching Everest Base Camp, leaving the high passes and side valleys far more peaceful by comparison.
Infrastructure, trails, and the reality of the Everest Region
While it`s easy to romanticise the Himalayas as some kind of hidden Shangri La we need to be realistic about one thing: The Everest region is pretty touristy. Accordingly, the Three Passes Trek – like all teahouse trails – has a good infrastructure in place. You will regularly pass through villages, meet porters, guides and other hikers on the trails. It´s far from a wilderness trek and you’re never more than a few kilometers from the next settlement.
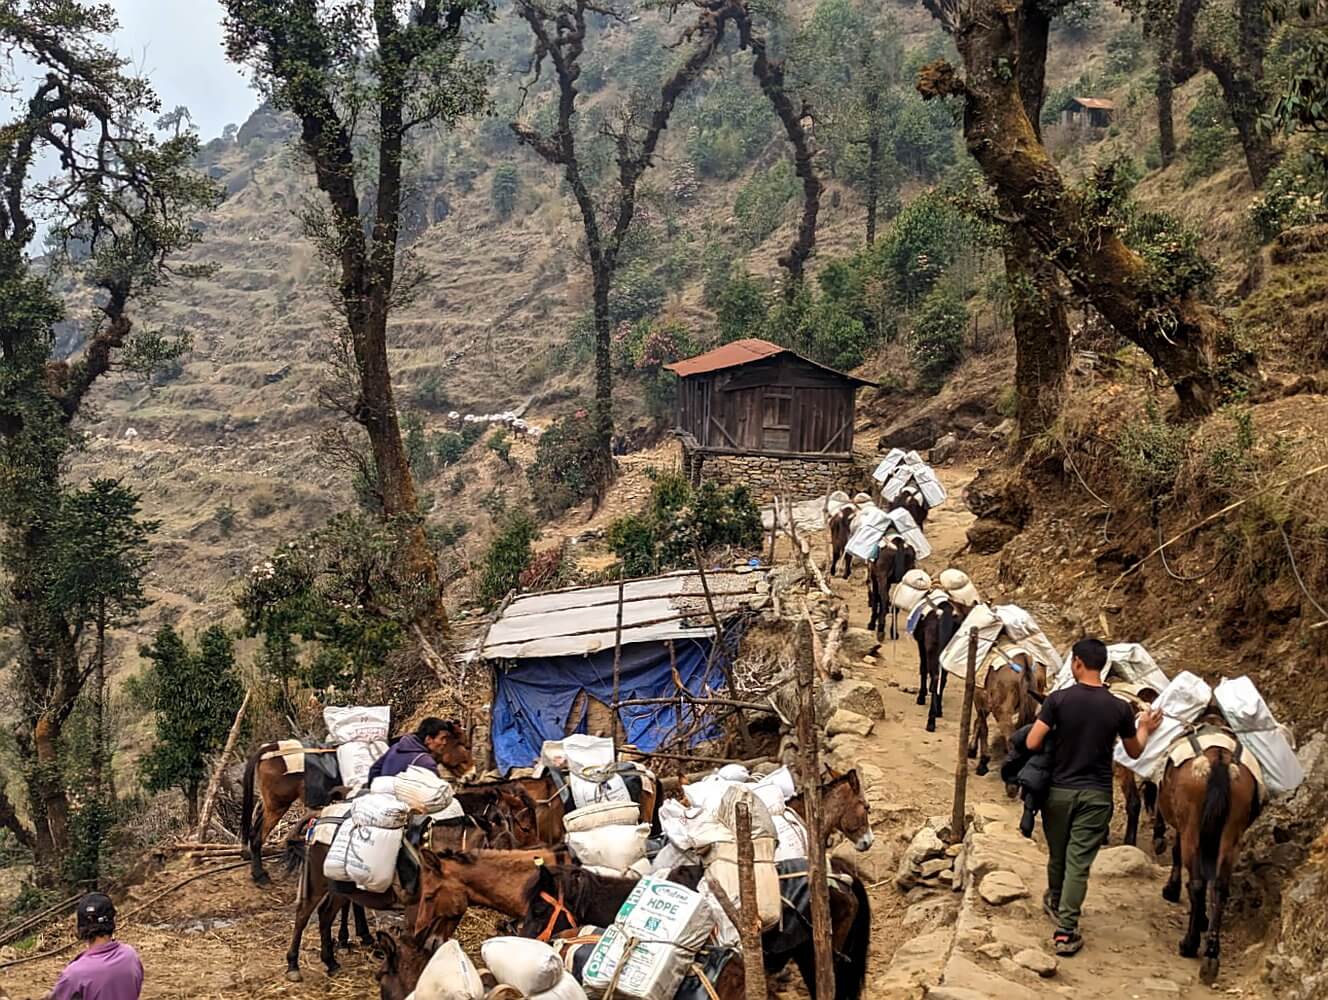
That said, the experience feels very different from the Annapurna Circuit — mainly because there are no roads. While many of Nepal’s well-known valley treks are increasingly affected by road construction, the Khumbu remains a region of pure trails. Beyond Lukla, you won’t encounter a single road. Everything is still transported the traditional way — by yak or on someone’s back.
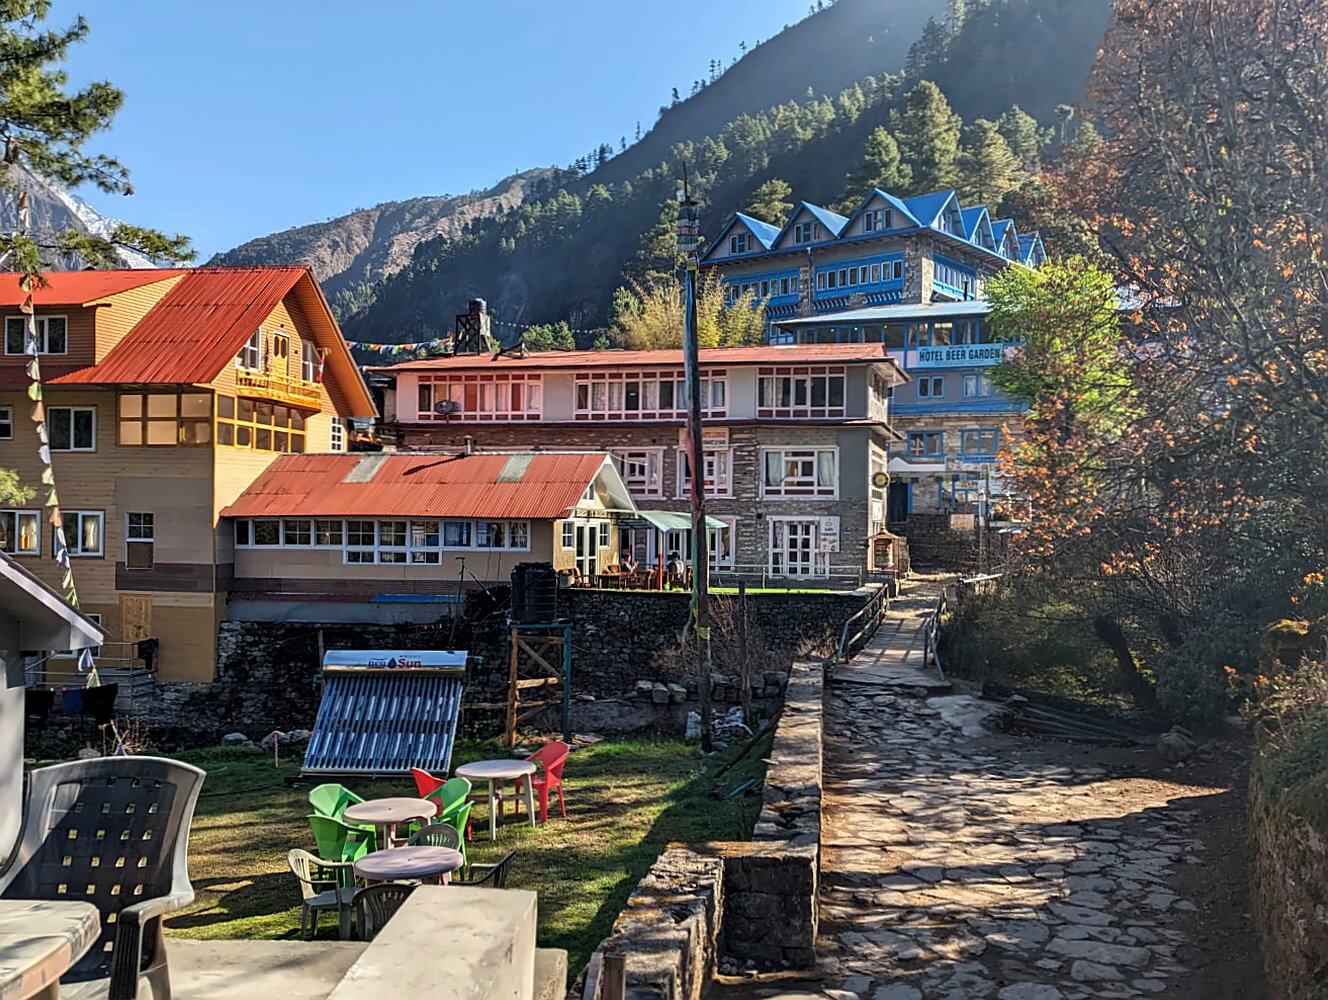
Also, much of the Everest region is a true high-altitude environment that was never inhabited year-round. Many villages above Namche Bazaar began as seasonal yak pastures and were only later developed into permanent settlements with lodges as trekking tourism grew. Outside these villages, you can sometimes feel exposed to the vast, unforgiving landscape — and that’s precisely what makes the trek so compelling.
Route and stages of the Three Passes Trek
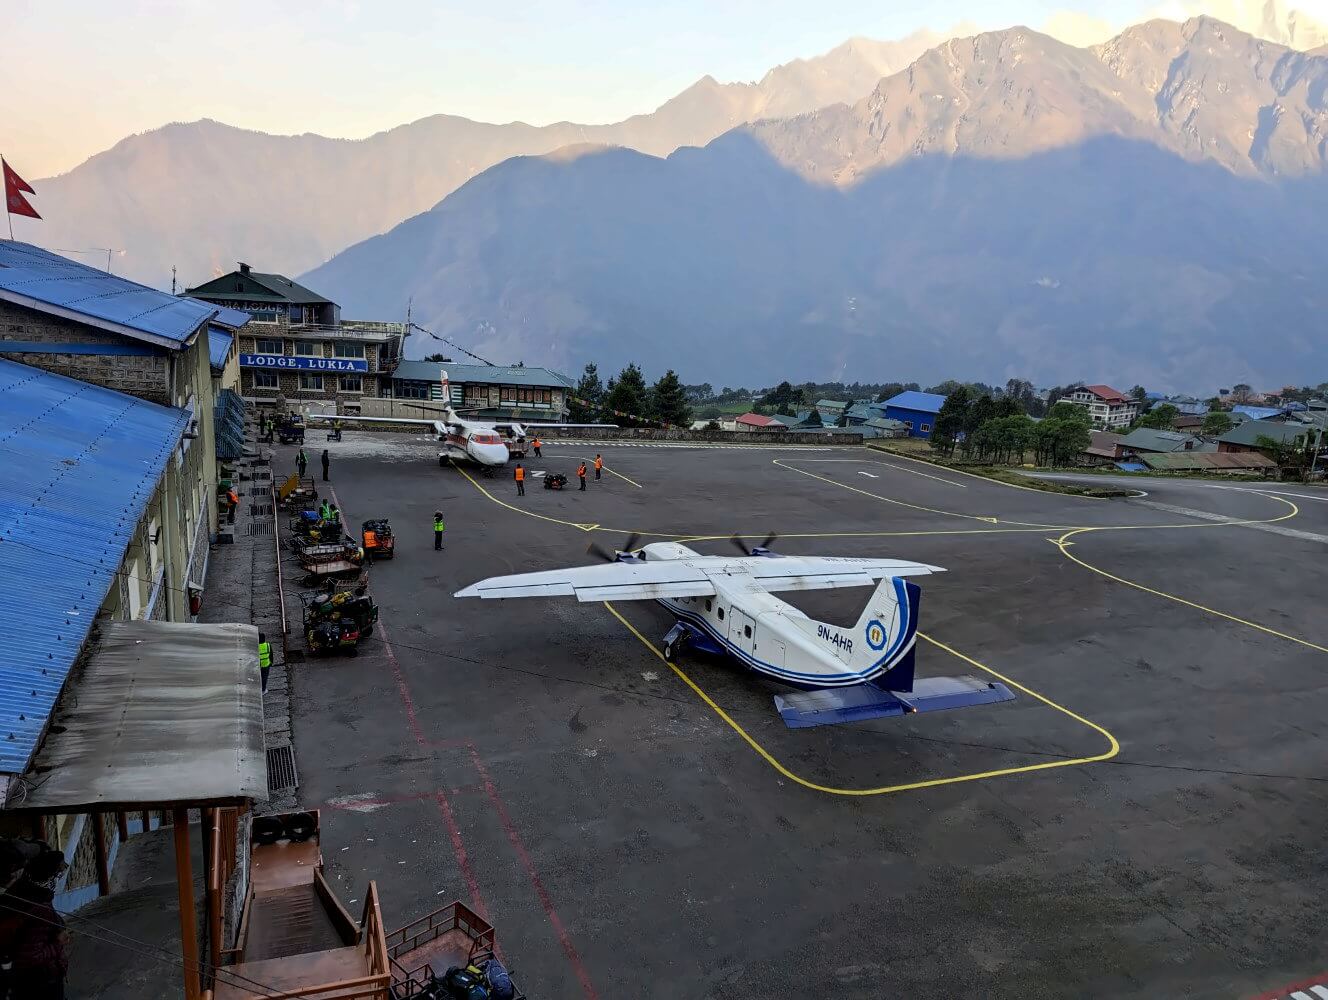
Owing to its shape on the map, the Three Passes Trek is often described as a “lollipop loop.” The “stick” of the lollipop follows the initial approach through forestes along the milky waters of the Dudh Koshi, leading from the small mountain airstrip in Lukla to Namche Bazaar — the “capital” of the Sherpa, dramatically surrounded by mountains. Most trekkers spend a day here to acclimatize and explore the surrounding area.
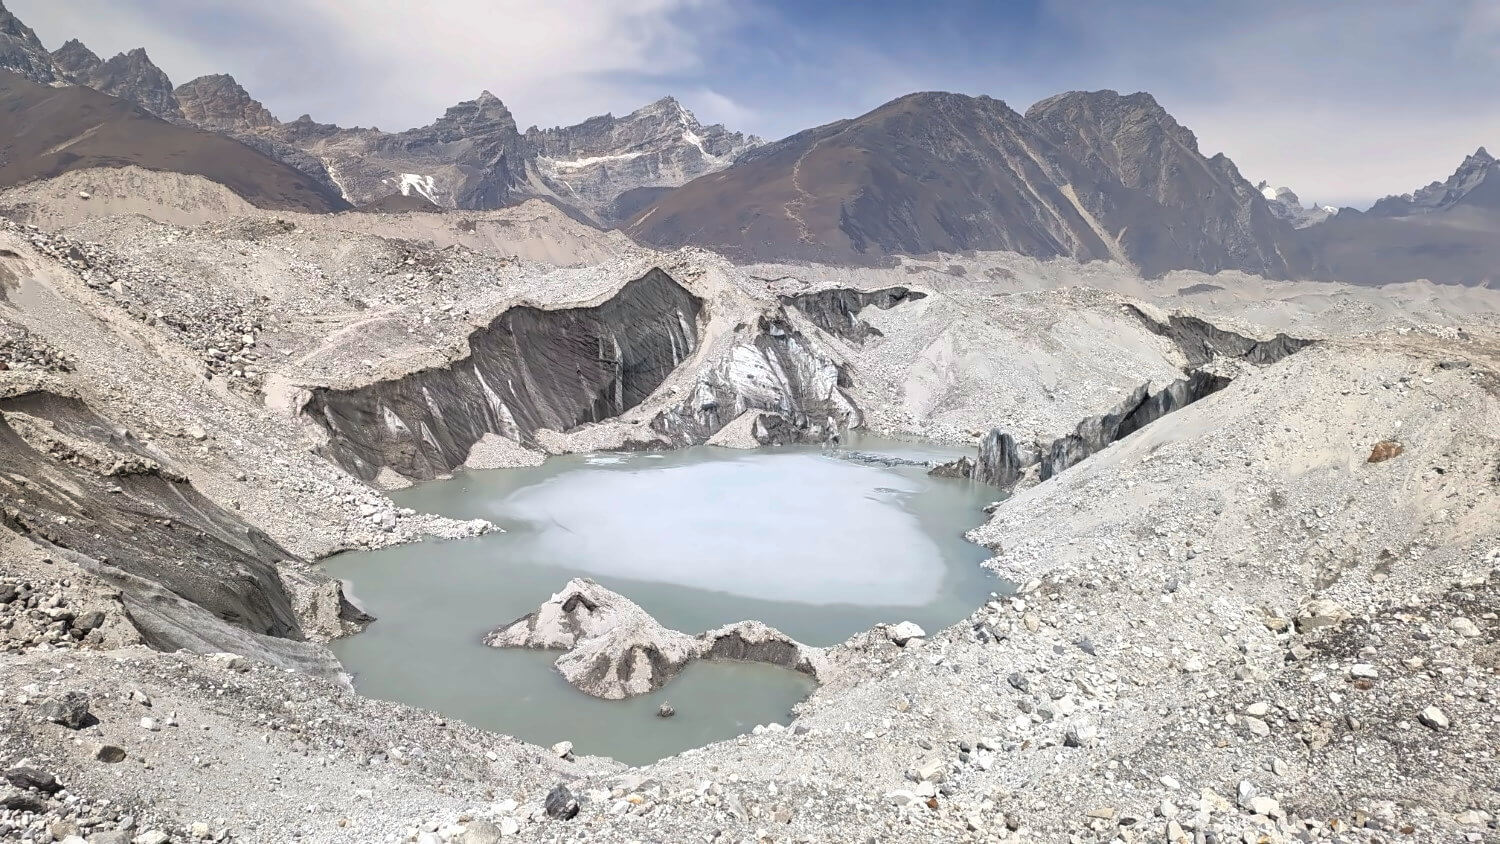
The alpine section of the trek begins in Namche. From here, the route crosses the three great valleys of the Khumbu: the Imja Valley, the Khumbu Valley, and the Gokyo Valley, home to the vast Ngozumpa Glacier and its six striking high-altitude lakes. Most hikers complete the trek in an anticlockwise direction, which generally allows for better acclimatization. Elevation is gained more gradually, and the climbs to the high passes involve less overall ascent and gentler gradients.
🧭 Popular side trips on the Everest Three Passes Trek
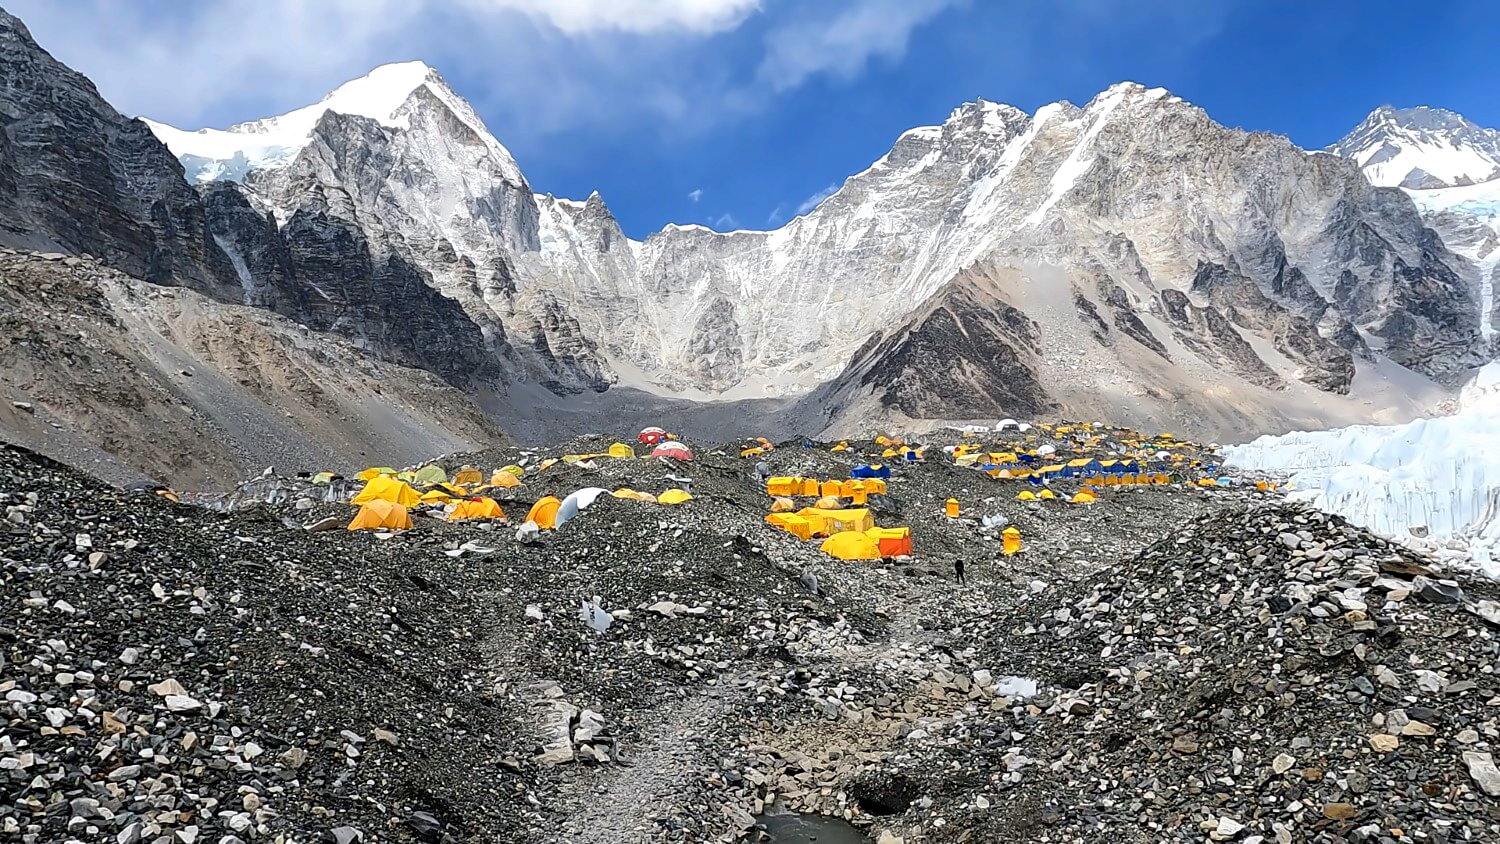
In the Khumbu Valley, a side trip to Everest Base Camp — arguably the most famous campsite in the world — is well worth considering. Many hikers also climb Kala Patthar (5,644 m), which offers one of the best viewpoints of Everest. Together, these two excursions require around two additional days.
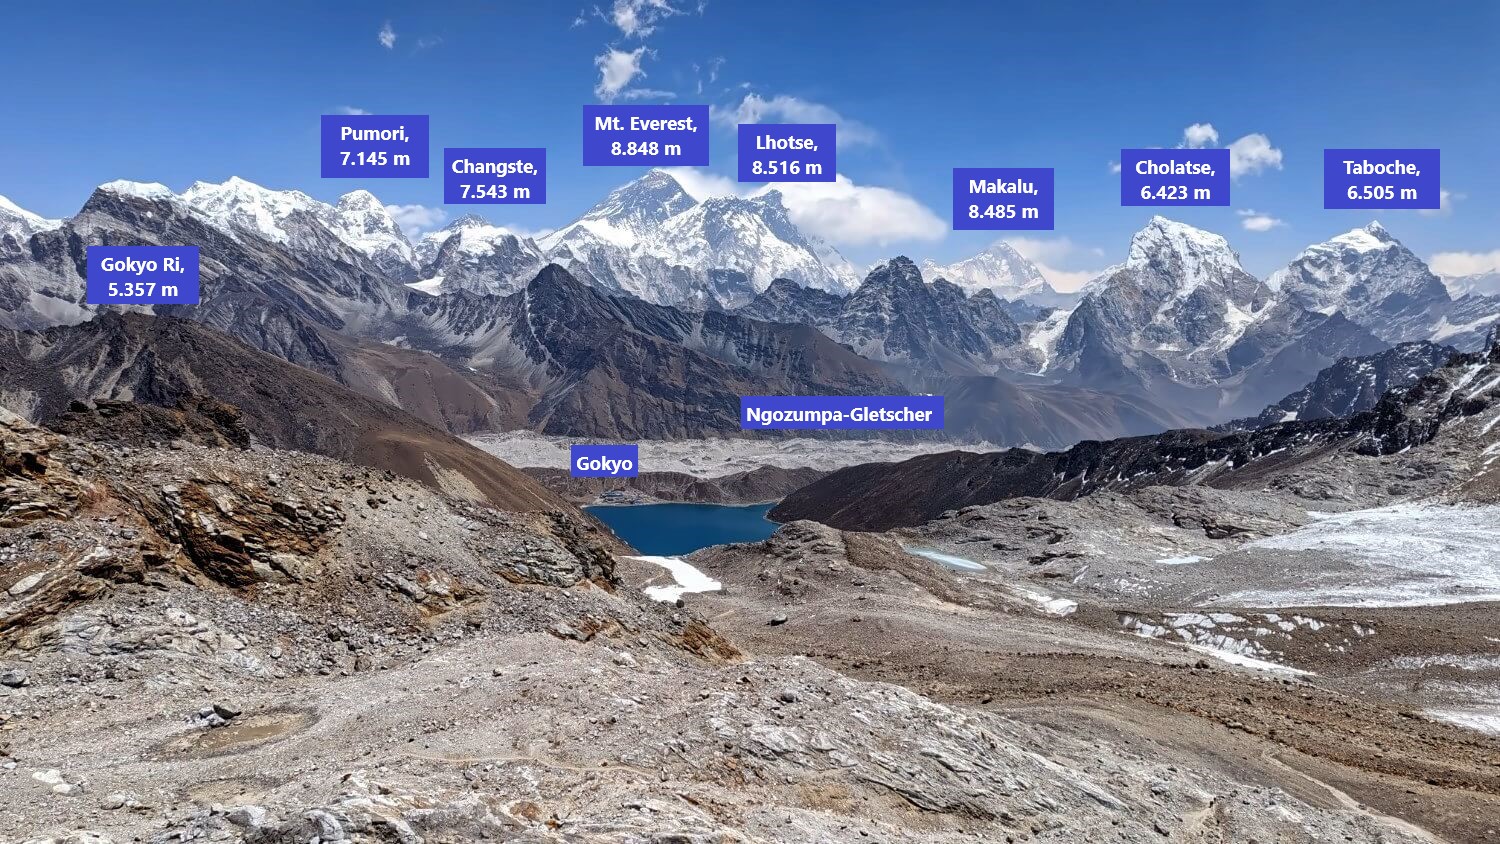
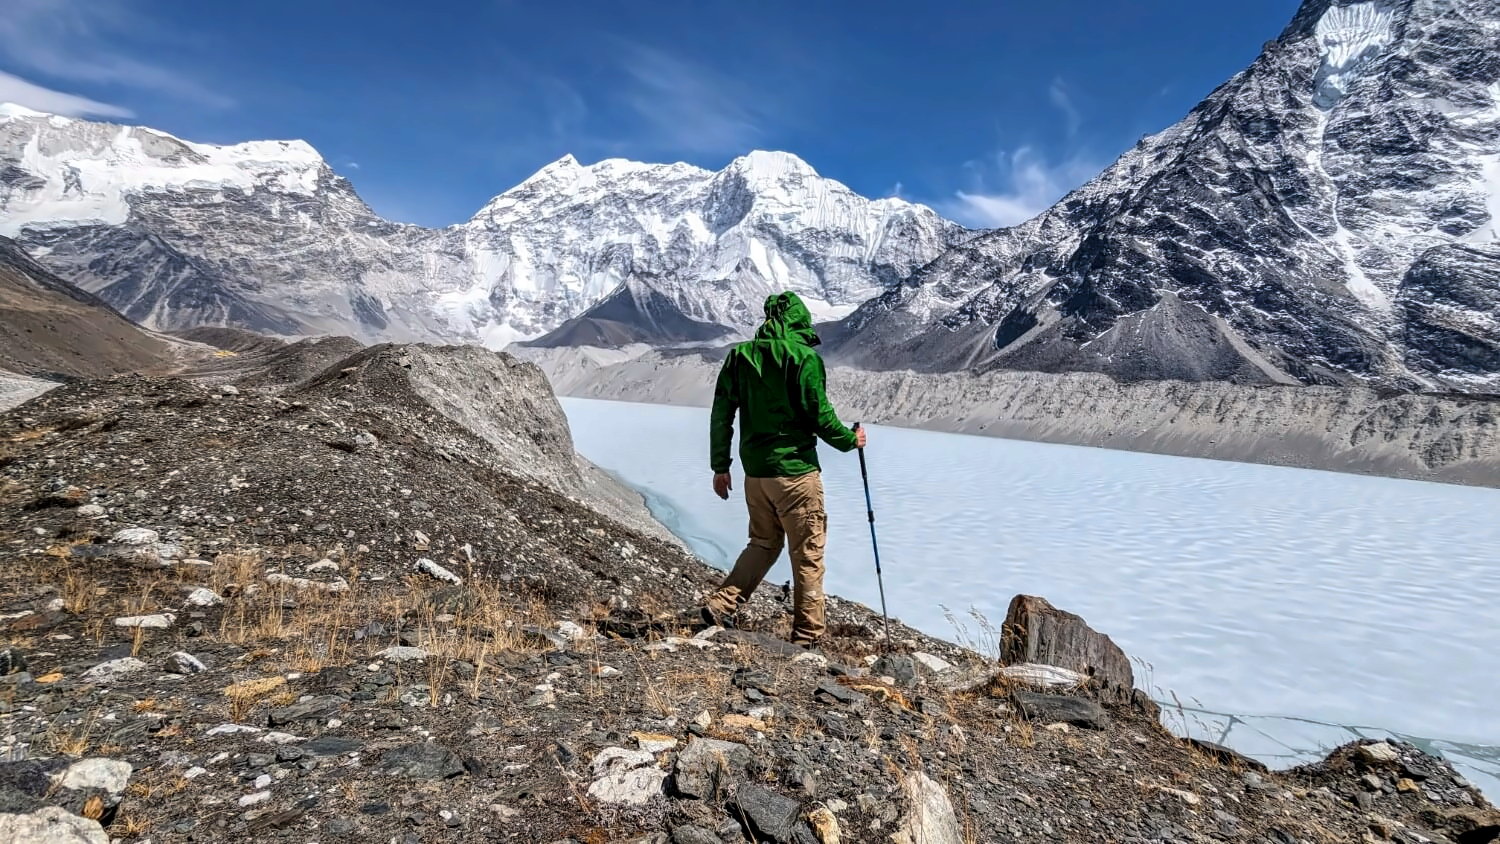
In the Gokyo Valley, hikes to the Gokyo Lakes and up Gokyo Ri (5,357 m) are especially popular and can be done with just one extra day.
Before crossing the first high pass, Kongma La, a climb of Chukhung Ri is highly recommended. Several guides told me it’s the single best viewpoint in the entire Everest region. With more time, you can also hike to Island Peak Base Camp — a rewarding trip even without a summit attempt — which requires one additional day.
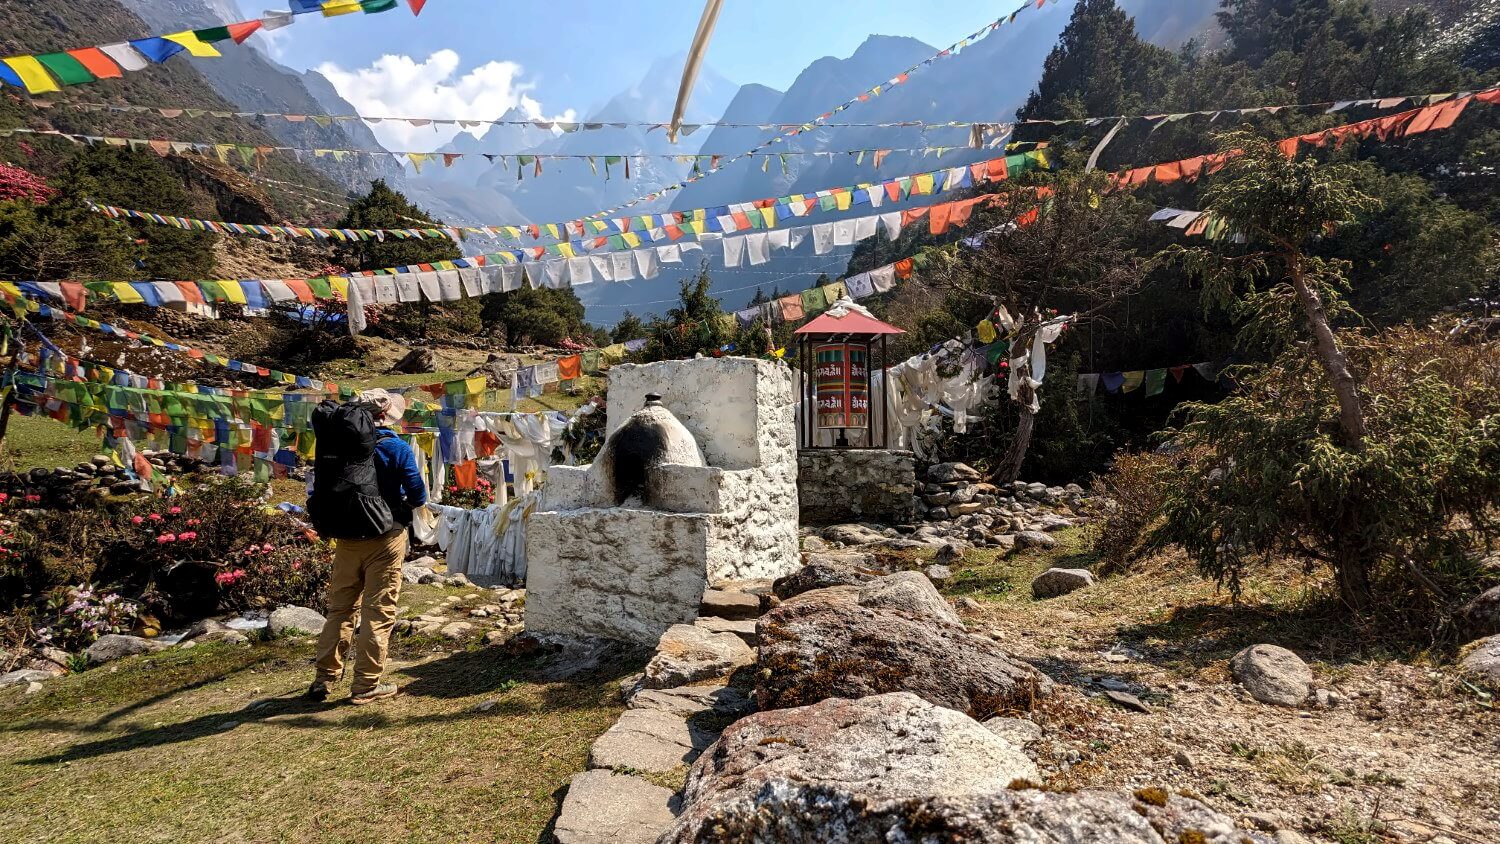
After Gokyo, the route crosses the final high pass, Renjo La, and descends into the quiet Thame Valley. After nearly two weeks spent high in the mountains, the trail drops back below the tree line, returning to a landscape of villages, shrines, and prayer wheels. From here, it’s only a short walk back to Namche, where the loop comes full circle. The final stretch to Lukla follows the same trail as the approach.
Download the GPS Track

Take a look at the exact route on the map below. The waypoints mark the locations of the individual stages. If you’re using the GPS track, please keep in mind that routes across glaciers can change, as this terrain is constantly shifting.
Elevation profile of the Three Passes Trek:
(Click to enlarge)

Overview of the stages and trip report of the Everest Three Passes Trek
Here you’ll find all stages of the Everest Three Passes Trek as I hiked them myself. The itinerary is based on recommended daily elevation gains (see the acclimatization section) and follows a deliberately conservative pace. If you start in Lukla, you can use this outline directly for your own trek — no prior acclimatization is required.
If you’d like to know what to expect on each day, the following pages cover every stage in detail. Simply click on the respective link. Each section includes a thorough route description, my personal trip report, and plenty of stunning photos from the world’s highest mountain range. Start here.
(Trip report only in German for now, but use Google Translate)
Part 1 – Lukla to first pass
| Stage | Start/Finish | Length | Elevation Gain |
|---|---|---|---|
| 01. An unpleasant start | Bupsa/ Lukla – Phakding | 14 km | ⬈915 ⬊1.050 |
| 02. In the land of the Sherpa | Phakding – Namche Bazar | 10,5 km | ⬈1.235 ⬊480 |
| 03. Acclimatization hike in Namche Bazar | Namche Bazar | 8,5 km | ⬈580 ⬊580 |
| 04. Farewell to Namche | Namche Bazar – Pangboche | 13,5 km | ⬈1.115 ⬊560 |
| 05. Journey into the high mountains | Pangboche – Dingboche | 7 km | ⬈545 ⬊216 |
| 06. In the shadow of Ama Dablam | Dingboche – Chukhung | 5,5 km | ⬈445 ⬊20 |
Part 2 – Kongma La to Gokyo
| Stage | Start/Finish | Length | Elevation Gain |
|---|---|---|---|
| 07. Hike to Island Peak Basecamp | Chukhung | 13 km | ⬈384 ⬊384 |
| 08. Hike to Chukhung Ri | Chukhung | 6 km | ⬈780 ⬊780 |
| 09. Kongma La: The toughest pass of the trek | Chukhung – Kongma La – Lobuche | 14,5 km | ⬈890 ⬊1.250 |
| 10. Visiting the most famous campsite in the world | Lobuche – Gorak Shep – Everest Basecamp | 11 km | ⬈430 ⬊190 |
| 11. Journey to the second pass | Gorak Shep – Dzonghla | 12 km | ⬈150 ⬊510 |
| 12. Cho La: Footsteps on the ice | Dzonghla – Cho La – Dragnag | 9 km | ⬈670 ⬊815 |
Teil 3 – Gokyo and the return to Lukla
| Stage | Start/Finish | Length | Elevation Gain |
|---|---|---|---|
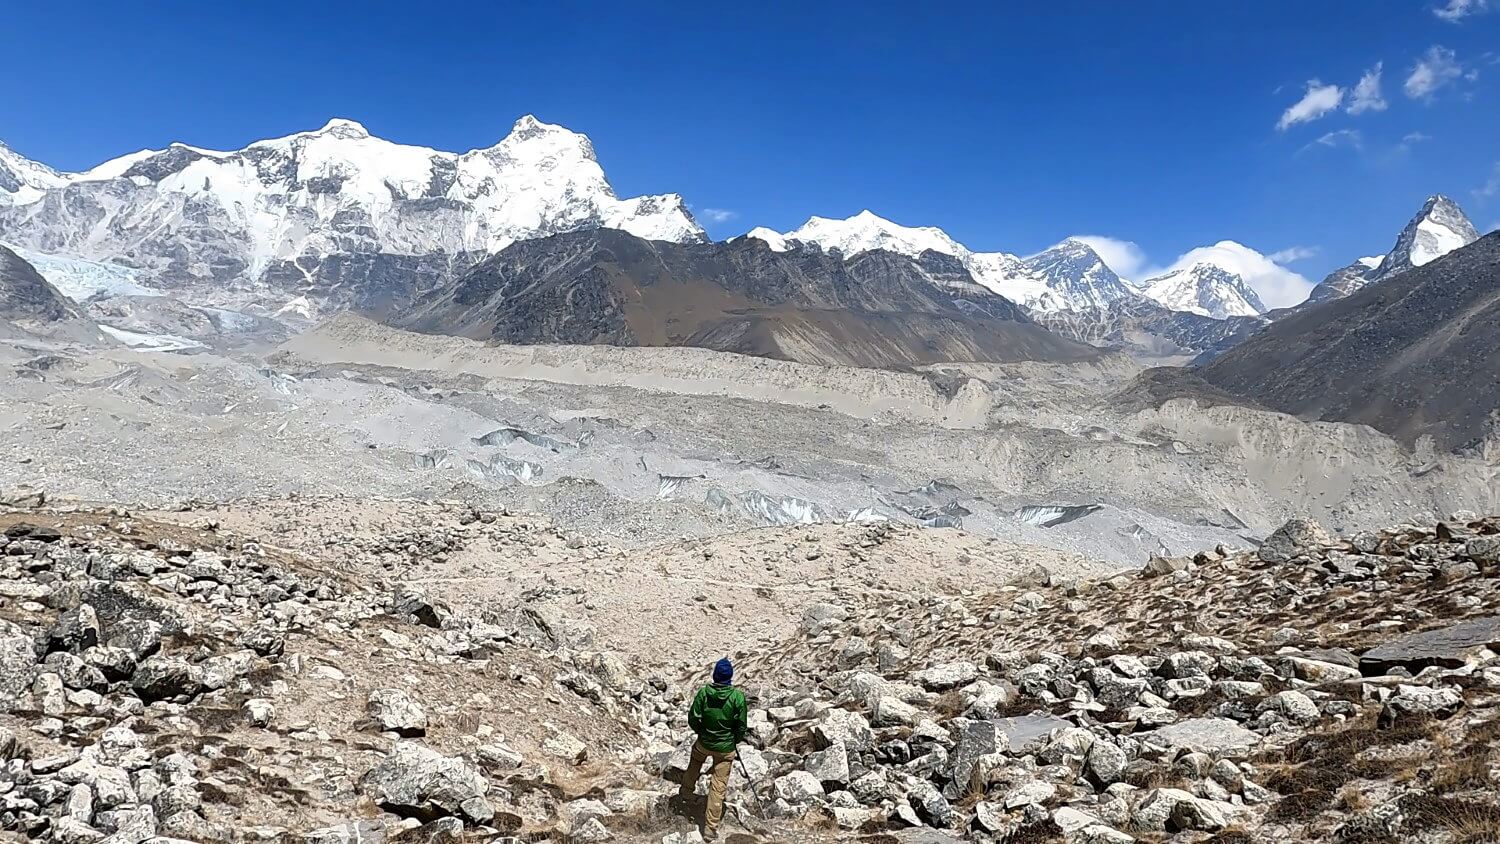
| 13. Ngozumpa: Crossing the longest glacier in Nepal | Dragnag – Gokyo | 4 km | ⬈120 ⬊50 |
| 14. The magical lakes of the Gokyo Valley | Gokyo | 12 km | ⬈250 ⬊250 |
| 15. Renjo La: The last obstacle | Gokyo – Renjo La – Lunghden | 11 km | ⬈630 ⬊1.040 |
| 16. Farewell to the high mountains | Lunghden – Thamo | 14 km | ⬈270 ⬊1.130 |
| 17. Back to civilization | Thamo – Namche Bazaar – Phakding | 16 km | ⬈610 ⬊1.460 |
| 18. The final problem | Phakding – Lukla | 7,5 km | ⬈415 ⬊200 |
The Three High Passes: What to Expect
The three namesake passes are both the highlight and the main challenge of the trek. None of them should be underestimated — these are true high-altitude passes, not a well-trodden “hiking highway” like Thorong La on the Annapurna Circuit. Along with demanding terrain, you’ll be dealing with altitudes above 5.000 meters. That said, the level of difficulty varies from pass to pass.
When hiking the route counterclockwise, the passes are crossed in the following order:
- Kongma La (5.535 m)
- Cho La (5.420 m)
- Renjo La (5.360 m)
Let’s take a closer look at each of the three passes.
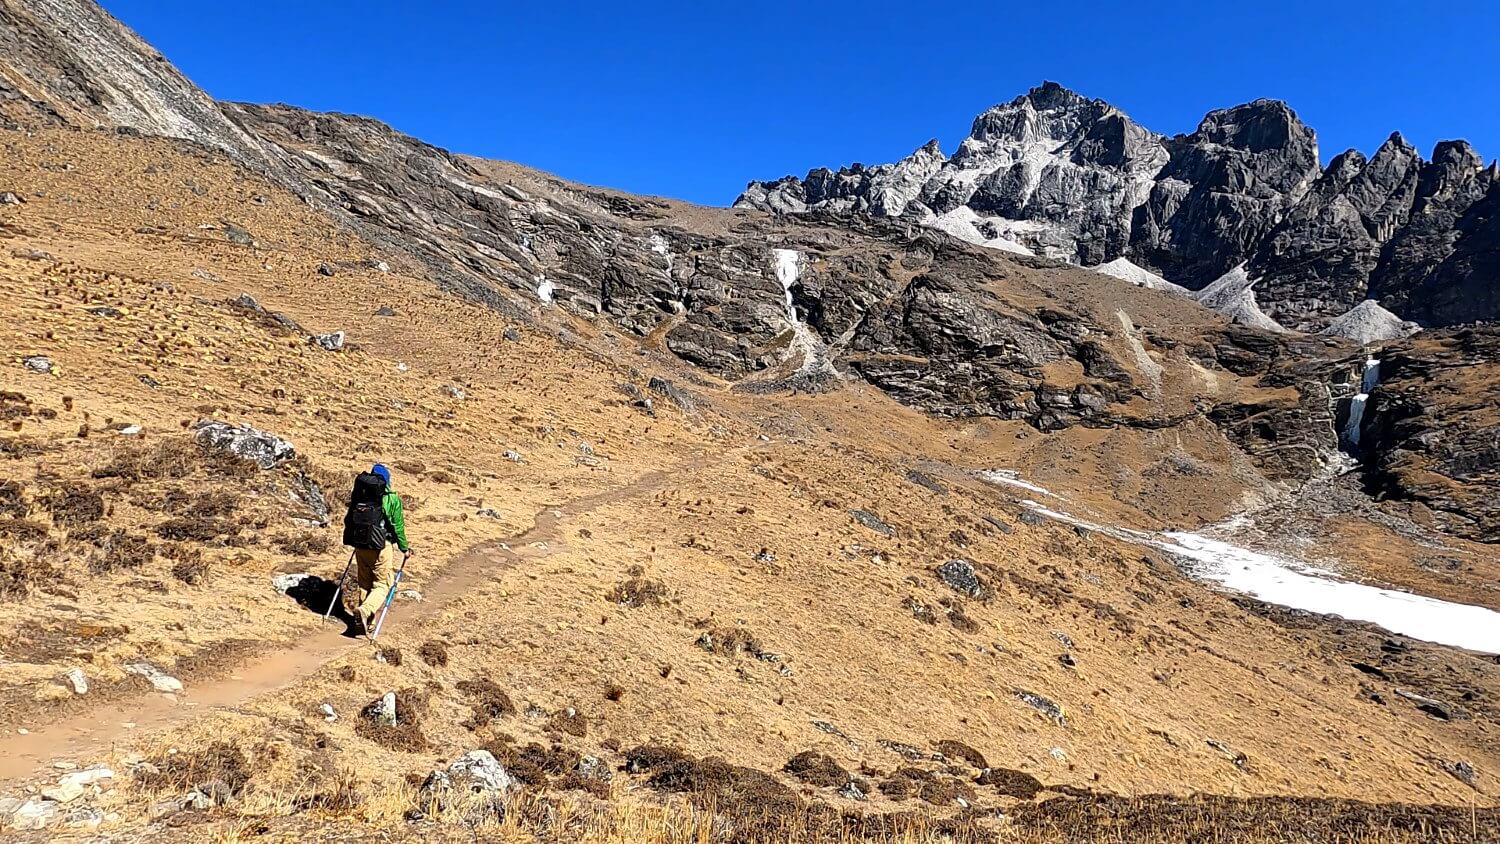
Kongma La — the long haul
Kongma La links the Imja Valley with the Khumbu Valley and is usually the first pass encountered on the circuit. It also tends to be the most demanding — a proper introduction to what lies ahead. The hike between the villages of Chukhung and Lobuche involves around 8–10 hours of actual walking time.
One of the main challenges is the long, sustained ascent: it takes hours before the pass itself even comes into view. In the upper sections, the trail becomes steeper and more alpine, with a few short scrambling sections that require careful footing.
The descent is even steeper, with sections that are almost trail-less, crossing scree slopes and boulder fields. At the bottom, the route continues across the Khumbu Glacier. Covered in loose debris, the glacier makes for slow, tiring walking after an already demanding pass and a long descent. In some areas, the route is also exposed to rockfall. All in all, this is a long and challenging day.
Cho La — crossing the glacier
Cho La forms the direct link between the Khumbu Valley and the Gokyo Valley and is partly covered by a glacier. Overall, it’s somewhat less demanding than Kongma La, as both the ascent and descent are less steep. In addition, the approach from the nearby village of Dzongla is noticeably shorter than on the previous pass.
As a result, this stage is comparatively easier. If you managed Kongma La without major issues, Cho La should pose no serious difficulties.
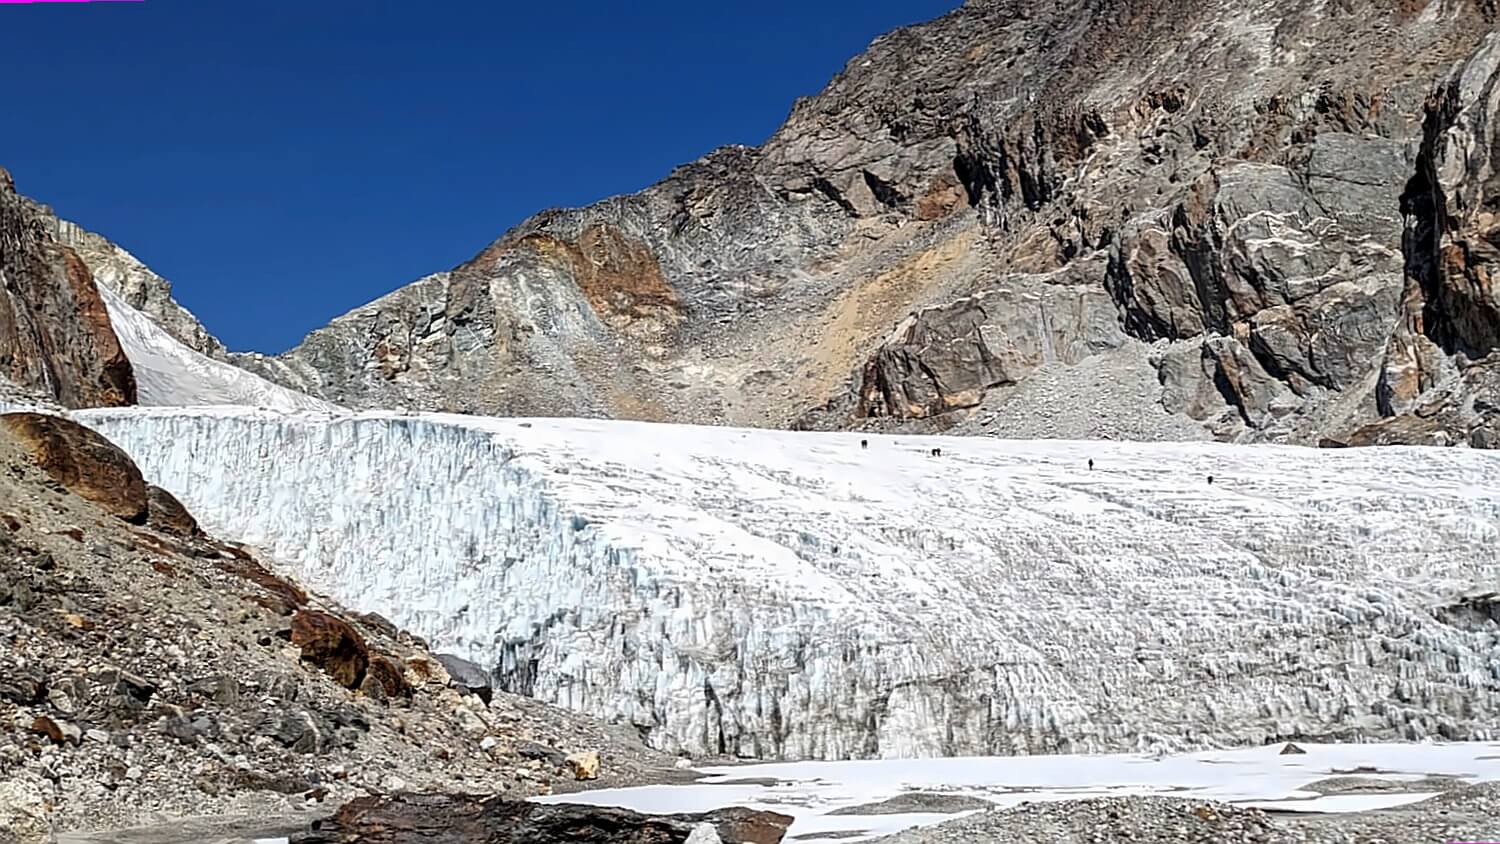
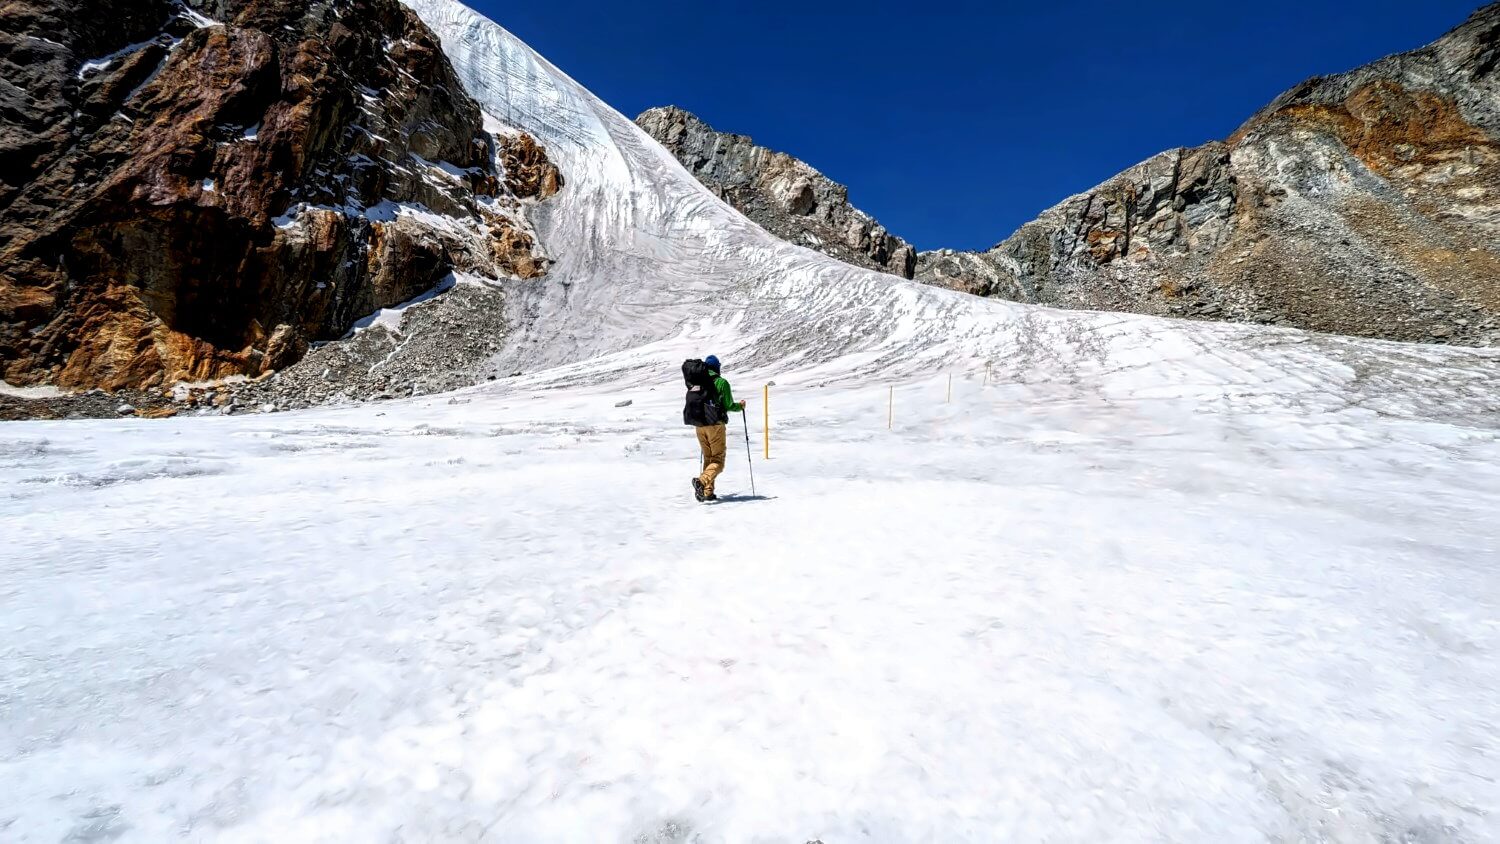
The main challenge on Cho La is the glacier itself. This is a true glacier with crevasses, not just a large snowfield. However, the correct route is clearly marked with poles — both across the glacier and along the rest of the stage. In good conditions, the crossing is technically straightforward. The pass is also regularly used by trekkers.
💡 Crampons are not strictly necessary, but microspikes are definitely useful.
Renjo La: The final boss
If you hike the circuit anticlockwise, Renjo La is the final major obstacle. It’s the lowest of the three passes, and many consider it the easiest — though at these altitudes, difficulty is always relative. What’s beyond doubt is the view: the panorama across the Gokyo Valley toward Everest is extraordinary.
Renjo La is also regularly used, even by yaks — something that would be unthinkable on the other two passes.
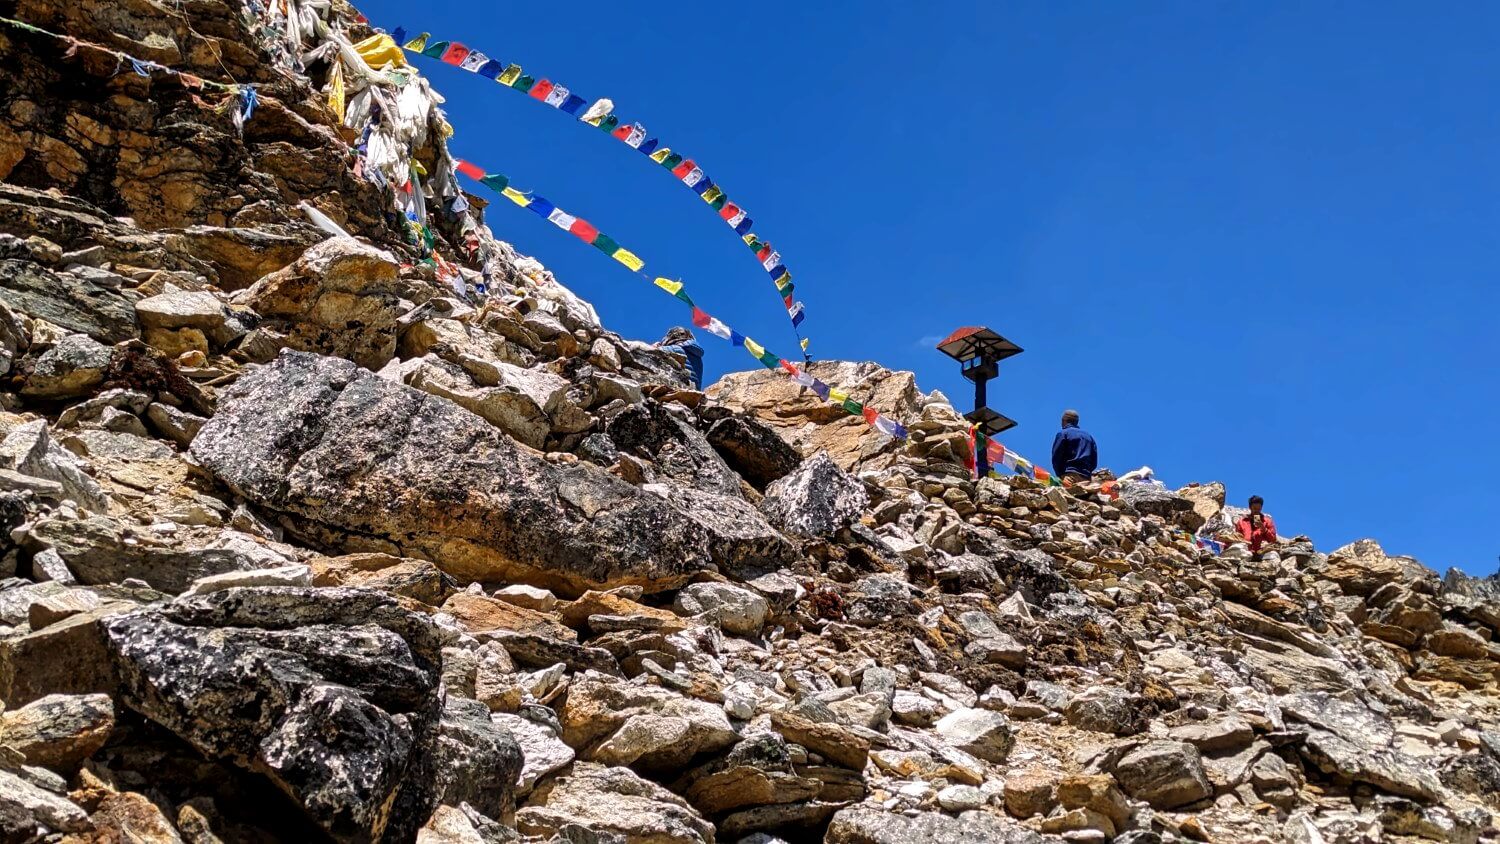
Once again, the approach from the nearest village, Gokyo, is relatively short. Shortly before reaching the pass, however, the route makes a small detour around a side ridge, which can feel a bit unnecessary.
The descent begins with a series of stone steps leading down to the beautiful mountain lake Angladumba Tso. From there, the trail to the first village on the western side, Lungden, is gentle and steadily downhill. With an early start, it’s possible to hike from Gokyo to Thame via Renjo La in a single day.
Stunning panoramic view from Renjo La (click to enlarge):
💡 Good to know: Kongma La can be bypassed via an alternative valley route through Pheriche. This option does not exist for the other two passes. Avoiding them would require a long descent into the respective valley, followed by a significant re-ascent on the opposite side.
Three Passes Trek clockwise or counterclockwise?
The Three Passes Trek is most commonly hiked in a counterclockwise direction. This option provides the best balance between daily distance and altitude gain. Elevation is gained more gradually, which greatly supports proper acclimatization and increases the chances of a successful and enjoyable trek.
Of course, hiking the route in the opposite direction — clockwise — is also possible, and I met several people who chose this option.
However, there are a few important points to keep in mind:
- ⛰️ Steeper ascents: When hiking from west to east, the climbs to the passes are steeper and involve greater elevation gain.
- ⏱️ Long days: As a result, crossings are more demanding and take longer — typically 8–10 hours, and often more at Kongma La.
- 🧠 Mental challenge: Kongma La in particular is demanding both physically and mentally, with hours of steep ascent through scree fields and the pass looming far above for much of the climb.
- ❄️ Glacier crossings: When trekking clockwise, both the Khumbu and Ngozumpa Glaciers must be crossed before reaching the passes.
- ⚠️ Crux section: Kongma La is again the key challenge — there’s no practical rest day between the Khumbu Glacier and the pass, so the route from Lobuche to Chukhung has to be done in a single push (plan on around 11 hours of walking).
One argument sometimes made in favor of hiking clockwise is that the views are better in that direction. At Renjo La, I would tend to agree, and the first glimpse of Cholatse’s north face after crossing the Cho La glacier is certainly impressive. That said, you can always turn around to enjoy the scenery, so in practice this isn’t a major advantage. Personally, I find that the benefits of better acclimatization clearly outweigh any drawbacks.
How difficult is the Three Passes Trek?
As mentioned above, the Three Passes Trek is not an easy hike. It’s a walking route rather than a mountaineering objective, but beyond Namche the trails can be rough in places, even before factoring in the altitude. The passes themselves are manageable but time-consuming. On top of that, you’ll spend a long period in thin air — roughly 10 days above 4,500 meters — and that inevitably takes a toll on the body.
It’s also important not to underestimate the impact of the harsh climate on your overall mood. This is a demanding, at times unforgiving environment. Conditions are often cold and windy and cleanliness in the lodges can be basic. At higher elevations, running water isn’t always available, as pipes may freeze overnight. And in the mornings, leaving the warmth of your sleeping bag can feel like a challenge in itself.
All of this can wear on you over time. I saw this firsthand in Dzongla, when a fellow hiker from the Czech Republic felt completely drained one morning and struggled to find the motivation to continue — a classic case of trekking fatigue. After a rest day, plenty of hot tea and some gentle encouragement from her friends she recovered. We later met again in Gokyo and the group went on to complete the trek as planned.
Let’s take a closer look at the main challenges:
Trails
The trails are easy, wide footpaths as far as Namche. Beyond that, they turn into rocky mountain trails. In many sections — especially around the high passes — you’ll be walking across scree slopes and boulder fields. While the paths can be steep at times, they are never overly exposed. Still, progress is often slower than you might expect and and daily mileage tends to be shorter than it looks on the map.
Navigation

The trails are not consistently marked. In some places you’ll find signposts at the start of a stage, elsewhere arrows or painted markers on rocks — but many paths remain unmarked. Solid navigation skills are therefore essential. A GPS device or smartphone with the GPS-track loaded, along with a physical map of the region, is highly recommended.
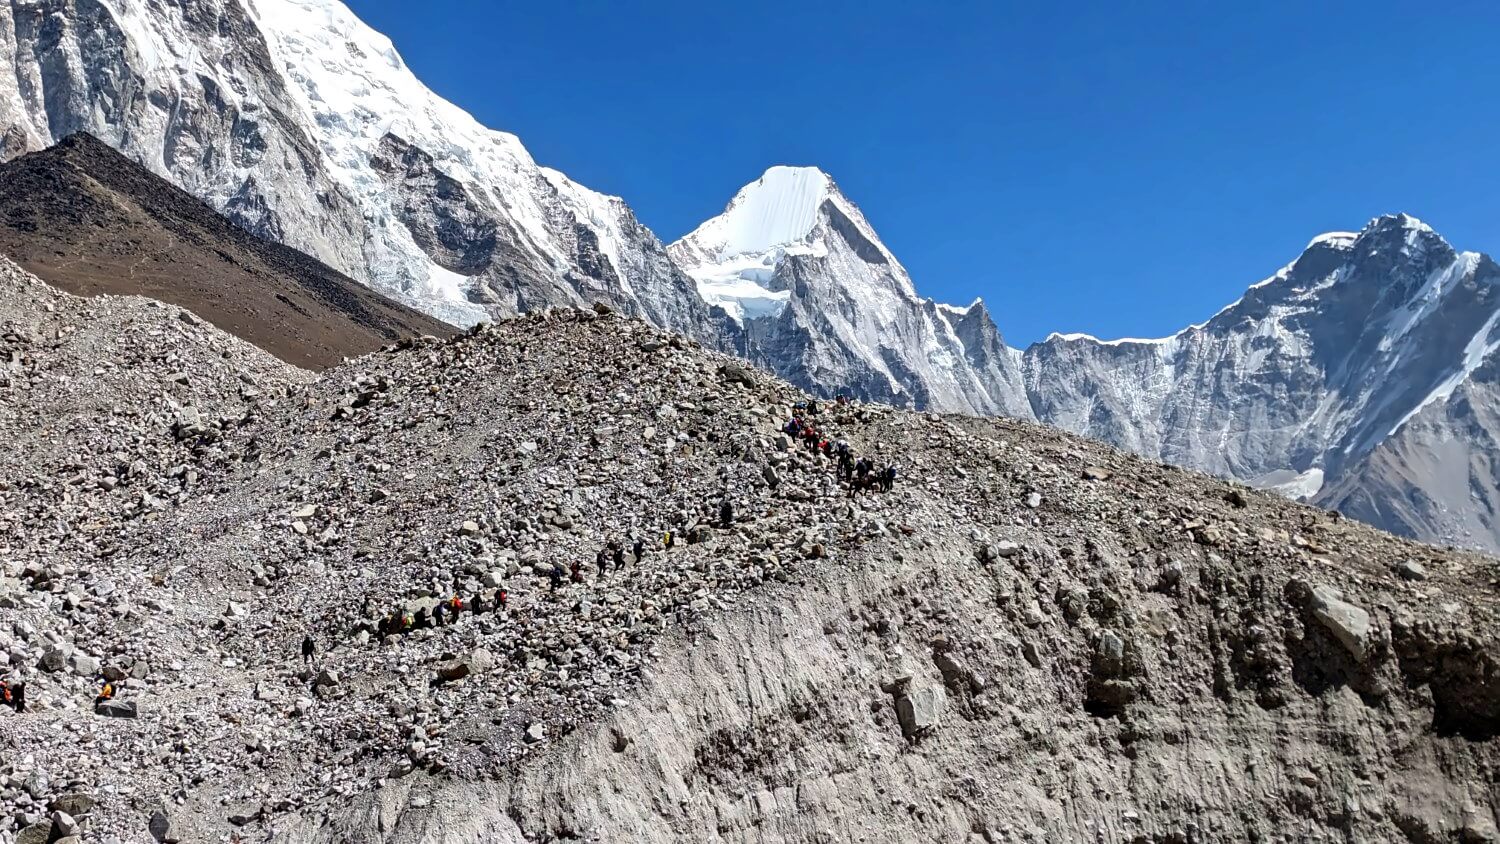
Glacier crossings
On the Three Passes Trek, you’ll cross three glaciers:
- 1️⃣ Cho La Glacier
- 2️⃣ Khumbu Glacier
- 3️⃣ Ngozumpa Glacier
As mentioned above, the crossing of the Cho La Glacier is relatively straightforward. Apart from a short initial ascent, the terrain is not particularly steep, and the route is clearly marked with poles. In good conditions, the risk of hidden crevasses is minimal. Follow the markers, keep your distance from the surrounding slopes due to potential rockfall, and you can cross the glacier in around 30 minutes.
The other two glaciers are wide, debris-covered glacial valleys. I found these more challenging, mainly due to the constant walking across scree and moraine rubble. The correct route is usually marked with poles or flags, and occasionally with cairns. Even so, navigation takes time — expect 2–3 hours to cross each glacier, despite the relatively short distance.
💡 On both glaciers, there are sections that are at least moderately prone to rockfall. For more detail, see the individual stage descriptions.
❗ Important note: All of the above applies only in good weather conditions — with clear visibility, no rain or snowfall and no icy sections on the trail. In poor weather, the routes can quickly become hazardous and crossing the passes may not be possible at all due to snow and ice. In such cases, it’s best to take a rest day and wait for conditions to improve.

Three Passes Trek — with or without a guide?
Officially, a guide is not required for the Everest Three Passes Trek, and it’s entirely possible to hike the route independently. Whether that’s the right choice for you is a separate question — but there is no obligation to hire a guide. That said, most trekkers do complete the trek with a guide. During my hike, I only encountered one solo French trekker and a group from Malaysia who, like me, were trekking without a guide or porter.
At the moment, there is some confusion surrounding the guide requirement in Nepal. While guides were announced as mandatory for foreign trekkers nationwide from April 2023, the local district administration of the Solukhumbu region has openly opposed this rule. Independent trekkers are still officially welcome to explore the region without a guide if they choose to do so.
👉 Also read: No, Solo Trekking in Nepal isn’t over: Here’s what to know
Is a guide useful for the Three Passes Trek?
Whether or not a guide makes sense for the Three Passes Trek largely comes down to three key questions:
- 🎒 How much trekking experience do you have?
- 🗂️ Are you comfortable organizing the entire journey yourself, including booking accommodation along the way?
- 🏋️ Are you willing to carry your own gear without the help of porters?
If you have limited experience or simply don’t want to deal with logistics on the trail, hiring a guide can be a sensible choice. A local guide can also add value by explaining regional customs and pointing out details you might otherwise overlook.
That said, my impression was that many trekkers choose a guide mainly for convenience — it simplifies the journey and removes the need to worry about planning and day-to-day decisions.
My experience trekking unguided
From my personal experience as a solo trekker in the Everest region, I found the logistics surprisingly easy to manage. Thanks to the dense network of lodges, you don’t need much gear. At the same time, it did feel a bit unusual: in most lodges, I was the only solo hiker without a guide among largely guided groups. This was quite different from the Annapurna Circuit, where you regularly meet other solo backpackers and independent travelers.
In the Annapurna region, it was also much easier to find spontaneous company, simply because many trekkers were in the same situation and naturally open to sharing experiences. Guided groups, on the other hand, often tend to keep to themselves. As a result, evenings in the lodges could sometimes feel a bit boring when there was no one to talk to. That said, in smaller villages along the Three Passes Trek — such as Chukhung, Dzongla, or Dragnag — I did meet some great people, so I never felt truly lonely.
5 things to keep in mind when trekking solo
My take on hiking the Three Passes Trek independently: go for it if you feel drawn to it — it can be an incredibly rewarding experience. That said, it’s best to consider going solo only if you have some experience with multi-day treks at similar altitudes and a realistic understanding of what your body can handle.
Before setting out alone, you should be able to answer the following questions with a confident “yes”:
- 🫁 Do you know how your body reacts above 4,500 meters, and do you have a realistic sense of how much distance and elevation gain you can manage per day at that altitude?
- 🧭 Can you plan a solid acclimatization schedule based on your own past experience?
- 🗺️ Are you able to navigate reliably in poorly marked — and sometimes trail-less — mountain terrain?
- ❄️ Can you cope with cold temperatures over extended periods, and do you know from experience how that affects you physically and mentally?
- 🌩️ Do you have experience dealing with bad weather and unfavorable conditions in the high mountains, and do you know how to keep yourself safe in such situations?
If you can confidently answer all of these questions with “yes,” tackling the Three Passes Trek on your own can be a truly memorable adventure. Logistics are manageable as well — lodges are easily found along the way and flights to Lukla can usually be booked within minutes (more on that below).
💡 If you’re unsure, hiring a guide is a sensible option — or consider starting with an easier trek. I deliberately chose the Annapurna Circuit as my first trek in Nepal: it involves only one high pass, the trails are generally easier, and the climate is more forgiving.
The Three Passes Trek is certainly not the hardest trek in Nepal — there are far more demanding routes out there — but it’s a different proposition than your typical lodge trek and requires a higher level of experience and self-reliance.
Do you need to train for the Three Passes Trek?
This is a question I’m asked sometimes: do you need specific training for a high-altitude trek like this? Personally, I didn’t follow a structured training plan. However, I completed the fairly demanding trek from Jiri to Lukla beforehand, which effectively served as my preparation — after that, I had no major issues.
If you start directly in Lukla, haven’t done any multi-day trekking before, and don’t exercise regularly, some preparation is definitely advisable. In that case, I’d suggest beginning to build your fitness around three months before the trek — for example, by running two to three times per week, combined with a few strength sessions focusing on legs and core.
I wouldn’t recommend attempting the Three Passes Trek if you’re completely out of shape. Mindset certainly plays an important role — sometimes even more than fitness — but this is not an easy trek. From the very first days, you’ll face long and often steep ascents. A bit of training won’t hurt — and it will make the experience far more enjoyable.
Permits required
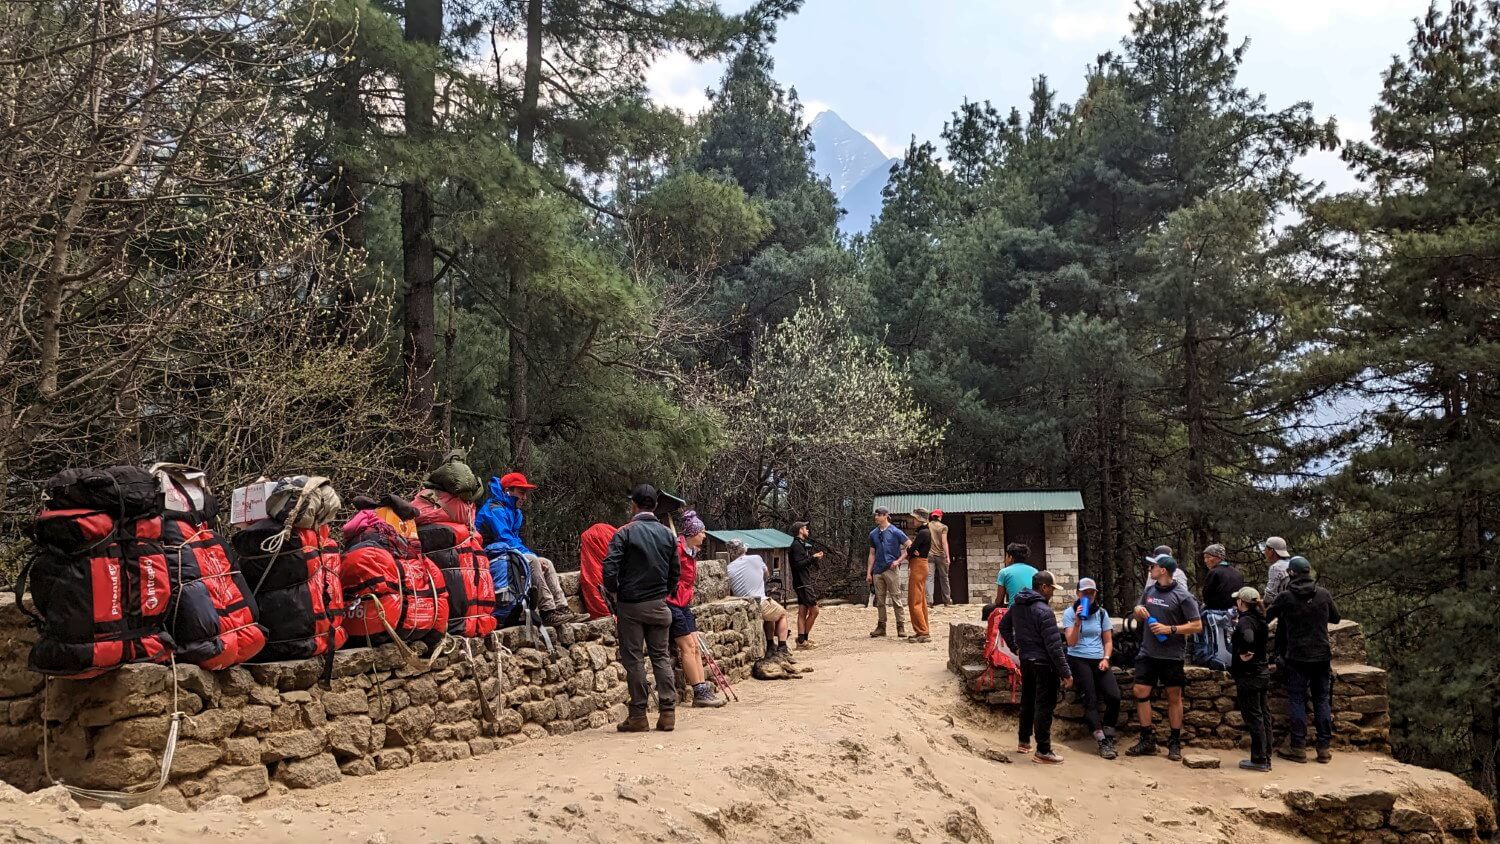
For the Everest Three Passes Trek, you need a permit for Sagarmatha National Park. Along with this permit, you’ll receive the Khumbu Trek Card — an electronic chip card used by the authorities to track trekkers’ locations.
❗ Both the national park permit and the trek card can be obtained on the spot, either in Lukla or in Monjo, right at the entrance to Sagarmatha National Park.
I personally paid a total of 2.000 NPR for the permit and trek card combined. According to the official information from the district administration, however, the fees should be 3.000 NPR for the park permit and 2.000 NPR for the trek card, for a total of 5.000 NPR. I’m not sure why I was charged less — it may simply have been an error at the counter. To be safe, I would plan on paying 5.000 NPR in total.
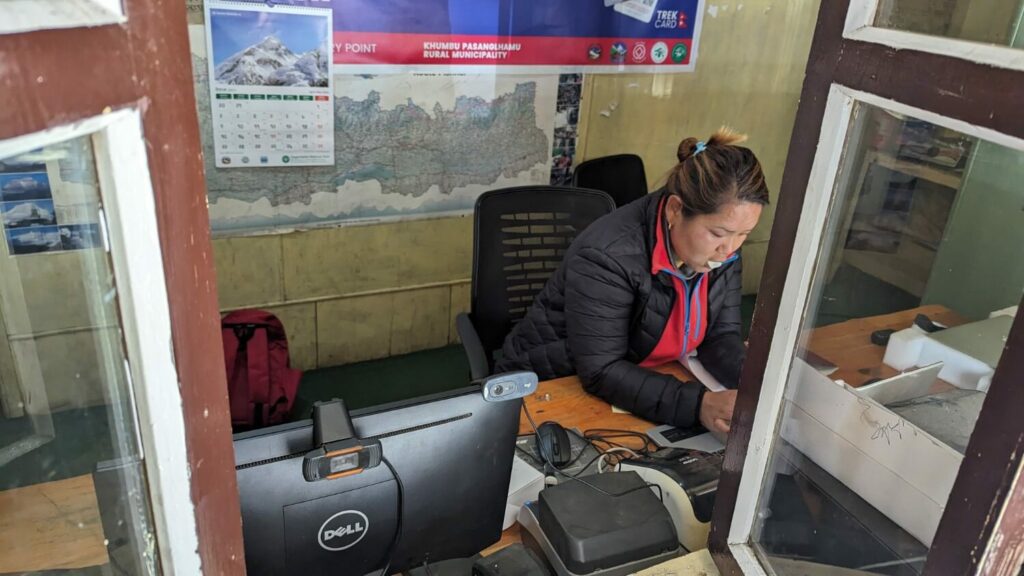
For the permit and the chip card, all you need is your passport — no passport photos are required. When applying, you’ll be asked to state your starting point, finishing point, and the estimated duration of your trek. That’s essentially it. The entire process is very straightforward and only takes a few minutes.
The permit is checked at several points along the route:
- 1️⃣ Monjo (at the entrance to and exit from the national park)
- 2️⃣ Shortly before Namche Bazaar
- 3️⃣ Phunke Tenga
In Monjo, some trekkers had their backpacks checked, though mine wasn’t – I guess because I just look trustworthy by nature. The use of drones is officially prohibited within the national park. That said, I did see drones being flown later at Everest Base Camp, so enforcement doesn’t always seem to be strict.
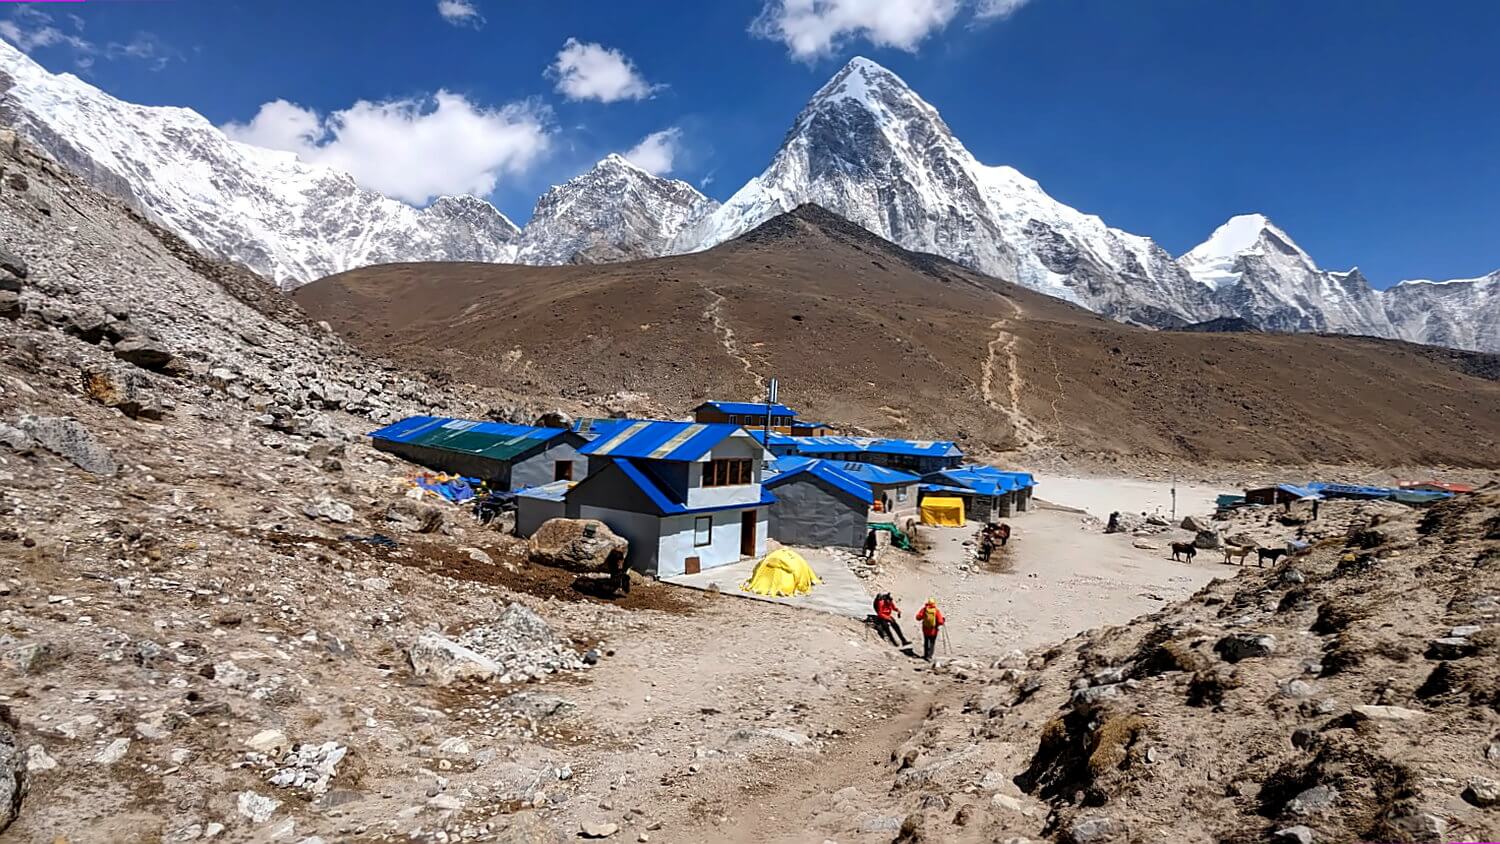
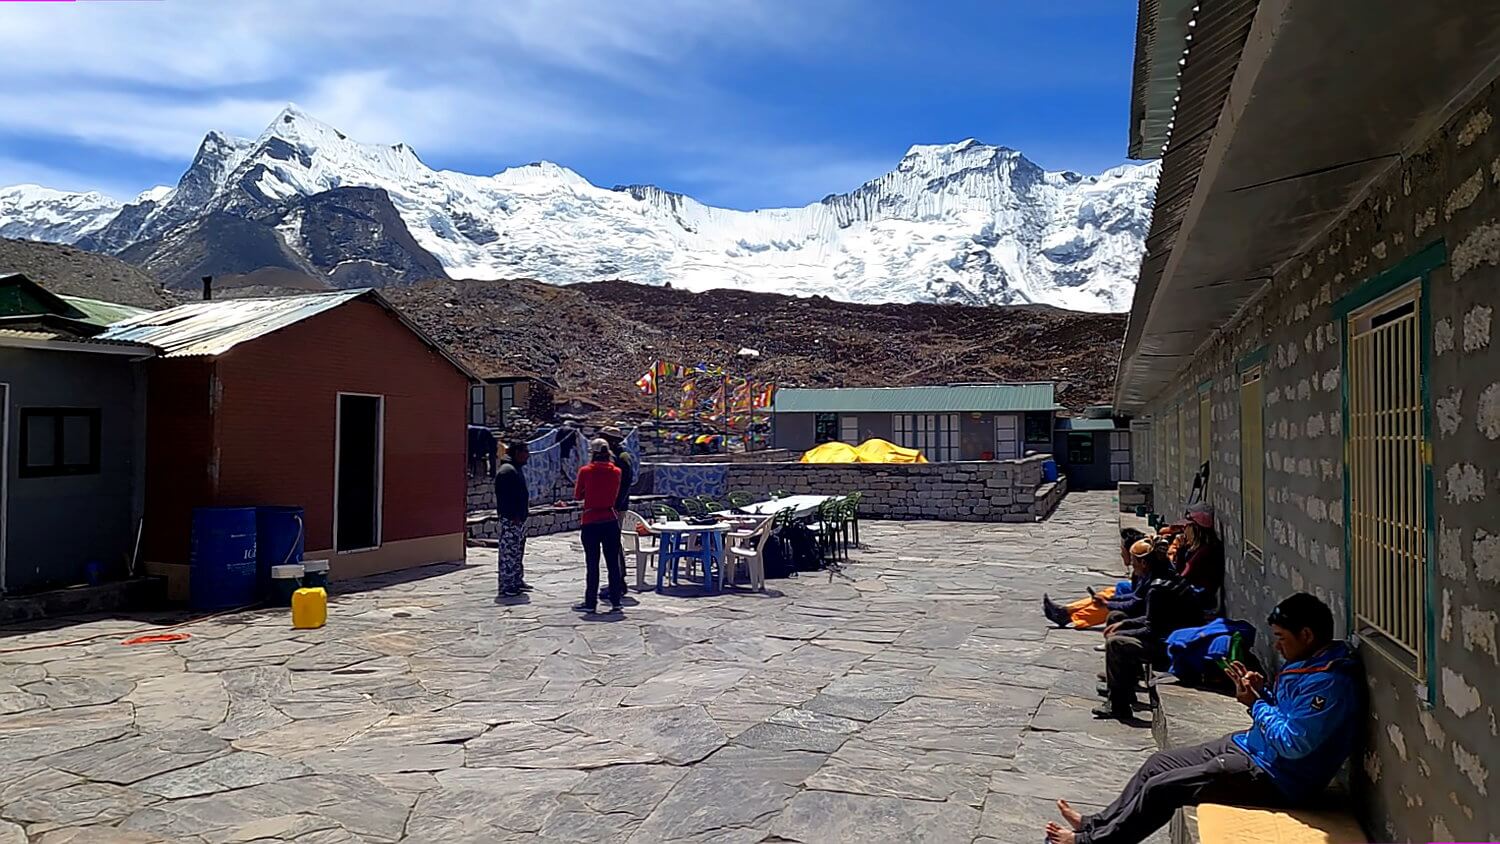
Overnight stays
The Three Passes Trek is a classic teahouse trek, meaning you stay in lodges every night. Up to Namche Bazaar, the standard is surprisingly high — some lodges feel almost luxurious. Beyond Namche, accommodation becomes noticeably more basic. That said, I still had access to a hot shower at every place I stayed overnight — a real luxury given the altitude.
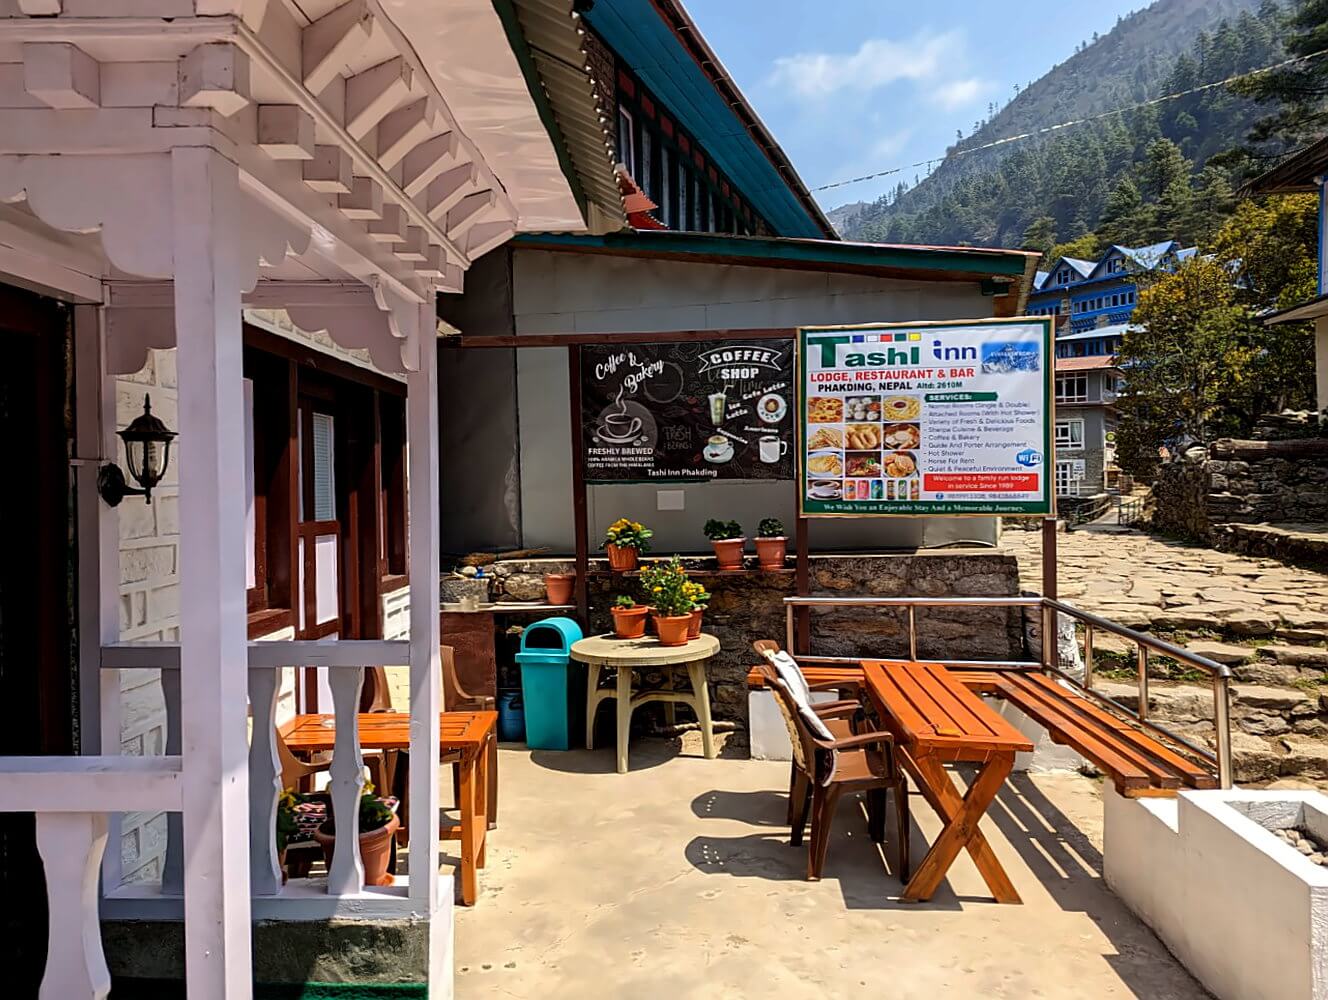
You can already find some lodges in the Khumbu on platforms like Booking, but by no means all of them. On the trail, accommodation generally works on a first come, first served basis. In the less frequented villages, this is rarely an issue. Along the busy Everest Base Camp route, however, popular lodges can fill up quickly due to the large number of trekking groups.
That said, the entire region depends on tourism, so there will always be somewhere to stay. There’s no need to worry too much. In the stage descriptions, I also share a few accommodation tips for lodges I particularly enjoyed.
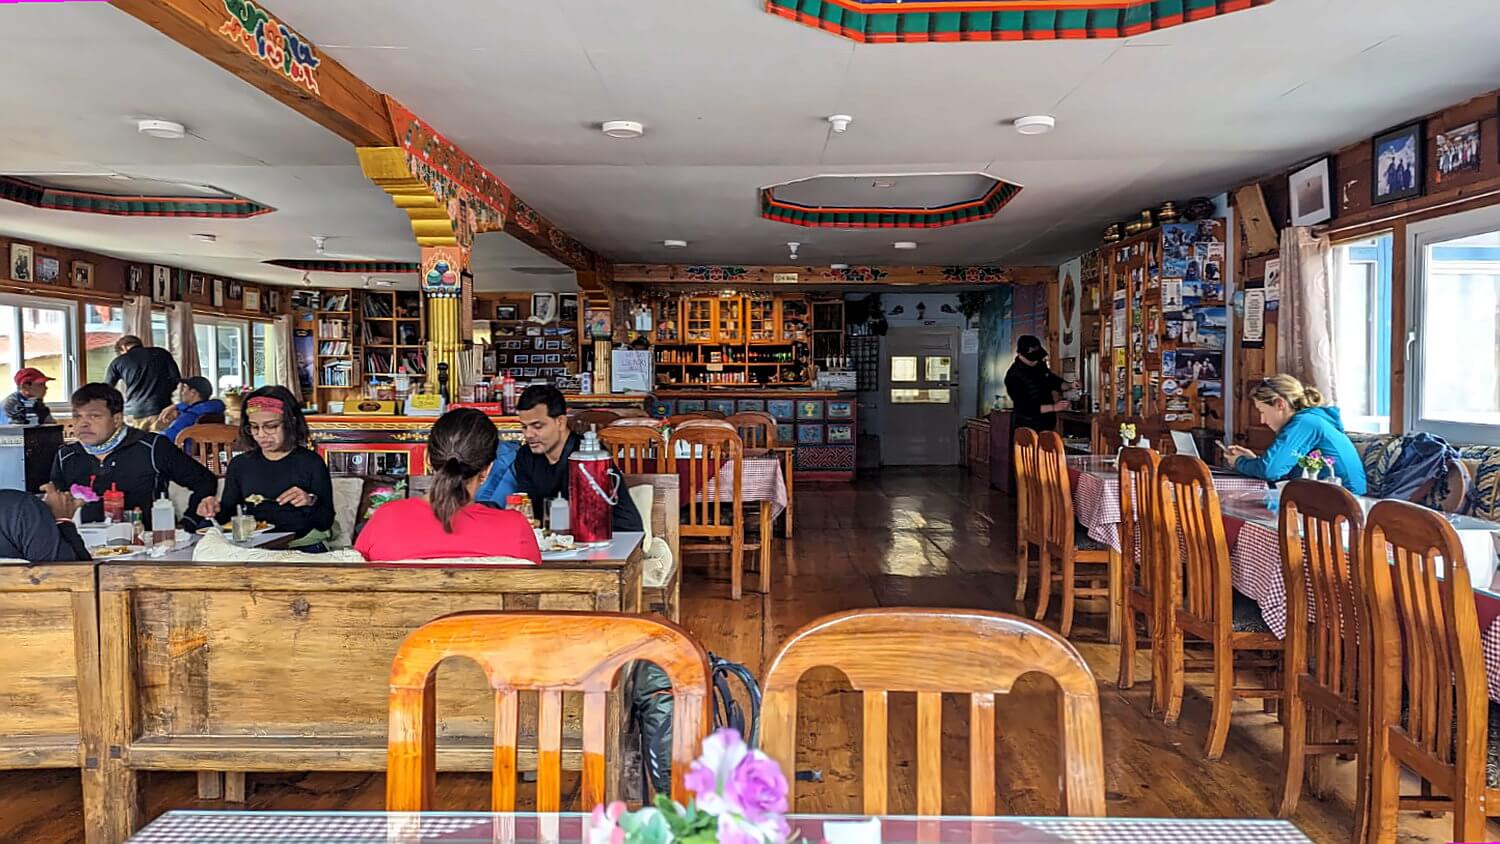
Lodges typically consist of simple guest rooms and a large communal lounge or dining area, which is heated with a stove from the afternoon onward. This is very welcome, as temperatures drop quickly in the evenings. The sleeping rooms themselves are unheated and usually only lightly insulated against the cold, which is why you generally use them only for sleeping.
💡 Tip: Consider bringing a proper sleeping bag. While lodges provide blankets, most people find them insufficient. From Dingboche onward, nighttime temperatures regularly drop below freezing. Your sleeping bag should be rated to around –10°C (see equipment section).
Depending on your preference, you can choose rooms with a private bathroom and toilet (attached bathroom) or rooms with shared facilities. I usually opted for the latter. From Chukhung onward, there is no running water, as nighttime temperatures are too low and pipes would freeze. Instead, you wash using water from a large barrel that is filled manually.
As mentioned, despite the altitude, hot showers are available in many places — even in Gorak Shep, which is quite remarkable. Showers are often located in a small stone hut outside the lodge. After sunset, showering can be a challenge due to the cold, so it’s best to shower by 4 p.m. at the latest. Alternatively, you can ask for a bowl of hot water, which is also slightly cheaper
Internet
Even if you plan to disconnect for a while, internet access is available in most places along the Three Passes Trek. To use it, you purchase a card with a numerical code from the lodges, which allows you to connect to the Everest Link Network. Each code is valid for 24 hours.
💡 Good to know: The Wifi code continues to work even if you change lodges, as long as the lodge is connected to the Everest Link Network — which applies to about 99% of lodges. This means that if you buy a card in the afternoon, you can usually use it until the following afternoon, regardless of where you stay overnight.
Connection quality varies. Sometimes the signal is only reliable in the common room. On the trail itself, you’ll usually have no reception — which is to be expected. With a regular SIM card, coverage generally works as far as Namche Bazaar. I bought a local data SIM from Ncell in Kathmandu beforehand, which cost NPR 600 for 60 GB, valid for 30 days.
How much does the Three Passes Trek cost?
The Three Passes Trek is somewhat more expensive than many other treks in Nepal, mainly because the entire Everest region comes with higher prices. That’s hardly surprising — after all, this is the home of the world’s highest mountain. Demand is high, and costs reflect that.
As a rough guideline, you should budget around 6.000–7.000 NPR per day. This typically covers accommodation, breakfast, lunch, and dinner, as well as internet access and the occasional tea or snack. With this daily budget, you can trek comfortably without having to watch every single rupee.
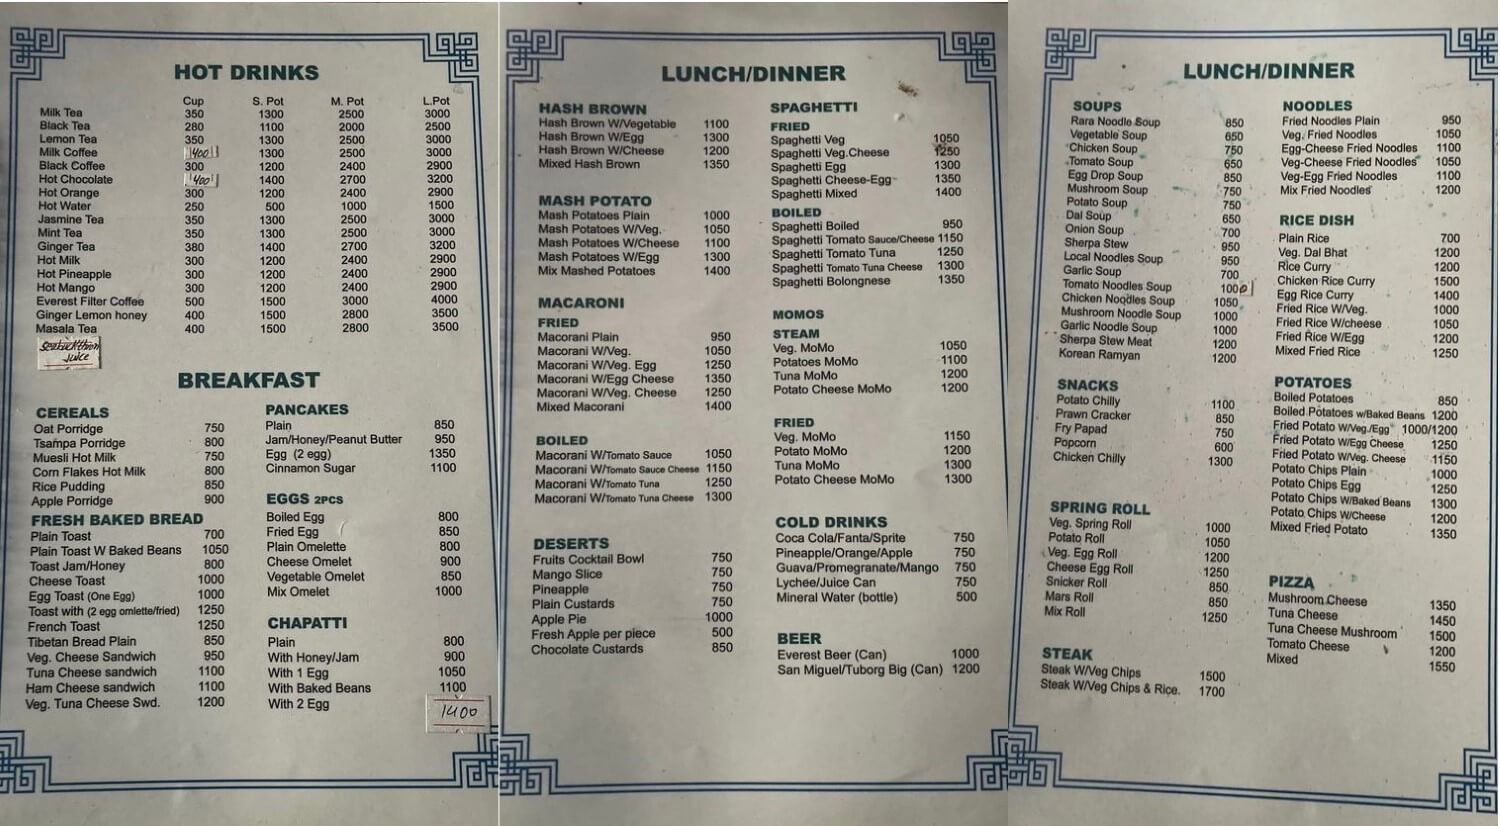
Here a brief overview of typical prices on the Three Passes Trek:
| Item | Price |
|---|---|
| cup of black tea | 100 -200 Rupees |
| portion of spaghetti with tomato sauce | 800 -1.000 Rupees |
| portion of Dal Bhat (+ free refill) | 1.000 – 1.200 Rupees |
| portion of Momo 10 pieces | 700 – 900 Rupees |
| Pizza | 1.000 -1.200 Rupees |
| Snickers | 500 Rupees |
| Coke | 500 – 700 Rupees |
| bottle of beer | 1.000 – 1.200 Rupees |
| roll of toilet paper | 400 Rupees |
| pack of spare batteries | 500 Rupees |
| pack of local cigarettes | 500 Rupees |
The basic rule is simple: the higher you go, the more expensive things become. Prices rise noticeably after Namche Bazaar. At higher elevations — for example in Gokyo or Lobuche — I sometimes spent more than 7.000 NPR per day.
For comparison, take a look at the prices at my lodge in Gorak Shep, the highest village on the trek (click to enlarge).
Also keep in mind: In addition to accommodation and food, there are extra charges for using showers and internet. Charging phones or power banks usually costs extra as well. Especially at higher altitudes, these fees can add up quickly. Bringing a large power bank is therefore highly recommended.
Typical prices are approximately:
- Hot shower: 800 rupees
- Bowl of warm water: 400-500 rupees
- Charging your mobile phone: 400 rupees
- Charging your power bank: 800 rupees
- Internet via Wi-Fi: 750 rupees
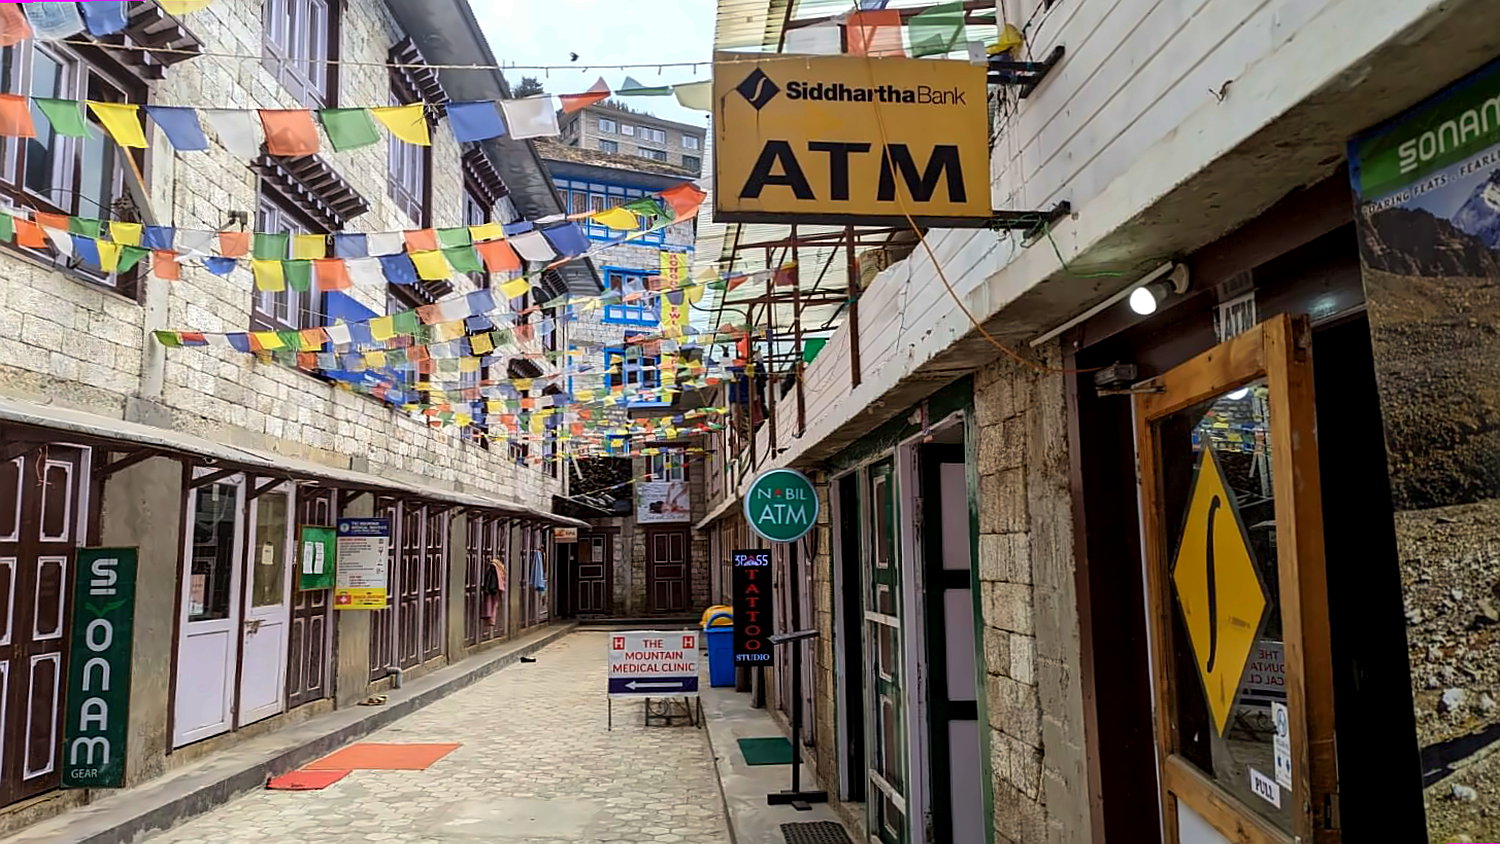
Banks and cash
The Everest region operates largely as a cash-based economy. While some lodges — especially in Namche Bazaar — do accept credit cards, this is by no means guaranteed. You should therefore always carry enough cash with you.
Along the trek, you’ll find ATMs in the following places:
- Lukla
- Cheplung
- Phakding
- Namche
- Dingboche
Finding an ATM in Dingboche, at over 4.000 meters, is of course quite remarkable — but I wouldn’t rely on it working consistently. It’s generally safe to assume that withdrawing cash is possible up to Namche. Beyond that, availability can be unreliable. To be on the safe side, bring a sufficient amount of cash from Kathmandu.
💡 Keep in mind the daily withdrawal limit (around 35.000 NPR).
Supplies and provisions
On the Everest Three Passes Trek, you pass through villages regularly, so there’s no need to carry large amounts of food. The main exception is on pass days. These stages are long and offer no rest stops along the way, so it’s best to carry a packed lunch. Just ask at your lodge — the owners are usually happy to prepare something like hard-boiled eggs, chapati bread, or a chocolate bar.
As with everything on the trek, prices increase with altitude, as all supplies have to be carried up by porters or yaks. For that reason, it makes sense to stock up on snacks — such as chocolate bars — in Namche Bazaar. Fresh fruit in particular becomes quite expensive at higher elevations. I still treated myself to an apple now and then. Vitamins can be hard to come by, even though the food served in the lodges is otherwise very good.

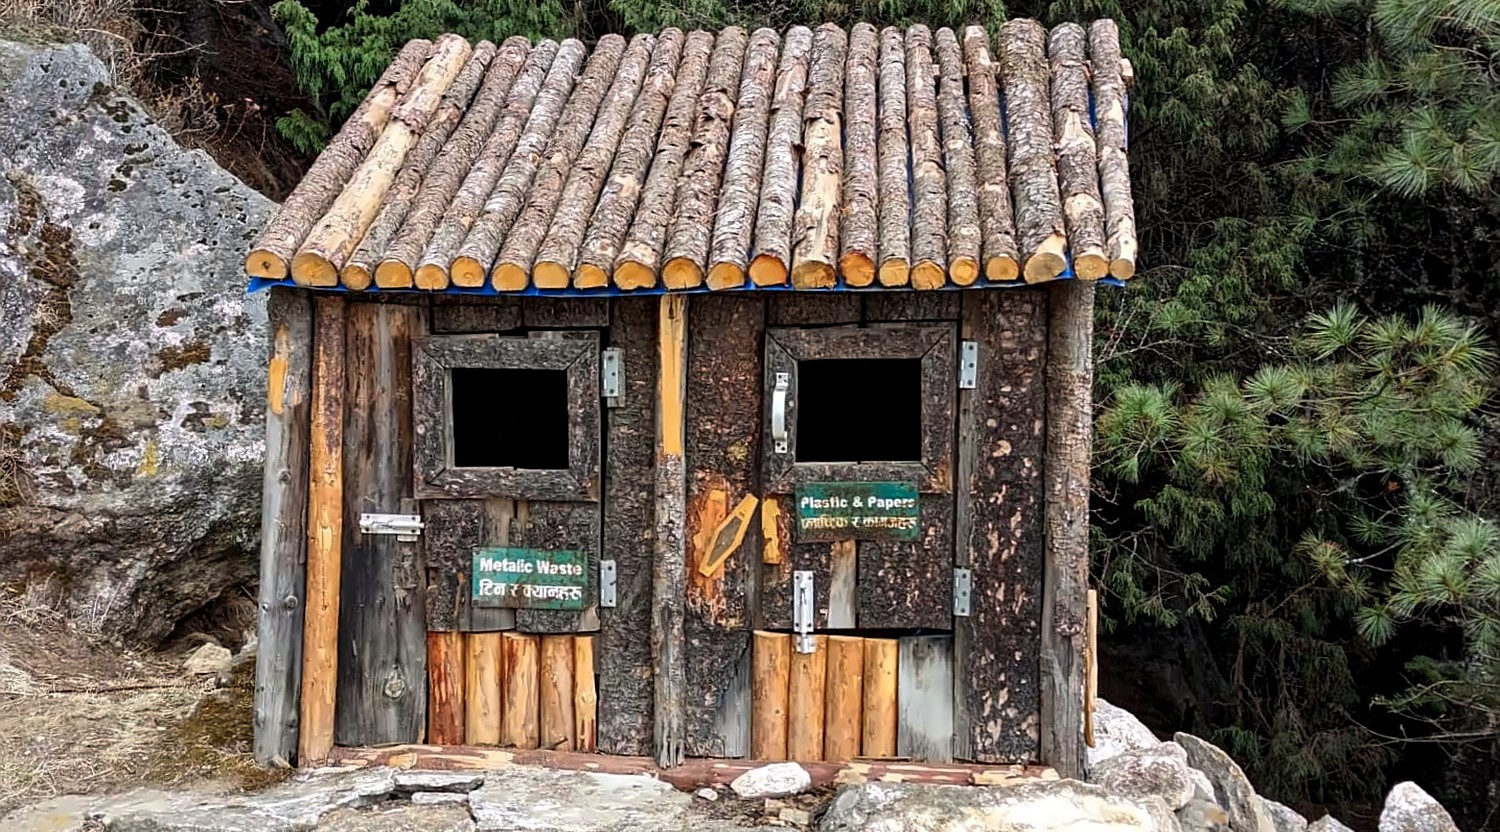
Water supply and plastic waste
I didn’t bring a mechanical water filter, as these can freeze and crack at low temperatures. Instead, I used purification tablets*. In most lodges, you can refill tap water and treat it with the tablets — though I also bought bottled water from time to time.
That naturally raises the question of plastic waste. In my experience, however, the issue is handled surprisingly well in the Everest region. There are rubbish bins at many points along the trail, which are regularly emptied and transported down to the valley. In the villages, there’s often even a designated person responsible for waste management. This stands in clear contrast to many other parts of Nepal.
In addition, trekkers are encouraged to carry a garbage bag on their way back to Lukla and drop it off at the checkpoint in Namche Bazaar. It’s a great initiative — even though the drop-off point was closed when I passed through. Overall, my impression was that the Everest region is relatively clean. Waste disposal is clearly taken seriously here, and it seems to work quite well.
Gear and equipment for the Three Passes Trek
When it comes to gear, three items are absolutely essential for the Everest Three Passes Trek:
- 🧣 Warm clothing to protect against wind and cold
- 🥾 Sturdy hiking boots
- ❄️ A sleeping bag rated for sub-zero temperatures
These are the top priorities. Beyond that, there are a few additional items that are well worth considering — which we’ll look at shortly. First, though, let’s cover the basics.
Clothing
When it comes to clothing, I strongly recommend using a layering system. This allows you to combine different layers depending on weather conditions and temperature. At the beginning of the trek, up to Namche Bazaar, you’ll often be comfortable hiking in just a T-shirt. From Chukhung onward, however, you’ll usually be wearing all your layers.
A simple and effective layering system consists of:
- Base layer: T-shirt or long-sleeve
- Insulation layer: fleece jacket, ideally with a hood
- Weather protection: wind- and waterproof hardshell jacket
As a base layer, I used a standard merino T-shirt. On top of that, I wore an inexpensive fleece jacket that I bought in Kathmandu. It worked perfectly well — not everything sold in Thamel is poor quality, and for this trek, simple and functional gear is often more than sufficient.
💡 A hood is extremely useful for protection against wind.
For weather protection, I used a 3-layer Gore-Tex jacket (Montbell Stormcruiser*). This ultralight shell weighs less than 300 grams and is technically a rain jacket. Thanks to the Gore-Tex membrane, however, it also provides excellent wind protection, which meant I didn’t need a separate windbreaker.
Because of the often strong winds, gloves are essential — without them, your hands can go numb very quickly. A buff adds valuable protection as well and can be worn around the head and mouth like a balaclava.
At these altitudes, the air is extremely cold and dry, which can irritate your throat with every breath. Over time, this may lead to the well-known Khumbu cough, a persistent dry cough. Wearing a buff helps protect your airways and makes breathing far more comfortable.

Always plan for emergencies
In high-altitude environments, it’s essential to carry some emergency reserves for sudden changes in weather. Above 5.000 meters, conditions can change rapidly within minutes – usually for the worse. For this reason, I brought a weather-resistant down jacket (Mountain Equipment Liteline). With 700 cuin of insulation, it’s very warm and the durable 40D outer fabric makes it robust enough to wear even with a backpack in severe conditions.
Fortunately, I had mostly good weather and never needed it in extreme situations. Still, I wore the jacket regularly in the evenings after hiking. Many trekkers opt for a lighter three-season down jacket instead which is also a reasonable choice. Personally, I didn’t regret bringing a more durable model. Either way, I strongly recommend packing some form of insulated “puffy” jacket — even Sherpa wear down jackets almost all the time.
Complete overview of clothing:
| Item | Recommendation |
|---|---|
| Underwear Merino x 2 | Icebreaker Cool Lite* |
| Hikingsocks x2 | Smartwool PHD Light Crew* |
| Merino-T-Shirt | Icebreaker Merino* |
| Fleeceshirt | Bergans Hareid* |
| Merino Longsleeve | Merino Icebreaker 200* |
| Comfortable hiking-pants | Maier Sports Latit Zip-Hose* |
| Shell-Layer with membrame | Montbell Stormcruiser* |
| Downjacket | Mountain Equipment Liteline* |
| Scarf or balaclava | Buff* |
| Gloves | Roeckl Sports* |
| Thermal underwear | Ortovox 185 Rock n Wool Pants* |
| Wool socks for the evening | Type “knitted as by grandma”, as thick as possible 🙂 |
| Camping shoes for low temperatures | Exped Camp Slipper* |
Tip: Check out my gear list for multi-day hikes here. You can also find my monthly updated list of the best outdoor deals and bargains here.
Hiking boots
On the Three Passes Trek, you’ll spend a lot of time walking across scree and extensive boulder fields. Sturdy footwear that can handle rough, uneven terrain is therefore essential. If you’re prone to twisting an ankle, ankle-high boots are a sensible choice. A water-resistant membrane is also useful, especially for glacier crossings and wet conditions.
For this trek, I used lightweight hiking boots — the Meindl Litehike GTX* — which I had already worn in the Peruvian Andes. They performed well and, like most Meindl footwear, proved to be quite durable. That said, by the end of the trek they were clearly worn out. Over the long term, the terrain is simply too demanding for this type of lightweight shoe.
💡 Full mountaineering boots with rigid soles and crampon attachments are not required for the Three Passes Trek.
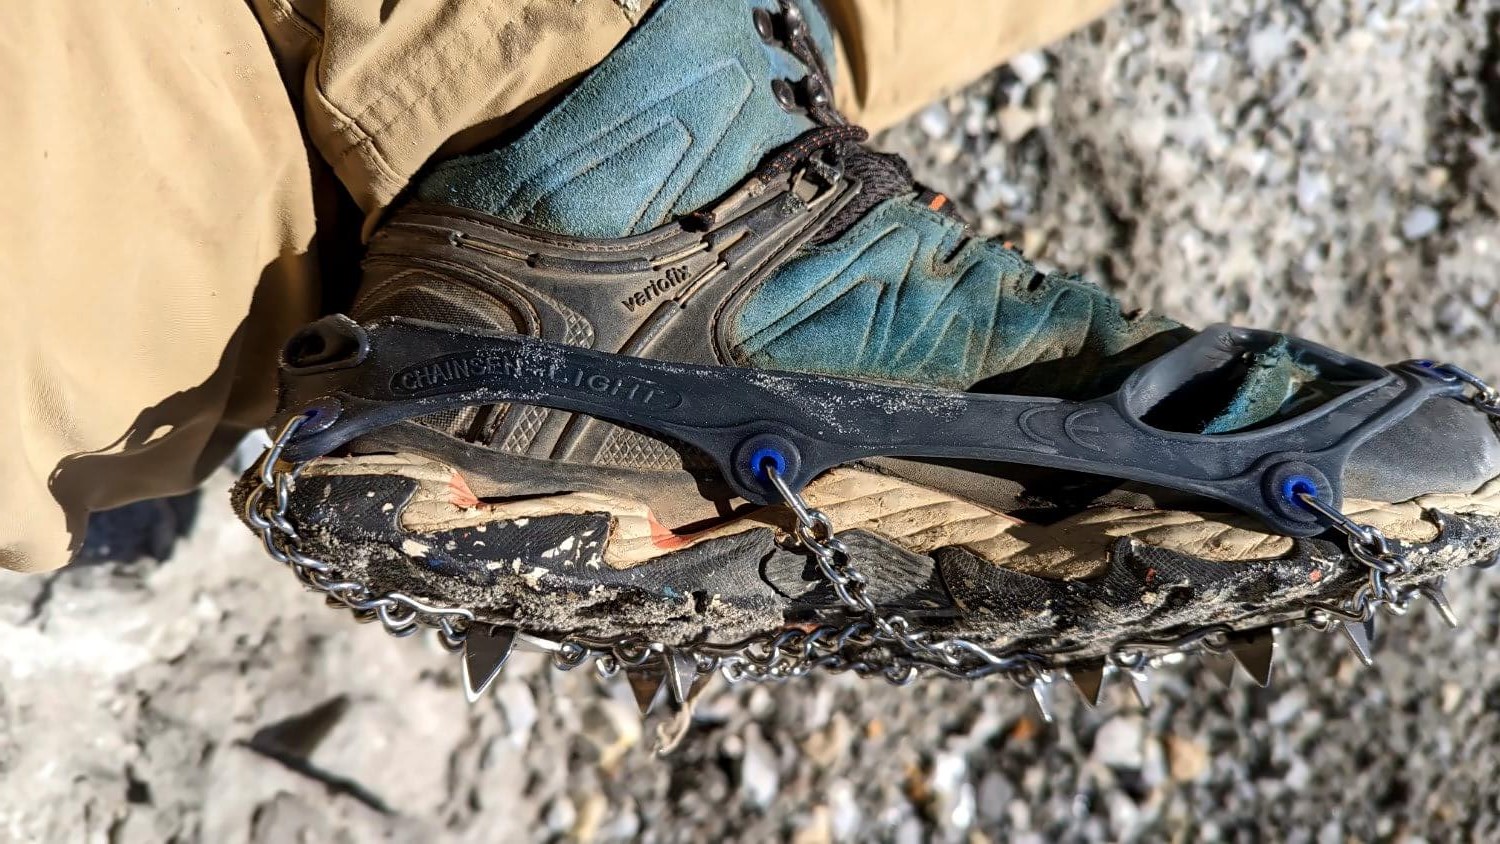
Should you bring microspikes for glacier crossings?
I used Snowline Chainsen microspikes to cross the Cho La Glacier. Realistically, I could probably have managed without them. Even so, I’d still recommend bringing microspikes along.
First and foremost, they add an extra margin of safety. Conditions on the trail can change quickly depending on weather and temperatures. Meltwater can refreeze overnight, turning glacier surfaces and trails into hard ice. Without spikes, progress can become difficult — or even impossible. The same applies after fresh snowfall, when the steep approaches to the passes can be awkward and slippery.
👉 For the small trade-off of carrying an extra 500 grams, microspikes are well worth it. In my view, this is a clear case of safety first.
Recommended sleeping bag
Your sleeping bag should have a comfort rating down to around –10°C. A lightweight option (e.g. Western Mountaineering Versalite) is well suited for this trek, though it does come at a higher price point. I personally used the even lighter (and cheaper!) Katabatic Sawatch* down quilt, which has a comfort rating of 15°F, -9° C. As always, I was very happy with its performance.
While lodges provide thick fleece blankets, I wouldn’t want to tackle this trek without a proper sleeping bag or quilt. Nighttime temperatures regularly drop well below freezing from around 3,500 meters, and you’ll be spending extended periods at even higher altitudes. A reliable sleeping system makes a big difference to both comfort and recovery.
Other useful equipment
In addition to the basics, the following items are useful:
| Item | Note | Recommendation |
|---|---|---|
| Backback | A 50-liter backpack is sufficient. | deuter Aircontact Lite 50+10* |
| Small daypack | for day hikes | Osprey Ultralight Stuff Pack* |
| Bottle, 1 litre | fill it with warm water in the evening and and keep it in your sleeping bag overnight. | Nalgene* |
| Filter tablets for water | provides clean drinking water | Micropur Forte* |
| Hand sanitizer | always use sanitizer before meals | buy in Kathamdu |
| Powerbank | as large as possible to avoid recharging costs | Anker PowerCore 26K* |
| Sun hat | useful at lower altitudes, the sun is very strong | Northface Horizon* |
| Sunglasses | at least UV protection factor 3 | Quechua MH140* |
| Sunscreen | protection factor 50 recommended | buy in Kathamdu |
| Trekking poles | very helpful while descending and walking through scree, moraines, etc. | Helinox Ridgeline LB135* |
In addition, you should carry a small personal first-aid kit, your documents, and anything else you typically need when traveling in less developed regions. I plan to publish a dedicated packing list for trekking in Nepal on my blog, where I’ll go into more detail.
One important point: pay close attention to personal hygiene, and always disinfect your hands before eating. Nepal is not the cleanest country in the world. Conditions in the mountains are generally better than in the cities, but it’s still wise to err on the side of caution. While basic medication is available in Kathmandu, it’s best to bring any specialized items with you from home.
❗ A few more words about Diamox (medication for altitude sickness) can be found below in the “Acclimatization” section.
Getting to the Everest region
There are three main ways to reach the Everest region:
- ✈️ Flight to Lukla
- 🚐 Jeep to Salleri or Paya
- 🥾 Classic approach on foot from Jiri
Most trekkers choose to fly to Lukla, as it’s by far the fastest option. I’ll therefore start by explaining this route. The other alternatives are covered further below.
Flight to Lukla
Flying to Lukla is the fastest and most straightforward way to reach the Everest region. The flight itself takes around 30 minutes and costs roughly 180 $ one way for foreign travelers. There is, however, one important caveat: during the main trekking seasons, only a limited number of flights operate directly from Kathmandu to Lukla, as Kathmandu’s airport is already heavily congested.
As a result, most Lukla flights depart from Manthali in the Ramechhap District instead. Manthali is about a five-hour jeep ride from Kathmandu, with fares of around 2.000 NPR. From there, the flight to Lukla takes roughly 20 minutes.
The jeep transfers usually depart very early — often around 1:30 a.m. — since you need to be at the airport well in advance and flights only operate in the morning. Alternatively, you can travel to Manthali the day before. This is also possible by public bus, with departures from Ratna Park, about a 10-minute walk from Thamel.
💡 Tip: For Lukla flights, the maximum allowed baggage weight is 10 kilograms for your backpack. They actually check this limit at the airport, although a few hundred grams more usually aren’t an issue.
Flights can’t be booked directly from abroad. During trekking season, however, it’s usually easy to arrange a flight once you’re in Kathmandu. My recommendation, if you’d rather have everything sorted in advance: contact your accommodation in Kathmandu and ask them to organize the flight for you. This is generally straightforward and they can often arrange the jeep transfer to Manthali at the same time.

Jeep to Salleri / Paya
If you prefer not to fly, you can travel by jeep from Kathmandu to Salleri, the next larger town, located about 30 kilometers south of Lukla. The journey takes around 10 hours. A seat in a shared jeep typically costs about 5.000 NPR (roughly €30), while a private jeep is around 250 $. It’s best to arrange transport through your accommodation or one of the many trekking agencies in Thamel.
From Salleri, you continue by jeep to Paya, which marks the end of the road in the mountains. This leg takes about 4 hours and costs roughly 4.000 NPR. With an early start, it’s possible to hike from Paya to Phakding — the first stop beyond Lukla — on the same day. The distance is about 14 kilometers, and I met several locals who did exactly that. All in all, you should plan on around two days to reach the trekking route from Kathmandu via this option.
ℹ️ Update 2026: The road from Salleri now goes all the way to Surke village, a short walk away from Lukla.
On foot from Jiri
Another option is to hike up from the lowlands, starting in Jiri. This is the classic approach used by early Everest expeditions and the route I chose myself. The drive from Kathmandu to Jiri takes around 4 hours by jeep. From there, the trek to Lukla or Phakding usually takes about 7 days.
It’s a demanding trek, involving countless valley crossings and constant ups and downs, but it offers a rewarding introduction to the region and a gradual approach to altitude.
The main drawback of the Jiri option: much of the old trekking route is now accessible by road. While there are still some beautiful sections, large parts of the walk are either on dirt roads or run directly alongside them. Some people still like do it and I provide the track in the GPS-Download Bundle. However, be warned: It might not quite live up to your expectation.
Return journey from Lukla to Kathmandu
⚠️ It’s highly recommended to arrange your return flight from Lukla to Kathmandu before starting the trek.
I organized my return flight through my accommodation and simply kept the ticket as a screenshot on my phone, which was sufficient. Rebooking is usually possible, but only to an earlier date. If you finish the trek ahead of schedule, you can contact your accommodation and ask them to change the flight — this worked smoothly for me.
Flights from Lukla are frequently delayed or canceled due to weather conditions, so rescheduling at short notice is quite common. For that reason, you should plan generous buffer time between leaving Lukla and your international flight from Kathmandu. I recommend allowing at least three buffer days after the end of the trek before flying home.
If you’re unable to get a flight out of Lukla at all, traveling back by road is an alternative.
- 🥾 From Lukla, it takes about five hours on foot to reach Paya, where you can usually find a jeep to Salleri.
- 🚙 From Salleri, another jeep will take you to Kathmandu.
- ⏱️ This option requires at least two days in total.
- 🛣️ Walking all the way from Lukla to Salleri would take around three to four days, mostly on dirt roads with frequent ascents and descents.
Weather on the Three Passes Trek
I’ve mentioned it several times already: the climate on the Three Passes Trek is harsh. This is a true high-mountain environment, with an average altitude well above 4,000 meters. The landscape is dominated by rock, scree, and glaciers, with little shelter from the elements. Add to that the thin, freezing air and often strong winds.
Staying warm is a constant challenge. Most of the time, the only ways to keep warm are by moving, sitting near the stove in the lodge, or retreating into your sleeping bag at the end of the day.
During my trek, I was fortunate to have mostly good weather, with bright sunshine on many days. Even so, daytime temperatures rarely climbed above 5°C, and it often felt significantly colder due to strong winds. At night, temperatures regularly dropped below freezing. In Dzongla, Lobuche, and Gorak Shep, the water in my bottle froze overnight — even inside my room. Lodges are not insulated and mainly provide shelter from the wind rather than warmth.
Strong winds
While we’re on the subject: expect strong winds from around 11:00 a.m., especially in exposed areas. I experienced this almost daily, and in such conditions you lose body heat very quickly. On the hike to Island Peak Base Camp, for example, I made the mistake of not bringing gloves and a buff. After two hours in the wind, I was completely chilled and barely able to move. It took a full liter of hot tea before I felt human again.
This is why it’s important to start early — ideally no later than 7:00 a.m. This is particularly crucial on pass days. With an early start, you’ll typically reach the pass around 11:00–12:00, before winds pick up. From around 2:00 p.m. onward, conditions often become genuinely unpleasant – it’s much better to already be descending back into the valley.
Needless to say, a jacket that offers reliable wind protection is absolutely essential.
How to acclimatize and prevent altitude sickness
The Three Passes Trek is a high altitude trek all the way. You will climb above 4.000 meters relatively quickly and stay at even higher altitudes for a long time. Most likely, you´ll fly in from Kathmandu (1.350 m) to Lukla, which is already at almost 3.000 meters. Therefore, adaptating slowly to the altitude is essential to enjoy the trek and avoid altitude sickness.
It´s recommended to ascend no more than 300-400 meters per day, a maximum of 500 meters. In my experience, you can push this a bit if you have already spent a few days above 3.500 meters. The emphasis here lies on “a bit”. If you ascend 50 meters more in a day, it´s unlikely that anything bad will happen. But this is different for everyone.
Elevation gain vs. sleeping height
The single most important factor in adjusting to the altitude is the “sleeping height”, i.e. the height at which you spend the night. This height should not be higher than 500 meters above the last place where you slept. So when we talked about the daily elevation gain that means:
💡 You can gain 1.000 meters or more in elevation during the day, as long as you descend to an appropriate sleeping altitude in the evening. The elevation of your overnight destination should ideally be no more than 300–400 meters higher than where you started that morning, with 500 meters as an absolute maximum.
The itinerary outlined above is deliberately conservative and follows the rule of no more than 500 meters of elevation gain per day. The only exception is the stage from Namche to Pangboche, where the sleeping altitude is about 525 meters higher than the previous night. I had a mild headache that evening, but felt completely fine the next morning. After that, I experienced no further altitude-related issues for the rest of the trek.
Always drink enough
I strongly recommend staying well hydrated — around 4 liters per day. On many stages this is easy, as you pass lodges regularly. On pass days, however, it becomes more challenging. For those days, I usually carried about 2 liters, making sure to drink plenty before and after the hike. For what it’s worth, I mostly drank black tea.
Is it a good idea to use Diamox?
Diamox (acetazolamide) is a medication used both to prevent altitude sickness and to treat its symptoms. For preventive use, the usual recommendation:
- 🌅 Half a tablet in the morning
- 🌙 Half a tablet in the evening
- 🚨 In acute cases, one tablet or more may be taken
Diamox is widely used on treks in Nepal — especially on commercially guided tours that operate on very tight schedules and leave little time for proper acclimatization. It’s not uncommon to see trekkers taking pills every morning as a matter of routine. In my opinion, that’s not something to emulate. More often than not, it’s a sign of a flawed itinerary that doesn’t allow sufficient time to acclimatize naturally.
So far I´ve never used Diamox on my previous high-altitude treks. In my experience, medication isn’t necessary if you take your time and acclimatize properly. That said, having a small supply for emergencies certainly doesn’t hurt. Diamox can be purchased over the counter in Kathmandu, without a prescription.
Rest days on the Three Passes Trek
A few words on rest days: spending 2 nights in Namche Bazaar (3.440 m) is essential, as you’ll be ascending close to 4.000 meters shortly afterward. Three nights are even safer. This may sound overly cautious, but in my experience, the body doesn’t adapt to altitudes above 4.000 meters within just a few days. For most people, proper acclimatization takes longer — and it’s always better to err on the side of caution.
Before crossing the first high pass, I spent 2 nights in Chukhung (4,730 m). That may also seem conservative, but passes above 5.000 meters on demanding mountain terrain shouldn’t be underestimated. I would strongly recommend staying at least one full day here and doing a short acclimatization hike — for example to Chukhung Ri or Island Peak Base Camp. After that, you should be well acclimatized and in good shape for the upcoming passes.
- Ascend slowly and follow a conservative itinerary
- Limit sleeping altitude gain to 300–400 m per day (500 m max)
- Plan proper rest days, especially in Namche and before the first pass
- Drink 4–5 liters of fluids per day
- Walk at a steady, sustainable pace — slow is fast at altitude
- Do short acclimatization hikes (“climb high, sleep low”)
- Listen to your body and take symptoms seriously
- Rush your itinerary or try to power through altitude
- Gain too much sleeping altitude in a single day
- Ignore symptoms like headache, dizziness, or nausea
- Rely on Diamox to compensate for poor acclimatization
- Start pass days late — early starts are key
- Compare yourself to others — everyone acclimatizes differently
If in doubt, rest or descend. The mountains will still be there tomorrow.
Proper walking technique at high altitude
If you’ve done high-altitude hikes before, you’ll probably be familiar with this advice: walk slowly and breathe evenly. This isn’t about speed, but about finding a steady, sustainable pace. Slowing down often means you’ll arrive earlier than those who push too hard at the start and are forced to take frequent breaks later because they’re out of breath.
A good indicator that your pace is right is being able to breathe comfortably through your nose while walking. Don’t worry if this doesn’t work at first — that’s part of the acclimatization process and it takes time. It’s also completely normal to feel short of breath even on small inclines during the first days. This usually improves after a while.
I’ll admit that I didn’t always follow this advice perfectly. Thanks to the trek from Jiri to Lukla, I was already in good shape and pushed the pace on some days. Whenever I did, though, I paid for it with a headache in the evening — a clear reminder that altitude always has the final say.
What to do if problems arise
If you experience severe headaches, persistent nausea, or pronounced weakness despite a slow ascent — and these symptoms do not improve even after a long rest or an overnight stay — there is only one correct response: descend immediately.
This can quickly become serious. Descending fast is difficult in rough terrain, especially when your body is already weakened. In such situations, the only viable option is often a helicopter evacuation.
I didn’t experience this myself, but helicopter evacuations are common in the Everest region. If you talk to lodge owners, you’ll hear that it’s not unusual for someone to be flown out every now and then. These evacuations are expensive, with costs typically starting at around USD 1.500.
⚠️ For this reason, I strongly recommend having comprehensive health and rescue insurance in place.

Best time to travel for the Three Passes Trek
To wrap things up, let’s turn to a more pleasant topic: the best time of year for the Three Passes Trek. Fortunately, this is fairly straightforward. Trekking seasons in the Nepalese Himalayas are largely shaped by the annual monsoon, which lasts from June to September. As a result, there are two main trekking seasons:
- 🌤️ Pre-monsoon (spring): mid-March to mid May
- 🍂 Post-monsoon (autumn): mid-October to late November
In spring, temperatures in the Everest region tend to be slightly warmer — at least according to the local guides I spoke with. At lower elevations, haze can sometimes build up during the day, but around Everest this is usually not an issue due to the high altitude. In April, I experienced almost consistently good weather, with excellent visibility throughout the trek. The only exceptions were one cloudy day in Namche and a brief afternoon shower in Dingboche.
💡 One additional point worth noting: spring is Everest expedition season. Summit attempts typically begin in early May. If you’d like to see Everest Base Camp buzzing with activity, March and April are the best months. In autumn, Base Camp is quiet, with little more than bare rock remaining.
Winter is generally not recommended. Extremely low temperatures and snow-covered passes can make the trek significantly more difficult — and in some cases, impossible.
Final tips
To wrap things up, here are a few practical tips that may come in handy:
- 💰 Currency: Nepalese Rupee (NPR). As a rough guideline, 1 euro ≈ 140 NPR.
- ⏰ Time difference (Central Europe): +3:45 hours (summer time) / +4:45 hours (winter time).
- ⏰ Water: Never drink tap water unless it has been filtered or properly treated.
- 🧴 Hygiene: Use hand sanitizer regularly, especially before meals.
- 🧻 Toilet paper: Usually not provided in lodges, but readily available for purchase in villages along the trail.
- 🎴 Spare time: Daily stages are often relatively short, so bringing something for the afternoons — a deck of cards, an e-reader, or similar — can be a nice bonus.
- 🔋 Cold temperatures: Keep batteries, smartphones, and power banks as warm as possible by carrying them close to your body. Cold temperatures cause batteries to drain much faster.
My verdict on the Three Passes Trek
On the Three Passes Trek, I quickly found myself running out of words to describe the sheer scale and beauty of the high Himalayas. One feeling stayed with me throughout the entire journey, however: the sense of moving through one of the most spectacular mountain environments on Earth.
Were there downsides? Perhaps. I did find the level of tourism in the Everest region somewhat overwhelming at times — especially the constant helicopter traffic. But that is likely the price of making the world’s highest mountains accessible to so many people.
In the end, though, none of this diminished the experience for me. The Three Passes Trek is an unforgettable journey that offers everything hikers look for: majestic scenery, varied and demanding trails, just enough challenge at the high passes — and, of course, the warmth and hospitality of Nepali culture.
If you’re looking to do a teahouse trek in the Everest region, this is the trail to choose.
Found this article helpful?
If you enjoyed this guide, you can buy me a virtual coffee:
Your support helps keep guides and stories like this freely accessible for everyone — independently researched, ad-free and driven by passion not algorithms.
Do you have any questions about the Everest Three Passes Trek or know of other great treks in Nepal? Let me know in the comments. I’d love to hear from you!
Disclaimer: This article contains affiliate links marked with an asterisk * that lead to online retailers such as Amazon. If you click on such a link and buy something, I will receive a small share that helps finance this blog. This is the best way for you to say thank you if you liked the post. Of course, there are no additional costs for you.