Click here to read the article in German
In this article:
- What to expect on the Annapurna Circuit
- Route and stages of the Annapurna Circuit
- Suggestions for alternative routes
- How good are the new NATT trails?
- Tips for accommodation
- Cost of the Annapurna Circuit
- Hike the Annapurna Circuit with or without a guide?
- How difficult is the Annapurna Circuit?
- Best time to travel, packing list and safety tips
- My verdict
📍 Many people are still wondering if it’s allowed to trek Annapurna Circuit solo without a guide. Short answer: It’s still possible as of 2025, the alleged solo-trekking-ban is not enforced. Find out more here.
The Annapurna Circuit: 250 kilometers of walking through the Himalayas – a dream come true for every trekker. I wanted to do this trail for years, like many before me. Since the route opened to tourists in the late 1970s, thousands of Western trekkers have made their way to the Nepal Himalaya to see the world’s tallest mountains with their own eyes.
Even today it’s a legendary walk that is hard to resist – and maybe you are also considering it…
The big problem: The Annapurna region has been systematically developed with roads for about 20 years. The old route is history – large parts of it have now been transformed into a dusty dirt road. And if you do one of the standard trips with a trekking agency guide, there is a relatively good chance that you´ll be hiking on a dirt road alongside motorbikes, jeeps and tractors for most of the time.
Not exactly why you go trekking in the Himalayas.
The new trails of the Annapurna Circuit
Fortunately, there is a solution to the road problem. Since 2010 a handful of trekking enthusiasts have been volunteering to explore new paths off the beaten track. The goal: to restore the Annapurna Circuit to its former glory. The promise: You can do almost the whole trip on proper hiking trails again, avoiding the worst parts of the road: the so-called NATT trails (Natural Annapurna Trekking Trail).
When I first heard about this, it immediately caught my attention: this sounded exciting and seemed worth a try!
The big question, of course, is: what’s it really like? I’ll delve into more detail below. Just as a little heads-up: if you approach it the right way and don’t expect wilderness trekking in complete solitude, the Annapurna Circuit is still a great adventure. But these days you definitely need to plan ahead to avoid disappointment. And to make sure that doesn’t happen, here is everything you need to know for the best experience on the Annapurna Circuit.
This is going to be a very long post, so here we go!


At a glance:
- 🌍 The most famous trek in Nepal, maybe in the world
- 🥾 Excellent introduction to Himalayan trekking, safe & beginner-friendly
- 📏 Length: approx. 250 km, shorter options possible
- 🗓️ Duration: variable, approx. 10-21 days
- ⛰️ Highest point: Thorong La, 5,416 m
- 🍁 Best time to trek: November
- ⚖️ Difficulty: moderate
- 🔥 Adventure rating: high
- 🛖 Accommodation and meals in guest houses and lodges
A quick note: I organized the trek completely on my own and hiked without a guide. Thanks to the excellent teahouse-infrastructure this is quite easy to do. However, I did many treks before, mainly in the European Alps and other European mountains. So this was not my first multi-day-hike.
True – there are many people who`ve never done a trek before who finish the Annapurna Circuit just fine. However, many also have problems, mainly with the altitude. So, if you’re just starting out, it might be a good idea to hire a local guide. My tip in this case: Discuss the route in detail beforehand to avoid walking long sections of the trek on the road. You will find tips on the most beautiful trails away from the roads below.
Don’t trust all commercial agencies and guides to automatically show you these paths by themselves. Unfortunately, the motivation for doing so is not very strong. It´s much more convenient to lead people along the road.

What to expect on the Annapurna Circuit
If I had to summarize the Annapurna Circuit briefly, it would be like this: The perfect introduction to Himalayan trekking.
It ticks pretty much all boxes: Amazing landscapes, friendly villages and beautiful views of some of the highest mountains on earth. Add to that an incredible diversity of eco-systems. In a matter of days you hike from humid tropical jungles into the staggering alpine scenery at the border of Tibet – it’s basically a wild ride through almost all landscapes and climates that Nepal has to offer.
Alas, the construction of roads continues. Some parts of the trail have fallen victim to new developments even since my first visit in 2022. For me as a trekker that truly sucks even if I´m realistic enough to accept that progress in the mountainous regions of Nepal is inevitable.
Here’s the thing though: Having hiked parts of it again in 2025 I would still say the Annapurna Circuit is a great journey on foot.
It’s a journey that will fill your mind with a thousand impressions. Rice fields in the steep terraces of the mountain slopes. Ancient Mani stones and prayer wheels at the wayside. Traditional villages where people share their homes with goats and sheep, while a motorcycle rattles by and the mighty snow-capped peaks of the Himalayas sparkle in the sun. Tattered prayer flags fluttering in the piercing cold air on the way to the 5.400-meter-high Thorong-La Pass.

Is the Annpurna Circuit too crowded for its own good?
At this point a quick reality check is in order: The Annapurna Circuit is anything but a lonely trek. You will pass a teahouse every few kilometers and walk through relatively densely populated valleys. In addition, the route is so popular that you´ll meet countless people from all around the world. On some of the lesser-known side trails it’s a bit quieter. But you won’t find any wilderness – the only parts withouth villages are the last few kilometers around the Thorong-La Pass and even there they built some lodges.
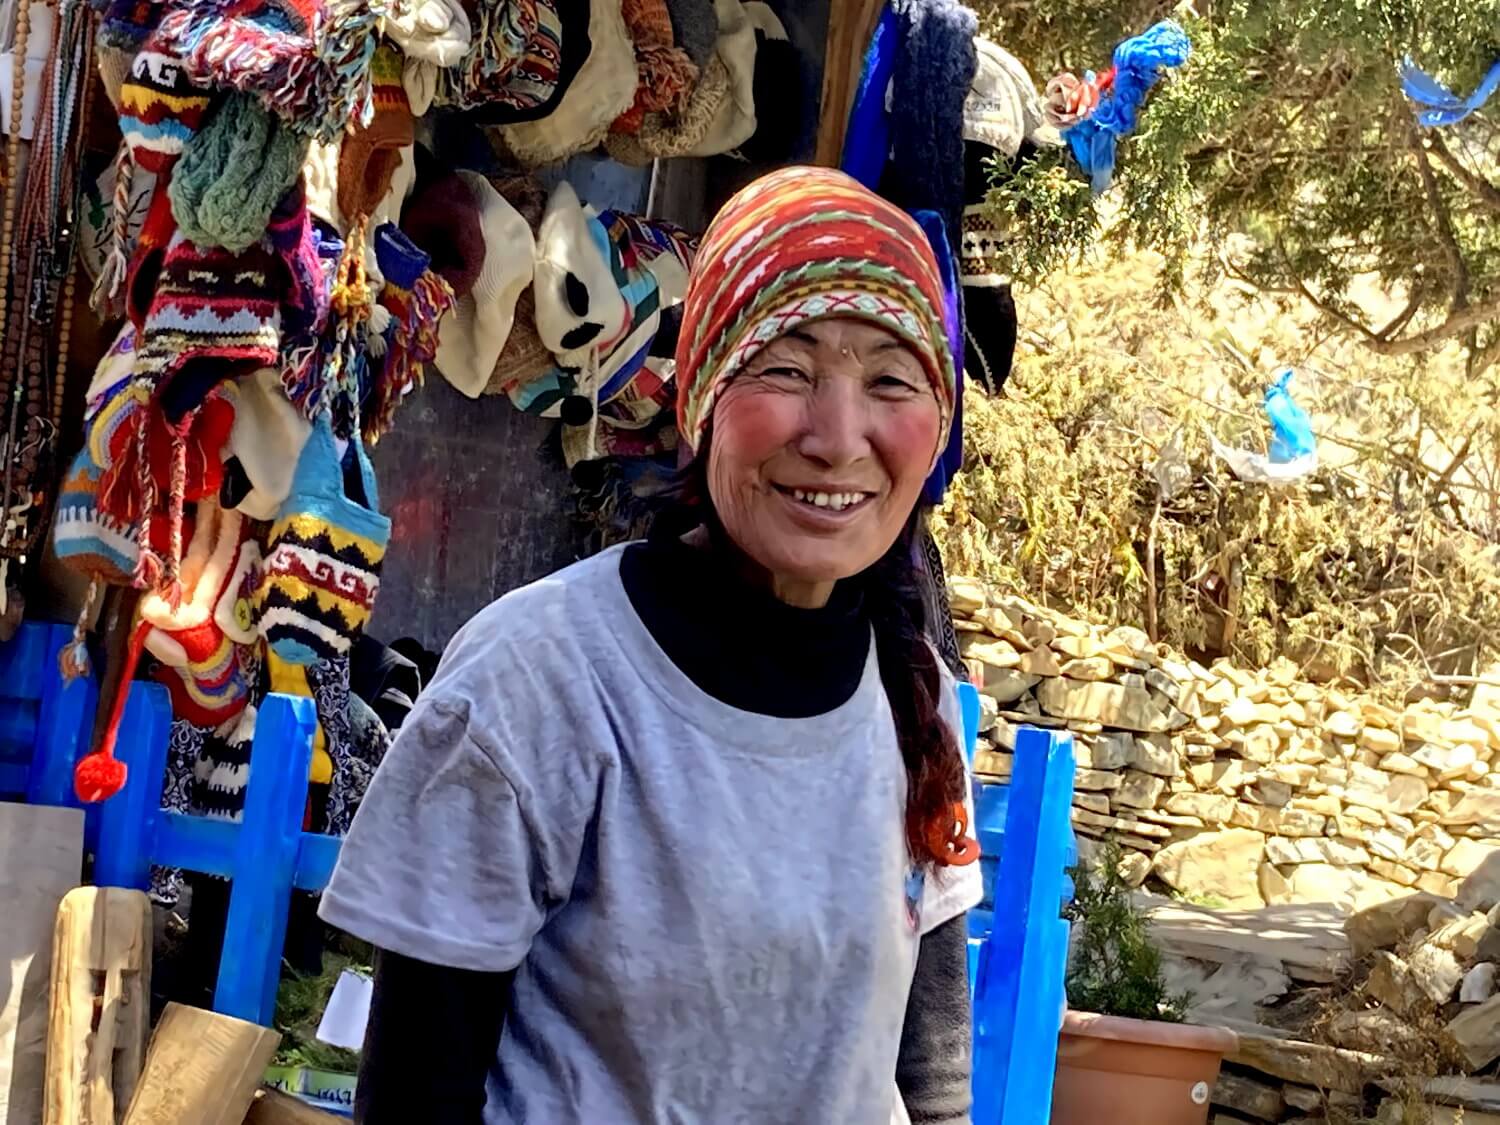
It’s also worth mentioning that the ongoing road construction and the constant influx of tourists have altered traditional ways of life. Farming and agriculture is on the decline, Internet and smartphones are available in even the most remote villages. However, for me that’s also part of the experience. On the Annapurna Circuit you get to meet people whose lifes feel rooted in an earlier age but who have to grapple with modernity at the same time. These are the real Himalayas of the 21st century with all their contradictions.
The mountains though…they are really timeless.
To be honest, I found some sections of the trek ugly. At the same time there is an abundance of amazing scenery, vivid cultural encounters, strikingly diverse landscapes and that ever-elusive magic of Asia. For my part, the lasting beauty of the journey far outweighed its rougher edges. I think it could be the same for you, particularly if you never hiked in the Himalayas before.
Best hiking guide and map
My recommendation: Himalayan Travel Guides – Trekking the Annapurna Circuit
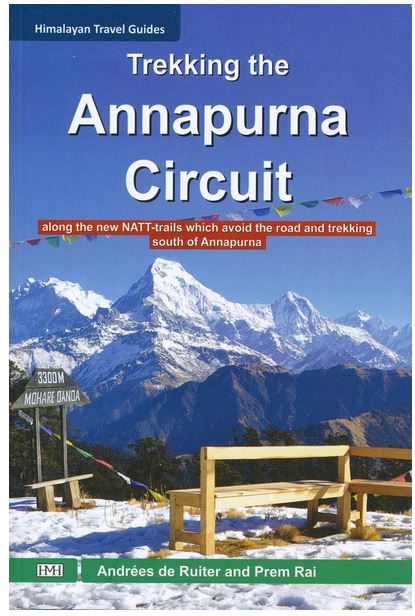
The excellent hiking guide “Trekking the Annapurna Circuit*” from Himalayan Travel Guides is currently the best guide book available for the Annapurna Circuit and my top recommendation for hikers going without a trekking guide.
This handy book describes every conceivable side route in detail – including paths that even the locals don’t know about. It also includes tips for other tours in the south of the region, such as the ABC trek and the Mardi Himal trek.
Together with a good hiking map*, this book will not let you down!
The Rother hiking guide* for the Annapurna circuit is designed a bit more professionally and is not too bad. However, it doesn’t include as many side trails. The book is particularly suitable for people who don’t like to plan as much in detail, but just want follow a convenient route. Fortunately, the most well-known alternative routes are included.
I used the Around Annapurna* map from Nepa Maps at a scale of 1:70,000. This scale is sufficient, all the important paths, the route, towns and lodges are correctly marked on it. You can of course also buy the map in Kathmandu or Pokhara. For planning purposes I would get it before, though.
Also recommended:
What you need to know about the route of the Annapurna Circuit
Like most so called “circuits” in Nepal, the Annapurna Circuit is not a full loop. Instead it’s kind of a 250 km long half-circle hugging the northern edge of the Annapurna massif. This mountain range is one of the most dramatic looking ranges of the entire Himalayas, rising sharply from the green mid-hill-country of Gandaki province to quickly reach heights above 8.000 meters.
The mountains and the famous trek are situated in the Annapurna Conservation Area, the largest nature reserve in Nepal. The landscapes are spectacularly varied and range from terraced hillsides to mountain forests, deeply eroded river valleys and a vast number of snow-covered peaks, many of them over 7.000 meters. Highest is Annapurna I (8.091 m) the first 8.000-meter peak to be conquered, who was climbed by a french party in 1950.
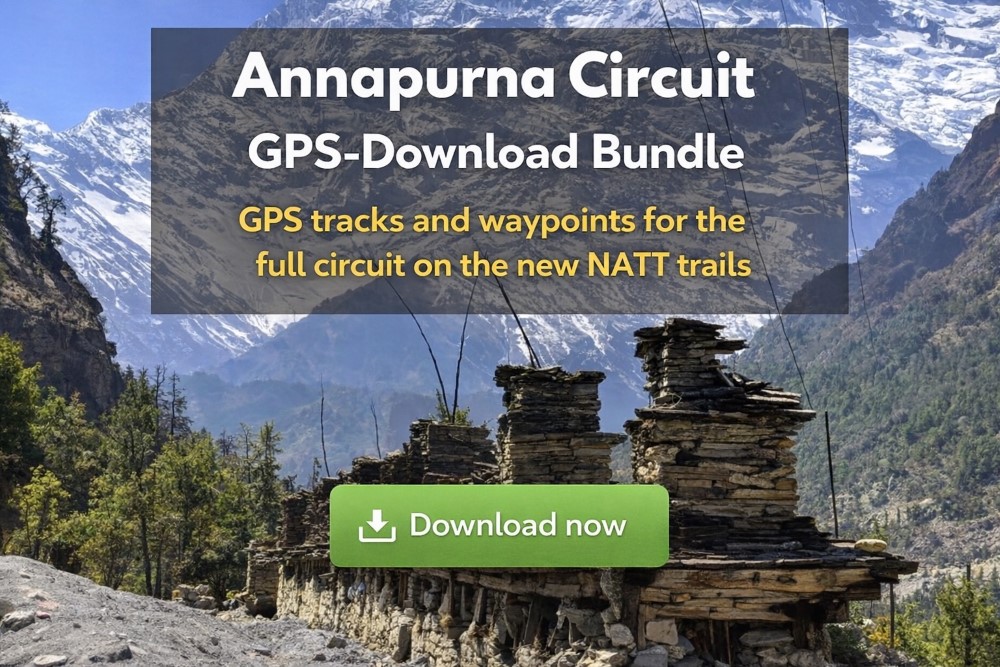
Download the GPS tracks for the Annapurna Circuit:
For the full circuit you’ll need around 20 days. However, there are many side trips and shorter treks possible so you can spend more time. I did quite a few of them and spent a total of 32 days on my first visit. Nowadays there are many people who skip parts of the Annapurna Circuit and do it in 14, sometimes even 10 days.
Some ideas if you are short on time:
- Don’t skip the first part from Besisahar to Chame, the NATT trails are mostly very beautiful – many who do it consider it as a highlight of their trip.
- The middle part from Chame to Pisang includes some boring road stretches and can be skipped without losing too much. You can easily find transport or hitchhike.
- The final section after Muktinath also has longer road stretches. You could skip it entirely or take transport to Tatopani and hike to Ghorepani Poon Hill from there.
Map and GPS track
Instructions for using GPX tracks
From Besisahar in 250 kilometers to Pokhara
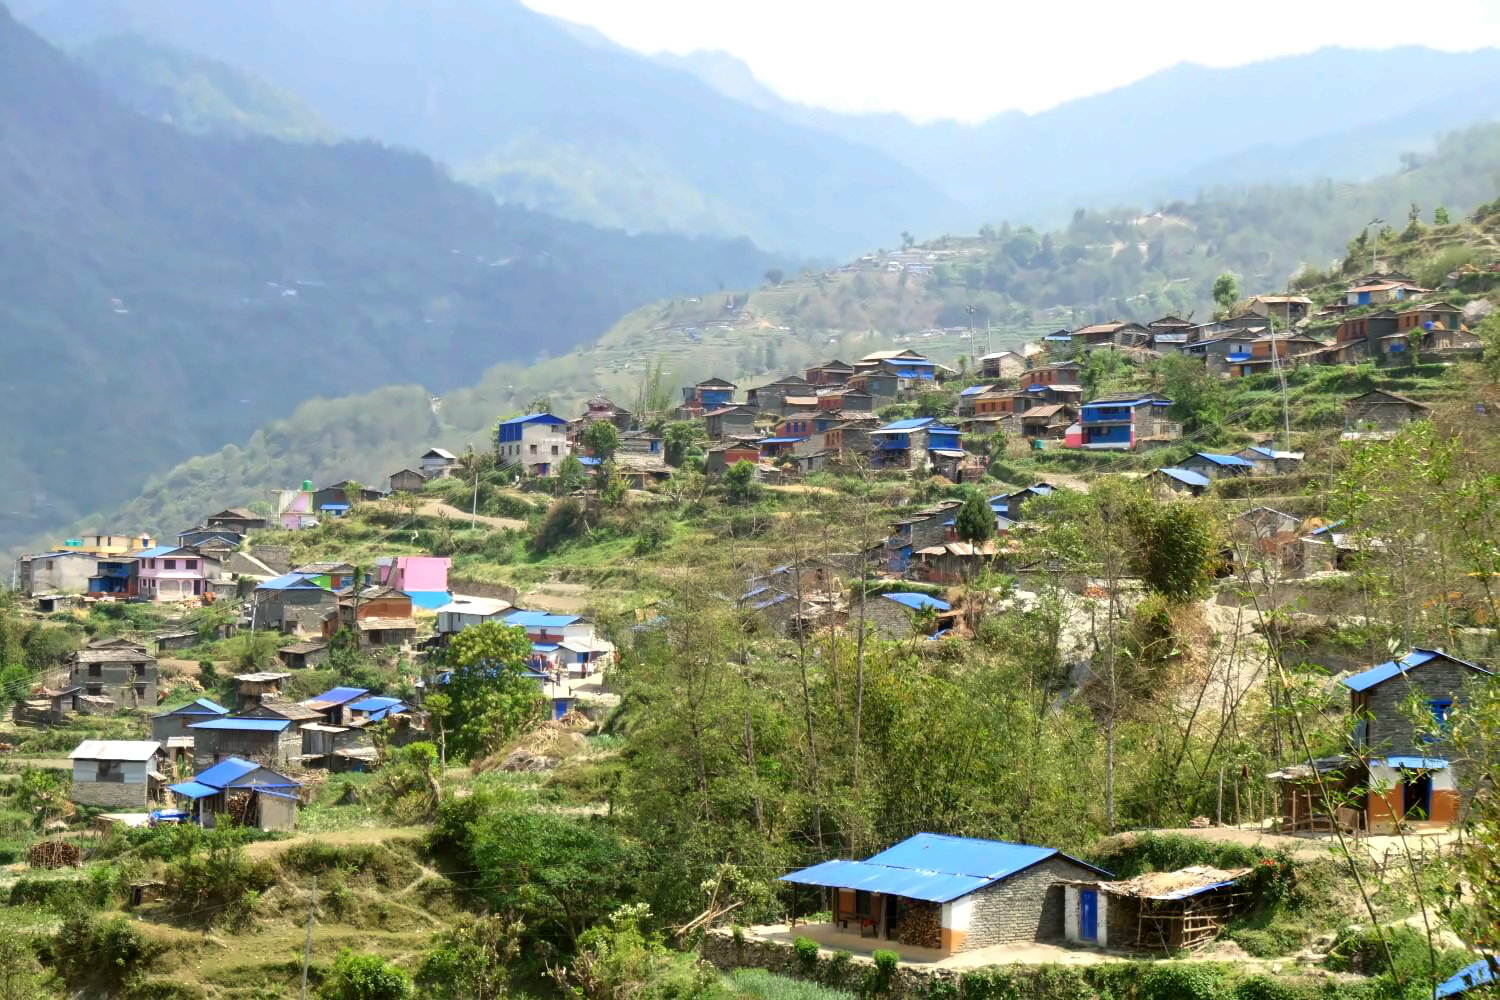
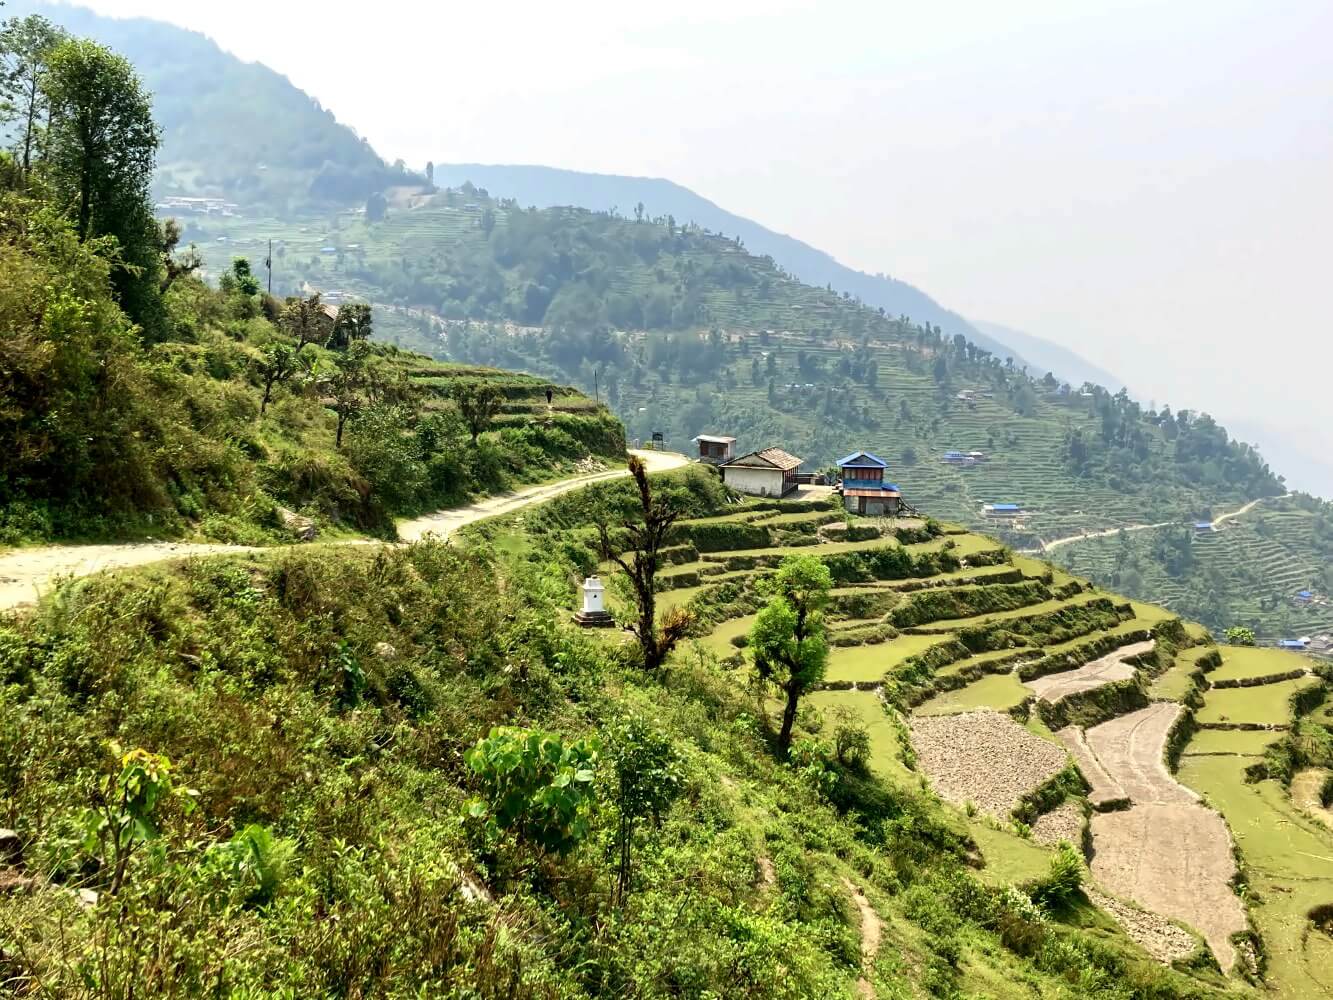
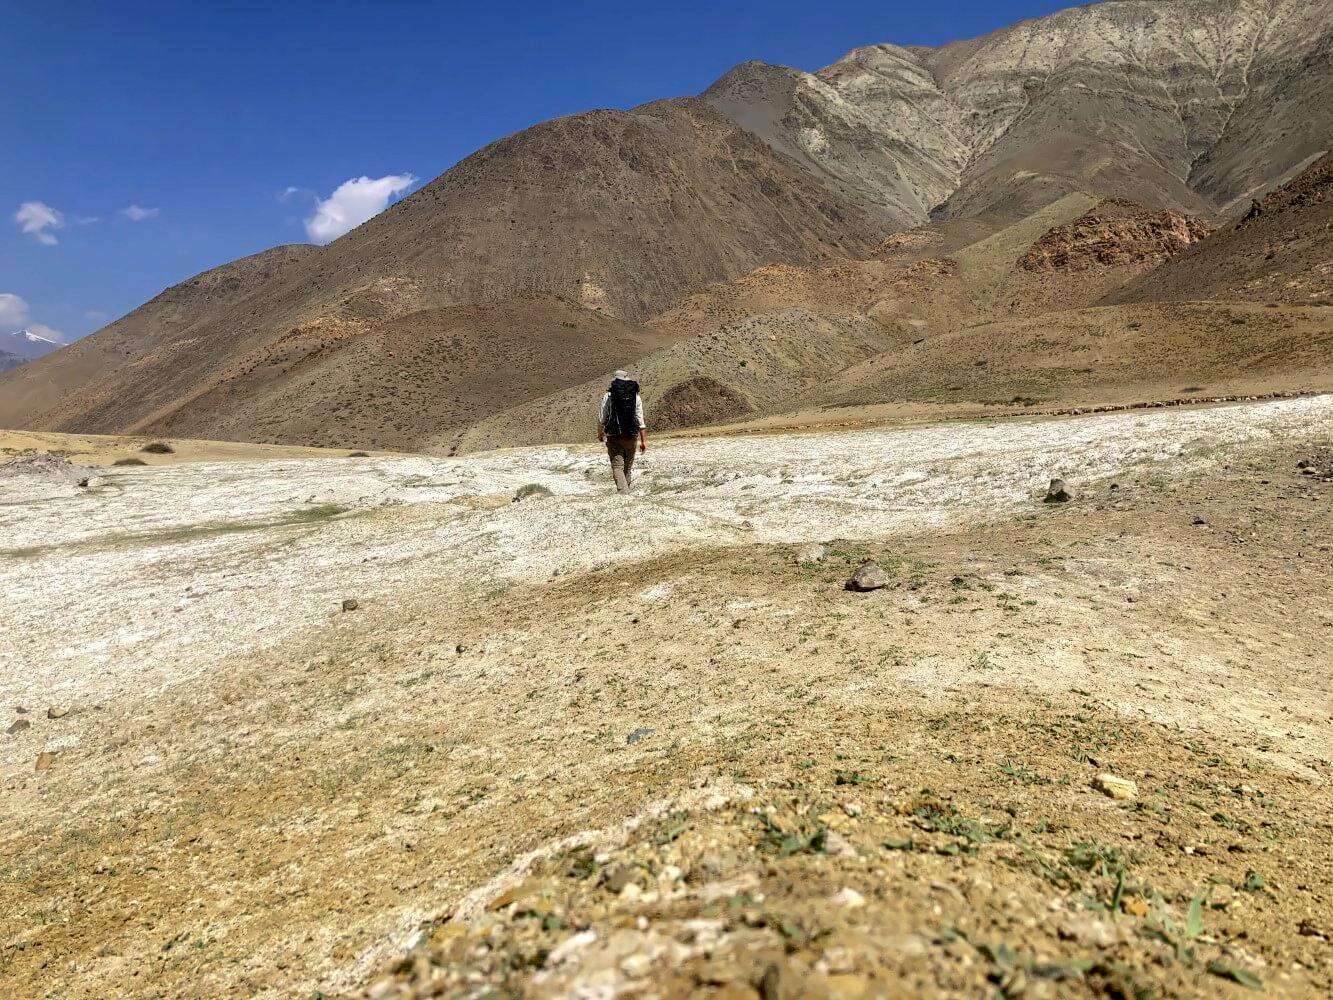
Most people walk the Annapurna Circuit counterclockwise as this allows for better acclimatization. The traditional start is the town of Besisahar, about 100 km northwest of Kathmandu. From here the trail follows the Marsyangdi river valley as it winds northwards in the direction of the Tibetan border. As you ascend, the subtropical forests, terraced rice fields and lowland Hindu villages slowly give way to increasingly mountainous landscapes. An enchanting experience!
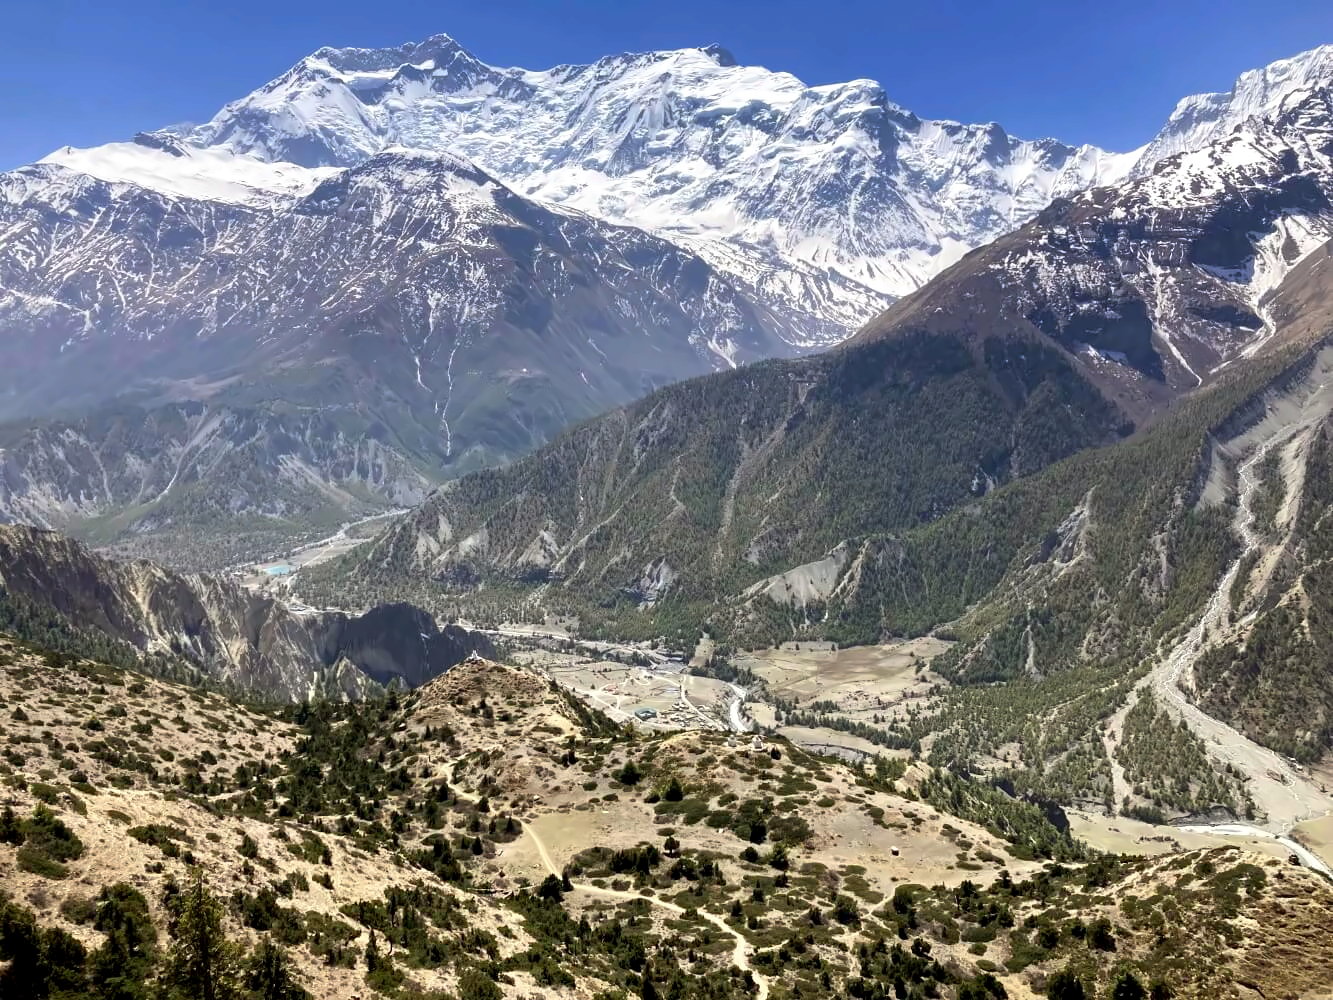
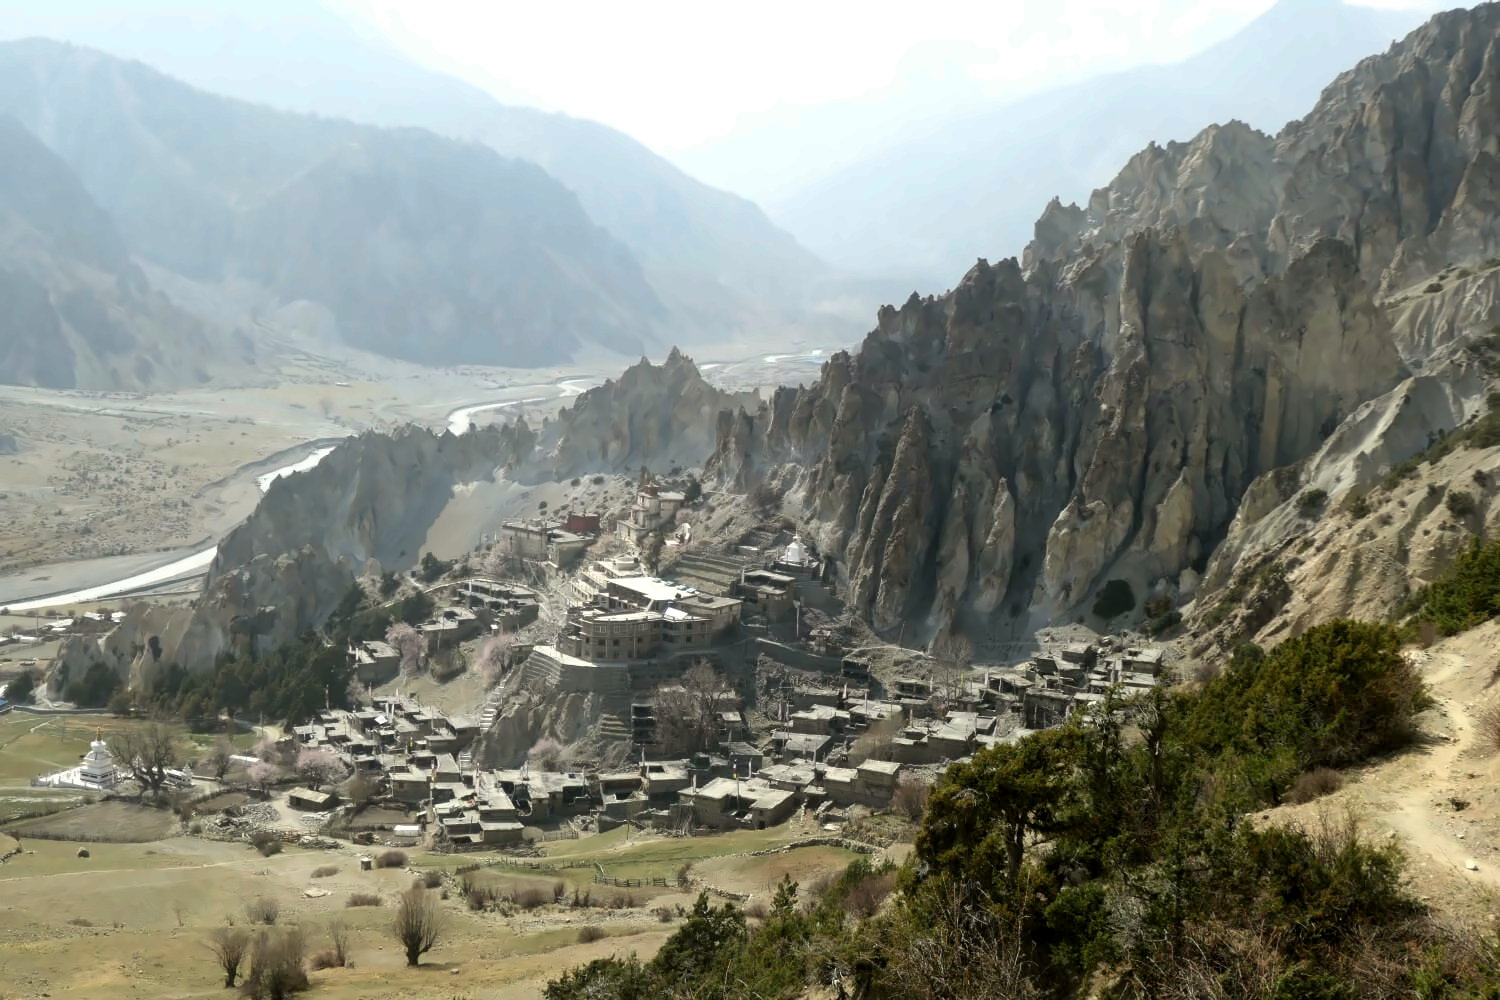
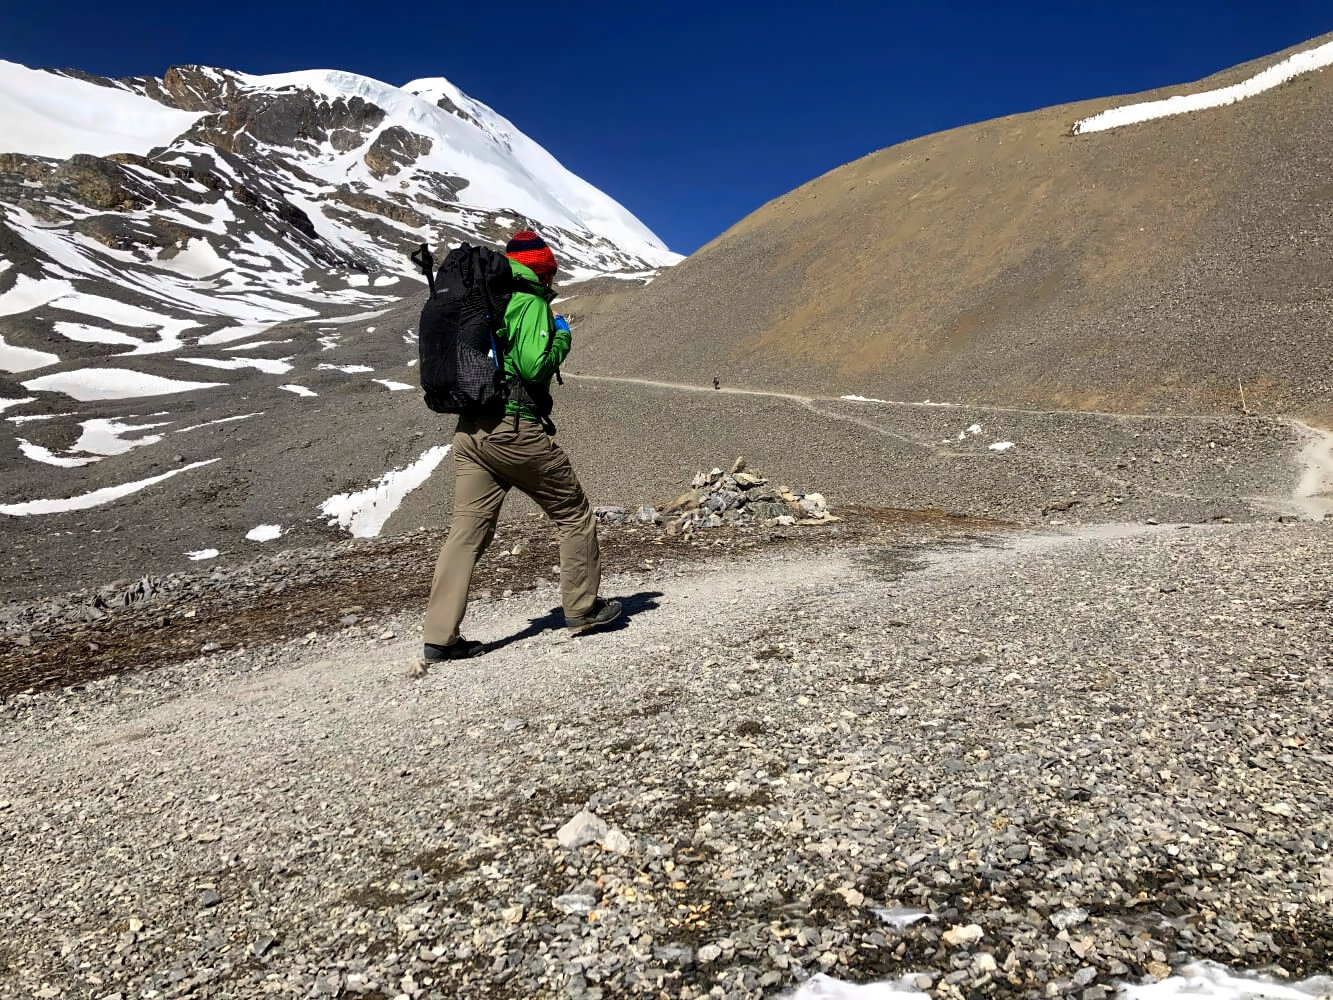
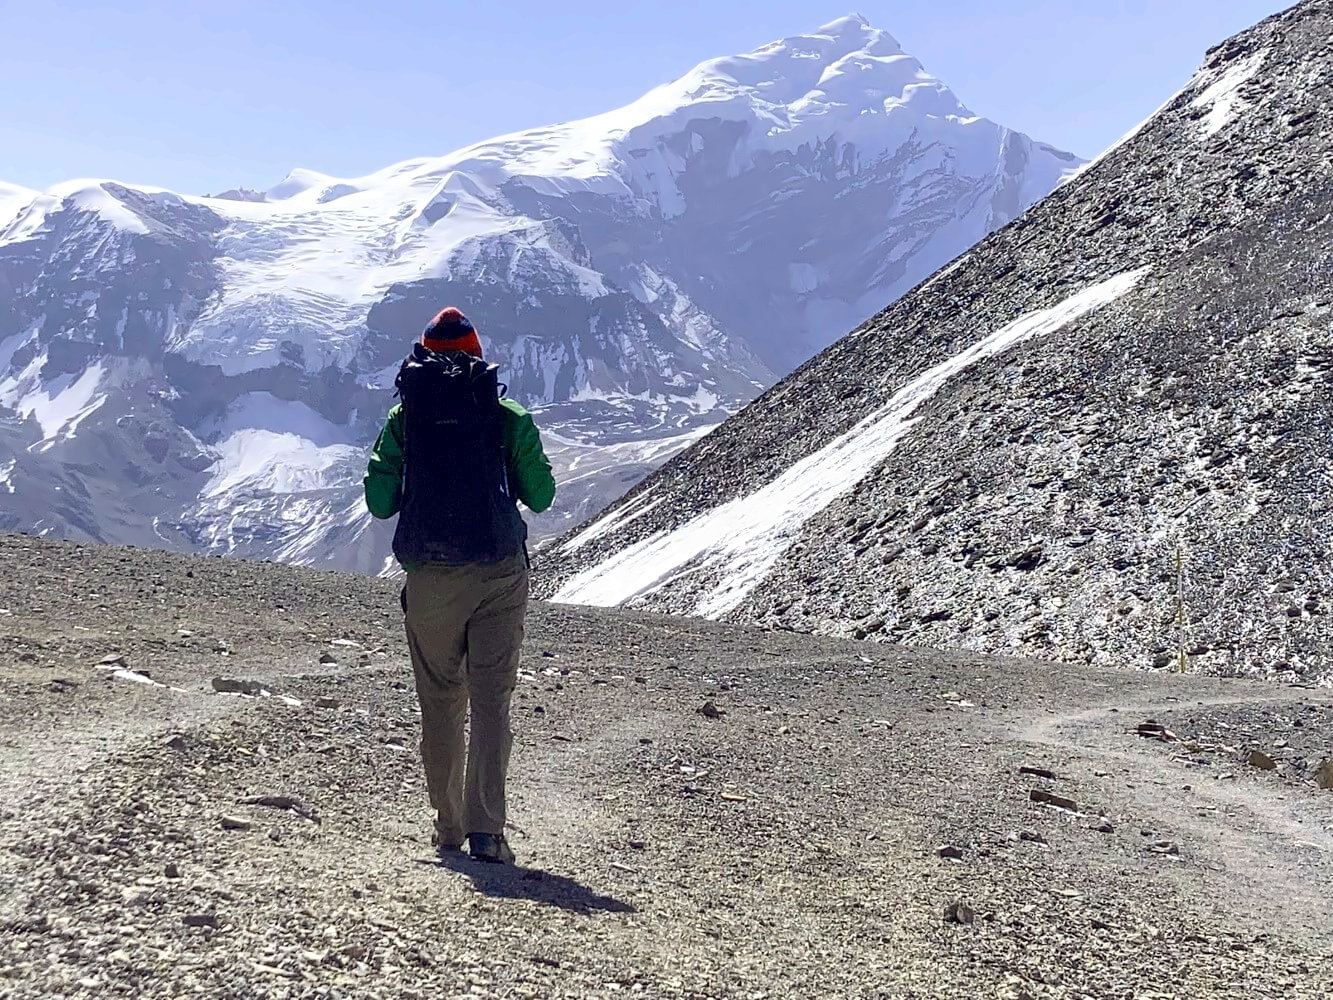
At Pisang you enter the Buddhist part of the Nepal Himalaya, which is reflected both in the villages and the landscape. From now on prayer flags and Mani walls accompany you on your way. Temperatures drop and the air turns crisp while the hills become increasingly barren. As you hike through the bizzare Ladakhi-like half-desert of the Manang valley the towering snow peaks and glaciers of the Annapurnas soar into the sky. A final push brings you to Thorong-La high pass – at 5.416 meters the highest point of the tour.
Thorong La is only the halfway point, though. After the pass you descend to the temple of Muktinath, one of the holiest pilgrimage sites on the Indian subcontinent. After crossing the deep gorge of the Kali Ghandaki River you spend several days walking through the windy high altitude desert of Mustang passing through fortress-like villages that look straight out of Tibet. At the hot springs of Tatopani you finally return to tropical climes.
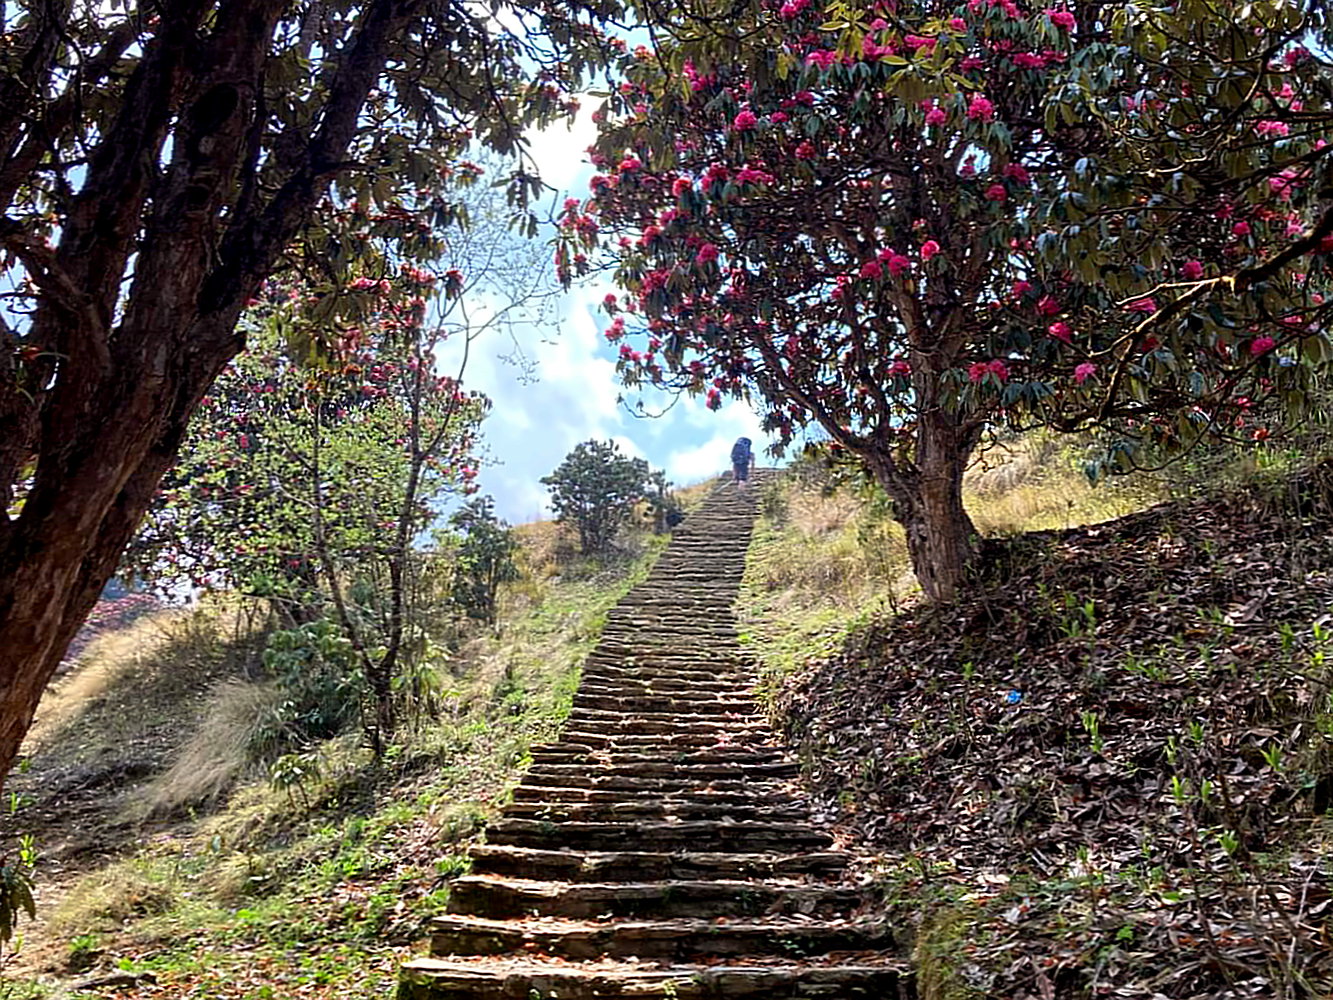
The final 2.000-meter-climb of the trek takes you through blooming rhododendron forests to the charming hill station of Ghorepani. Here you can savour a last view of the Himalayas at sunrise on the famous Poon Hill. After that it’s only a days walk to Nayapul, where the buses to the Pokhara leave. If you have more time, Ghorepani is the ideal place to start exploring the beautiful hill country of the southern Annapurna region.
Overview of the stages of the Annapurna Circuit
Excepting detours and rest days, it took me 20 days hike the full Annapurna Circuit. After that, I did the Annapurna Basecamp Trek and the Mardi Himal Trek. More information on that below. The most popular side trip on the circuit, which almost everyone does, is the trek from Manang to Tilicho Lake (about 3 days). Of course, I wanted to see it too. Unfortunately I caught a cold and had to turn back.
Check out this overview with all the stages my hike. Just click on the respective stage for a detailed description. In the posts, you will find information about the trails avoiding the road, accommodation options and a few nice insider tips that you won’t find in any guidebook.
(only in German for now but use Google Translate)
Annapurna Circuit: Lower part to Manang
| Day | Route | Length |
|---|---|---|
| 01 | Kathmandu – Besisahar – Bhulbhule | 188 km (Bus from Kathmandu) |
| 02 | Bhulbhule – Ghermu | 14,3 km |
| 03 | Ghermu – Chamje | 14,1 km |
| 04 | Chamje – Dharaphani | 18,4 km |
| 05 | Dharaphani – Chame | 19,6 km |
| 06 | Chame – Upper Pisang | 14,5 km |
| 07 | Upper Pisang – Ngawal | 10,9 km |
| 08 | Ngawal – Bhraka | 8,2 km |
| 09 | Tagesausflug zum Ice Lake | 12,6 km |
| 10 | Bhraka – Manang | 2 km |
Annapurna Circuit: Thorong La Pass to Jomson
| Day | Route | Length |
|---|---|---|
| 11 | Manang – Churi Ledar | 13 km |
| 12 | Churi Ledar – Thorong Phedi – Thorong Highcamp | 6 km |
| 13 | Thorong Highcamp – Thorong La – Muktinath | 14 km |
| 14 | Muktinath – Jhong | 3,5 km (+ walk around Ranipauwa and Jhong) |
| 15 | Jhong – Kagbeni | 8,8 km |
| 16 | Kagbeni – Jomsom | 13,2 km |
Annapurna Circuit: Jomson to Ghorepani
| Day | Route | Lenghth |
|---|---|---|
| 17 | Jomsom – Sauru | 18 km |
| 18 | Sauru – Kalopani – Tatopani | ca. 10 km + 30 km with Jeep |
| 19 | Tatopani – Chitre | 12,7 km |
| 20 | Chitre – Ghorepani – Poon Hill | 3 km + 2,8 km to Poon Hill |
Check out this film about the Annapurna Circuit on YouTube:
Alternative route suggestions for the Annapurna Circuit
Maybe you don’t have the full three weeks or don’t want to do the whole trek for other reasons. This is not a big problem, since almost the entire route is now accessible by road. From Besisahar, a road leads to Manang (some parts from Pisang to Manang paved). On the other side of the pass, the road leads from Muktinath all the way down to Beni and from there to Pokhara.
This means that you can easily shorten the route, for example by starting the trek at a later location or by having yourself driven back earlier. Many people, for example, only spend two weeks on the circuit. The important thing is to allow yourself enough time at the beginning to acclimatize to the high altitudes.

Possible starting points of the Annapurna Circuit
From what I saw and heard on the trek, these were the most popular starting points of the Annapurna Circuit:
| Location | Altitude | Distance from Besisahar | Distance to Manang |
|---|---|---|---|
| Besisahar | 760 m | – | 110 km |
| Bhulbhule | 840 m | 7 km | 103 km |
| Tal | 1.700 m | 43 km | 67 km |
| Chame | 2.670 m | 70 km | 40 km |
Starting in Besisahar
Besisahar has been the classic start of the route since the early 2000s because the buses from Pokhara and Kathmandu stop here. From here many people surprisingly just follow the motorable road. However, there’s also a very nice NATT trail on the eastern bank of the Marsiyangdi. Besisahar therefore makes a good point to start the trek if you have the time.
Start in Bhulbhule
A few kilometers further north is Bhulbhule, behind it the small village of Ngadi. These places are good starting points for people who arrive too late at the first day and don’t have time to hike there. That’s exactly what happened to me and I just took the bus to Bhulbhule. With this option, you’ll miss very little of the beautiful lower part of the circuit.
Start in Tal
Tal is also a popular starting point. I met many individual trekkers who were driven there by jeep. Tal is located at 1.700 meters, so you still have plenty of time to acclimatize. One drawback: you’ll miss the entire tropical section of the circuit, as you start directly in the temperate climate zone.
Start in Chame
Chame at 2,670 meters is the last place that makes sense to start. This way you will have at least one more day before you crack the 3.000-meter mark. However there’s a drawback: Between Chame and Pisang there are long stretches of not avoidable road. So you would start your trek with a lot of roadwalking.
Not recommended: Starting in Manang
There are groups that travel in one day from the lowlands to Manang (3.540 m), mainly Chinese and Nepali who go from there to Khangsar and next day to Tilicho Lake. This is quite dangerous. Every year there are some altitude-related deaths on Annapurna Circuit – almost all of them drove to Manang too fast. So please don’t be one of them. Start in Chame at the very latest and allow yourself 2-3 days to reach Manang from there.
Tip: Check out the 12 best excursions and places to visit in Manang. The place is quite popular to acclimatize (1-2 days) and there’s a lot to see.
Possible endpoints of the Annapurna Circuit
As mentioned, many people don’t walk the entire route and get off somewhere behind the Thorong-La Pass. From the people I met, these were the most popular places to end the Annapurna Circuit:
| Location | Altitude | Distance from Thorong La |
|---|---|---|
| Muktinath | 3.700 m | 10 km |
| Jomsom | 2.720 m | 32 km |
| Tatopani | 1.190 m | 94 km |
| Ghorepani | 2.860 m | 102 km |
| Nayapul | 1.070 m | 110 km |
End in Muktinath
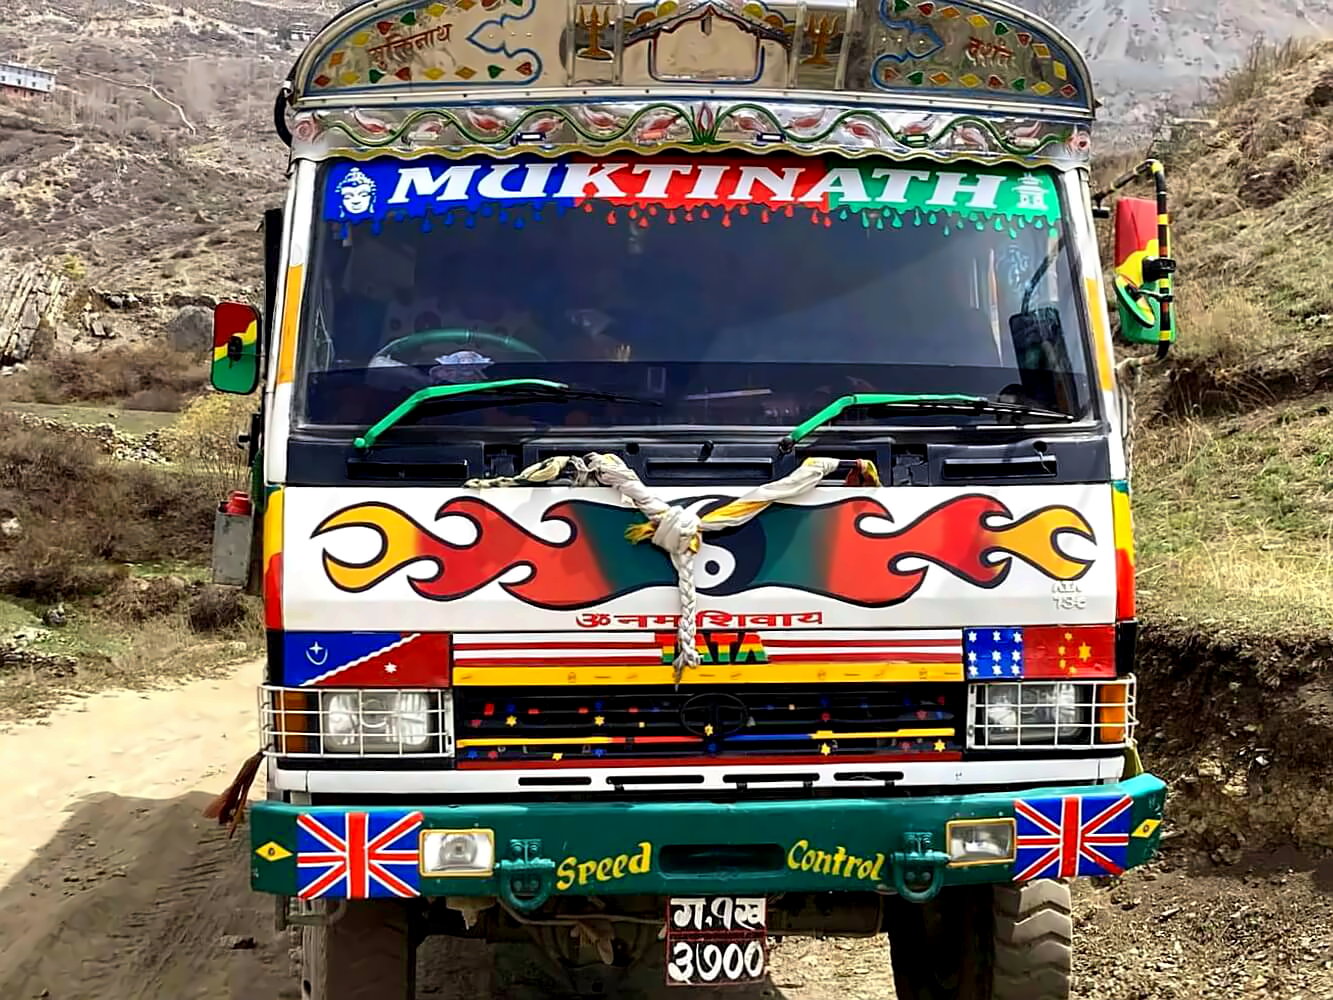
Muktinath is the end point of the Annapurna Circuit for quite a few trekkers, as it lies directly behind the Thorong-La Pass. From here many take a jeep to Jomson and then a plane to Pokhara. Unfortunately, this means you miss some very beautiful sections in Mustang and ultimately only walk half of the Annapurna Circuit. However, a visit to the Muktinath temple would be a nice way to end the trip.
End in Jomsom
Jomson is also a popular final destination because there is an airport with connections to Pokhara. The Tibetan villages on the way were a highlight of the whole trip for me. If you want to finish early, I would at least walk to Jomson and visit Jhong and Kagbeni on the way. Jomson itself is not a pretty town, though, and a somewhat unsatisfying end to such a great hike.
Tip: Personally I wouldn’t take a plane from Jomsom – the Nepalese domestic airlines don’t have the best reputation and Jomsom is a rough airstrip due to the constant winds. There have been several crashes in recent years, including flights starting and ending in Jomsom. Among the victims were also trekkers on the Annapurna Circuit.
End in Tatopani
Tatopani is famous for its hot springs, which is why many people end their trek at this place. I found the trail to Tatopani a mixed bag. There is a beautiful NATT trail on the east bank of the Gandaki river which starts before Marpha and leads to Kalopani, but also ugly sections on gravel roads behind Jomsom. From Kalopani to Tatopani the NATT trail continues on the eastern river side. Unfortunately, I did not take it because of bad weather and hitchhiked this section.

End in Ghorepani
Ghorepani was my last stop on the classic route. From here you can climb to Poon Hill and take one last look at the Annapurna range at sunrise. This is a great way to end the trip! After that you either walk a short distance to Ulleri and take the jeep. Or you can add another day and walk on to Nayapul, where jeeps and buses also leave for Pokhara.
Discover the most beautiful places, top stays, and my best tips for Pokhara:

👉 Also read: 5 Epic Day Hikes in Pokhara (That Almost Nobody Knows)
Best Annapurna Circuit side trips and other treks
If you have a little more time, you can easily combine the Annapurna Circuit with other treks in the southern Annapurna region. A good starting point for this is Ghorepani. From here you can add the Poon Hill Panorama Trek, the Annapurna Basecamp Trek (ABC-Trek) or the Mardi Himal Trek to your round trip.
Annapurna Circuit + Poon Hill Panorama Trek
The Poon Hill Panorama trek is a 4-5-days-loop through the southern Annapurna region that can easily be started in Ghorepani, which you will reach on the Annapurna Circuit anyway (if you do the full circuit). From here, you continue to Tadapani, then to Ghandruk and then slowly descend down to Dhampus in the lower valleys. From Dhampus catch a Bus to Pokhara.
The Poon Hill trek was one of my highlights in the Annapurna region. Yes… it’s well known, slightly touristy and a bit crowded. However, the dense evergreen forests of the Annapurna foothills are truly magical. And there are countless opportunities to avoid the crowds on lesser-trod paths. I highly recommend this trek! If you want to continue walking for another week, this would be my first choice.
Read more: Check out the complete guide to the Poon Hill Trek here.
Annapurna Circuit + Annapurna Basecamp Trek
The Annapurna Basecamp Trek starts in the village of Chomrong, which you can comfortably reach from Ghorepani in 2 days. From there, the route takes you deep into the mountains to the so called “Annapurna Sanctuary” – an impressive glacial cirque surrounded by snow peaks, right in front of Annapurna I. The first part of the route is identical to the Poon Hill Panorama Trek. At Tadapani you branch off northeast to Chomrong and then follow the Modi Khola to the Sanctuary. With the return journey you`ll need about a week extra in total.

I did it as follows:
- Day 1: Sunrise at Poon Hill in Ghorepani in the morning, then trek to Tadapani
- Day 2: Tadapani to Chomrong, then on to Sinuwa
- Day 3: Sinuwa to Deurali
- Day 4: Deurali to Annapurna Basecamp
- Day 5: Sunrise at Annapurna Basecamp, then back to Sinuawa and on to Jhinu Danda
- Day 6: Jhinu Danda to Landruk
- Day 7: Landruk to Dhampus
Since you will already be well acclimatized by this time, you don’t have to worry about the altitude (max. 4.400 meters). Of course, you can also take a little more time. But the trek is not particularly long in terms of distance (about 40 km round trip starting in Chomrong).
After that, you could walk via Landruk to Dhampus. This will take you about three days.
Read more: Detailed report on the Annapurna Base Camp Trek.
Annapurna Circuit + Mardi Himal Trek
The Mardi Himal Trek traverses a ridge east of the Modi Khola valley and provides very nice views of Mt. Machapuchare and several Annapurna peaks. There are various starting points. If you come from the Annapurna Circuit you can trek to the village of Landruk and then follow the forest trail on to the ridge.
Check out my detailed guide of Mardi Himal Trek:
Many people begin the Mardi Himal Trek as a stand-alone tour from Pokhara, which is even better – the mountain views from Dhampus and Pothana are amazing. However, the views from the ridge itself are also stunning, particularly in the fall post-monsoon-season. So it’s a really great trek to do. And it’s slightly less crowded than the very popular ABC Trek. Highly recommended!
👉 Also check out: 13 stunning side trips to discover on the Annapurna Circuit
About the roads on the Annapurna Circuit
You cannot talk about the Annapurna Circuit without mentioning the dreaded “road”. And I don’t want to sugarcoat anything: you’ll encounter quite a lot of roads during your trek.
However, in Nepal they have a slightly different idea of what constitutes a road. In reality, most of them are dirt roads, i.e. gravel tracks. These are used mostly by jeeps and buses for the tourists. The Nepali themselves mostly travel by motorbikes, sometimes you will also see the occasional tractor.
Check out this overview map that shows the current road situation and NATT trails:
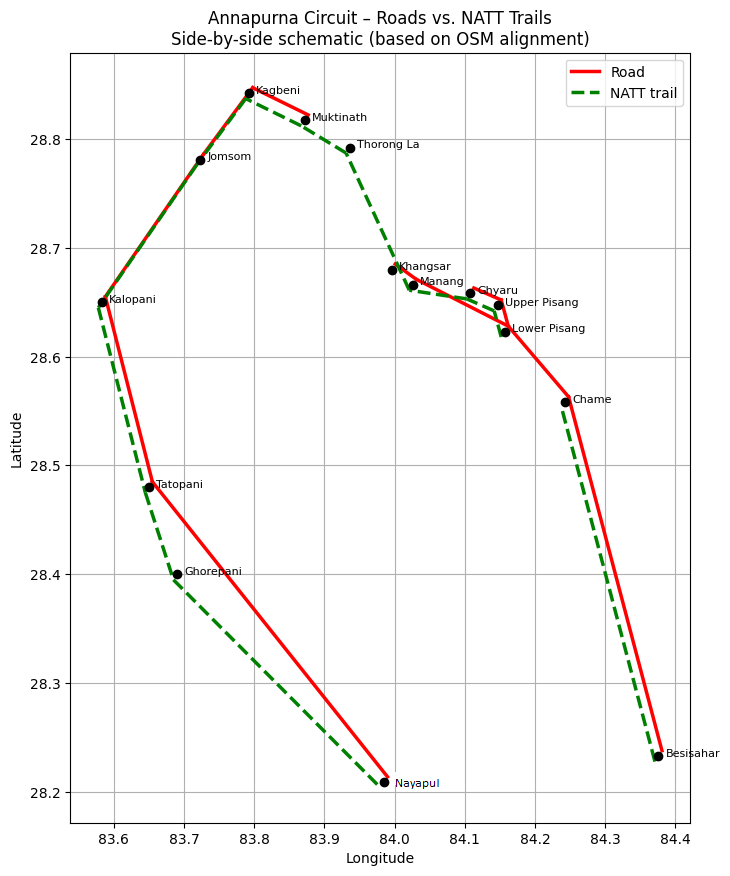
To help your planning, here are some further explanations to the map:
Marsyangdi side
Besisahar to Chame
- conditions: pretty rough dirt road on the west bank of Marsiyangdi river, road building continues on the east bank, so far until Tal
- avoidable by NATT trail? almost completely avoidable
Chame to Lower Pisang
- conditions: partly paved road or dirtroad
- avoidable by NATT trail: only in very short sections
Lower Pisang to Upper Pisang
- conditions: new dirt road
- avoidable by NATT trail: no
Upper Pisang to Ghyaru
- conditions: new dirt road
- avoidable by NATT trail: no
Lower Pisang to Manang
- conditions: relatively good road, partly paved
- avoidable by NATT trail: yes, from Lower Pisang take trail to Upper Pisang
Manang to Khangsar
- conditions: new road, partly paved
- avoidable by NATT trail: only partly

Kali Gandaki side
Muktinath to Kagbeni
- conditions: new road, partly paved on the east side of Kali Gandaki, almost deserted dirtroad on western side to Jhong and Kagbeni
- avoidable by NATT trail: yes, walk on the west side of Gandaki
Kagbeni to Jomsom
- conditions: paved road on the east side of Kali Gandaki, not much used track/ dirtroad on west side via Dhagarjun
- avoidable by NATT trail: yes, walk on the west side of Gandaki
Jomsom to Kalopani
- conditions: paved road on the west side of Gandaki to Marpha, rough dirtroad on west side to Kalopani
- avoidable by NATT trail: yes, cross to east side before Marpha and then walk to Kalopani via Sauru
Kalopani to Beni via Tatopani
conditions: rough dirtroad on western side of Gandaki to Tatopani, after that better road until Beni
avoidable by NATT trail: yes, after Ghansa cross the river and walk on east side via Pairothapla and Kopchepani
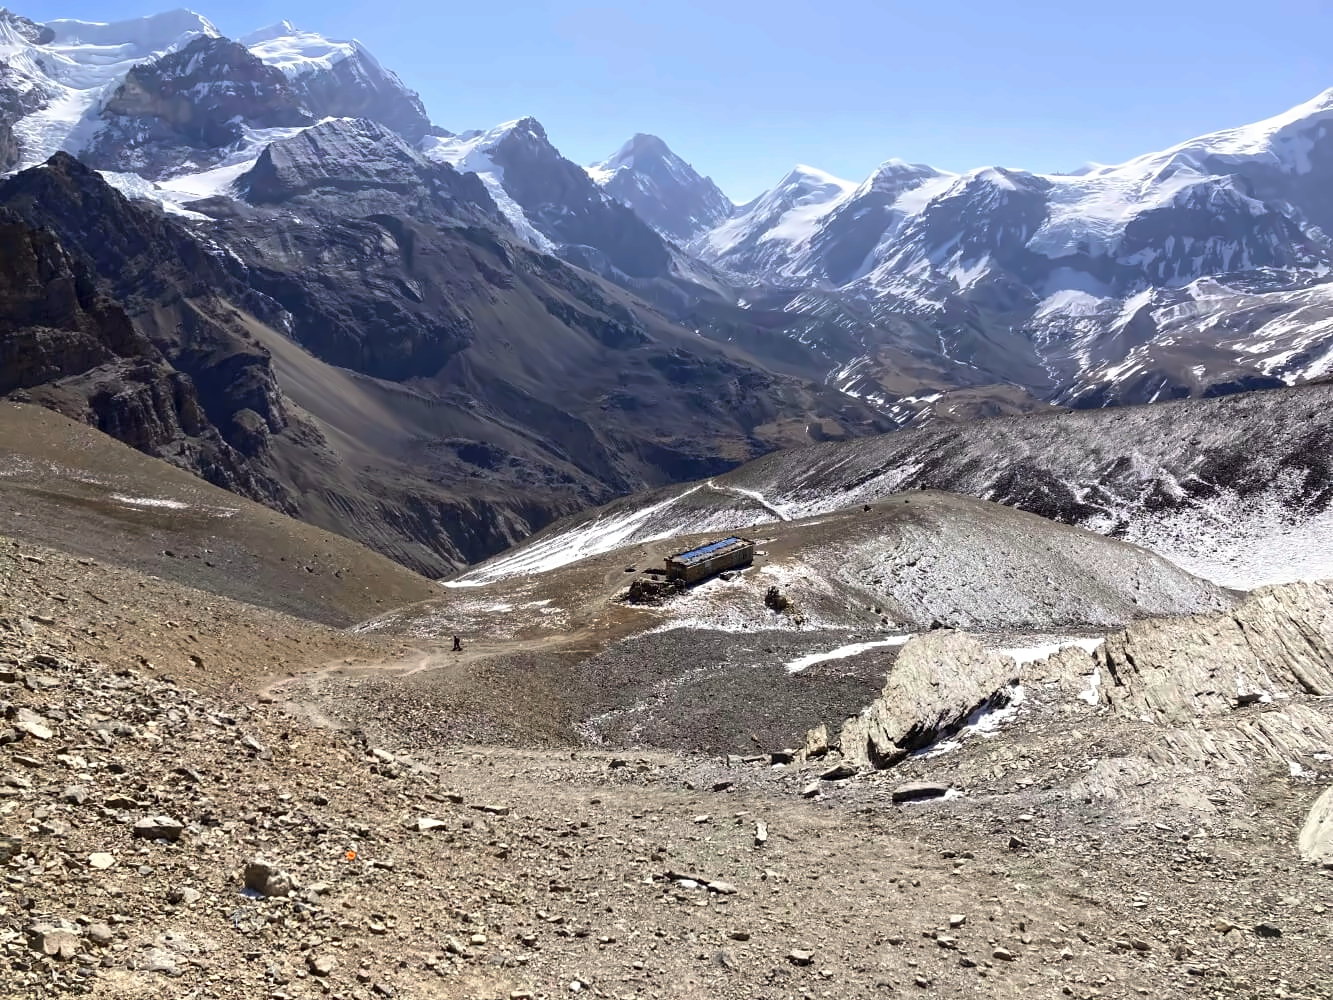
📍 The only section of the Annapurna Circuit that is completely road-free are the 3 stages around the Thorong La Pass.
As you can see from the above overview, there are many roads. But the good thing is, you can avoid them for the most part. My GPS track always follows the best possible path, i.e. as far away from the road as possible. If you use it, sometimes you won’t even notice there’s a road.
Please note: Road building continues at a rapid pace. As an example, when I was last there, the road from Manang to Khangsar that was still under construction in 2022 was finished and being expanded in the direction of Tilicho Lake. My guess is, they want to connect the lake to Manang to facilitate easier access for Nepali daytrippers.
Also, crazy as it may sound, some residents in Manang told me, they have plans to build a road over Thorong La pass. From a technical standpoint this should be possible – in India they build motorable roads over passes that are quite a bit higher and steeper. So Nepal could do it as well.
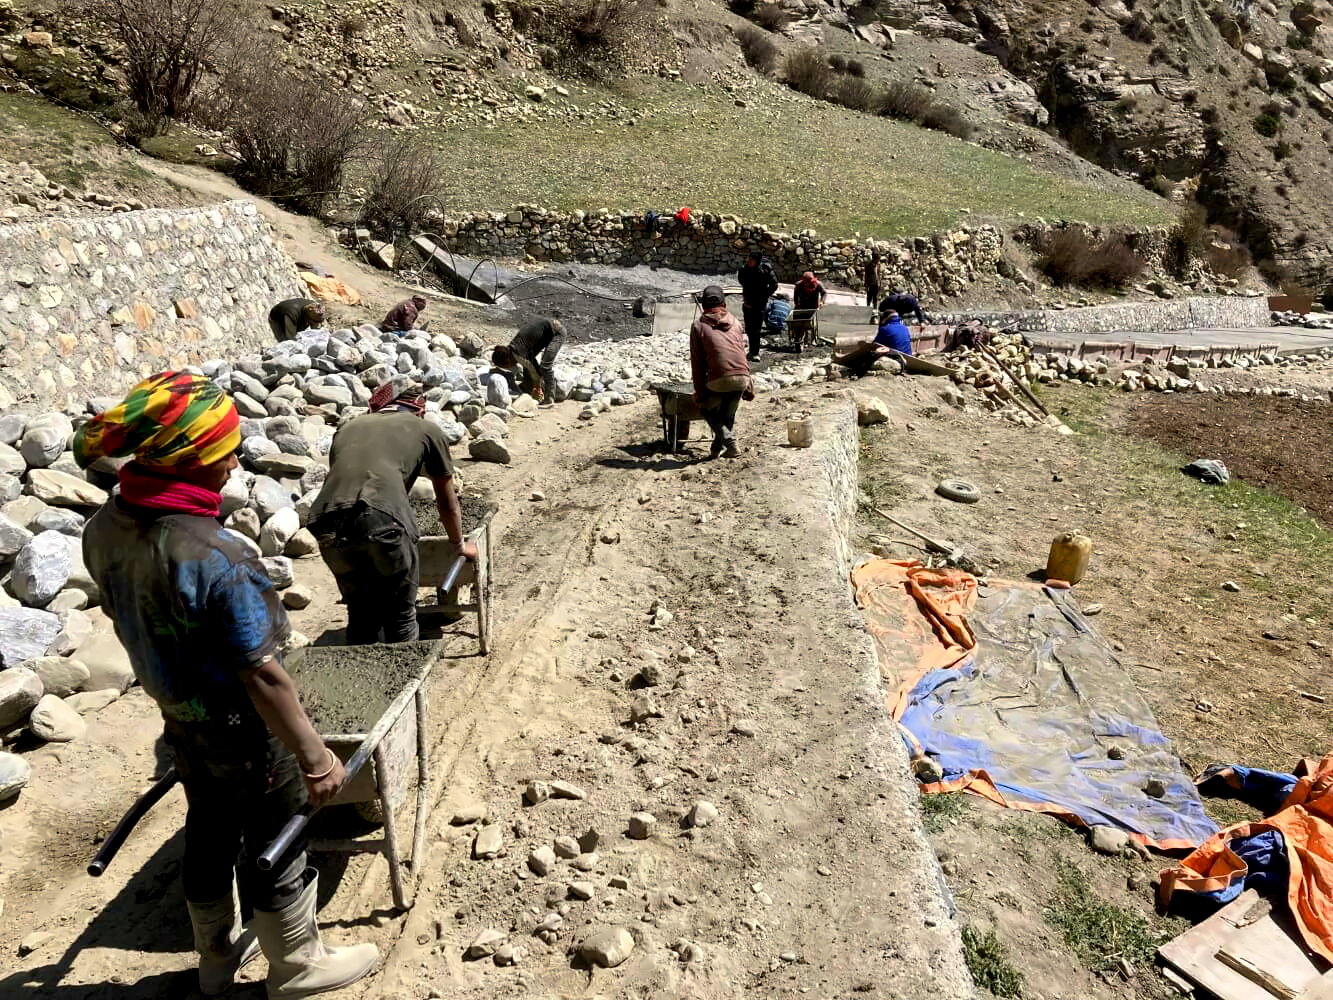
What this all means: Classic hiking trails are not that common on the Circuit and in the future there might be even less of them. The thing is, Nepali citizens applaud road development. Where we, as trekkers, rejoice at the lack of roads, common Nepali people will take it as a sign that the government has failed to do its job. That’s the reality of hiking in a developing nation.
To be honest, though, many dirt roads aren’t that bad. And many aren’t much different from slightly wider hiking trails. Also, fortunately, even with all the development going on, there are still some really beautiful natural trails. Many of these trails run through terrain that is so rough or remote that it’s unlikely that any roads will be built there in the future.
How good are the new NATT trails on the Annapurna Circuit?
The national park administration ACAP has long recognized that “the road” is a problem. Western visitors don’t like to hike on dusty jeep tracks. And if the trekkers stay away, Nepal will lose an important source of income. Trekking is one of the mainstays of tourism in Nepal and tourism contributes significantly to the country’s GDP.
On the other hand, as mentioned, for the Nepali, lack of roads equates to government failure. Roads ensure the cheap transport of goods, easy access to medical care and education, in other words: development. This is a real dilemma and therefore it’s perhaps not surprising that the solution didn’t come from the official side, but from two passionate trekkers: the Belgian Andrèes de Ruiter and the local guide Prem Rai.
Since 2010, these two have undertaken numerous long trips in the Annapurna region to explore lesser known paths and alternative routes connecting the villages. Surprisingly, they managed to persuade ACAP to mark these newly discovered routes similar to how the alpine clubs do it in the West. The Natural Annapurna Trekking Trails (NATT) were born.
Red vs. blue NATT trails
Nowadays, a large part of the Annapurna Circuit can be walked on NATT trails. The old route – now largely a motorable road – is thus relegated to history. Of course, to anyone who did the Circuit in the 1970s or 1980s that’s a bit sad.
On the other hand, we as modern trekkers now have a kind of new Annapurna Circuit. A trek where it still makes sense to cover the distance on foot.
You will encounter two types of NATT trails along the way:
- 🔴⬜ Main route: red-white marking – the official route of the “new” Annapurna Circuit, sometimes on roads
- 🔵⬜ Side route: blue-white marking – alternative routes for people who have more time, generally avoids roads wherever possible
In many cases, the new trail runs above or below the old route. Sometimes it’s on the other side of the valley. If there is not enough space (i.e. when the valley is too narrow) the road and NATT trail sometimes cross – usually at the trail’s expense. In some places, I felt that they made a new trail as an excuse – kind of to make you feel like you are hiking at least sometimes and not just walking on the road.
Are the new trails worth it?
In my opinion, the classic “original” route is a bit more elegant. That’s not a big surprise though: It traced an almost ideal trekking route, essentially forming the direct line between the villages scattered around Annapurna massif. The new route, on the other hand, sometimes feels a bit like a patchwork of side trails and access roads. And as mentioned, many of the NATT trails are “just” dirt roads, but dirt roads that are less traveled or not traveled at all.
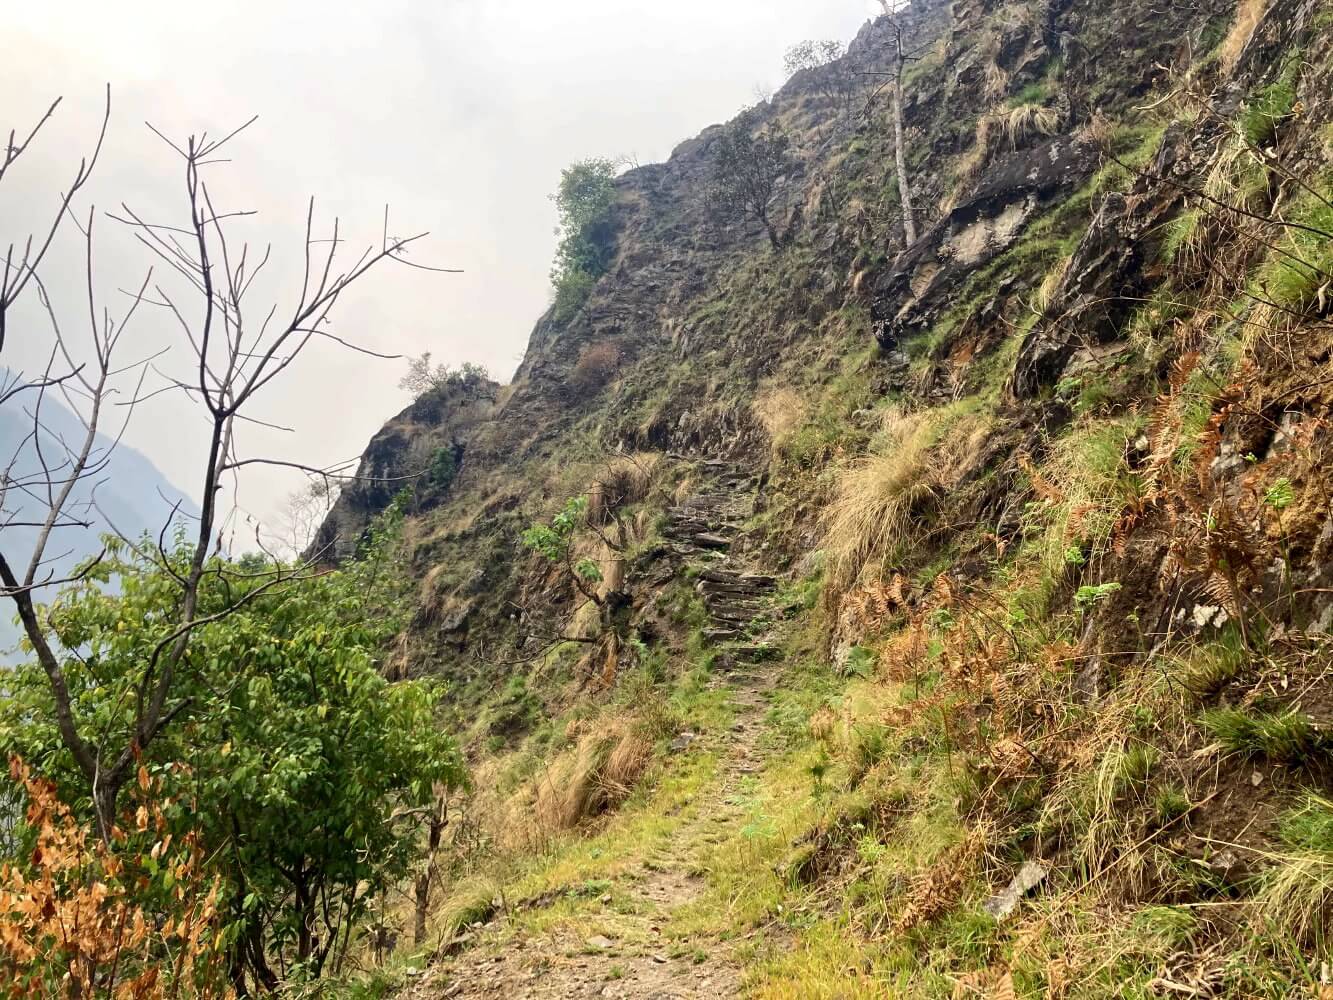
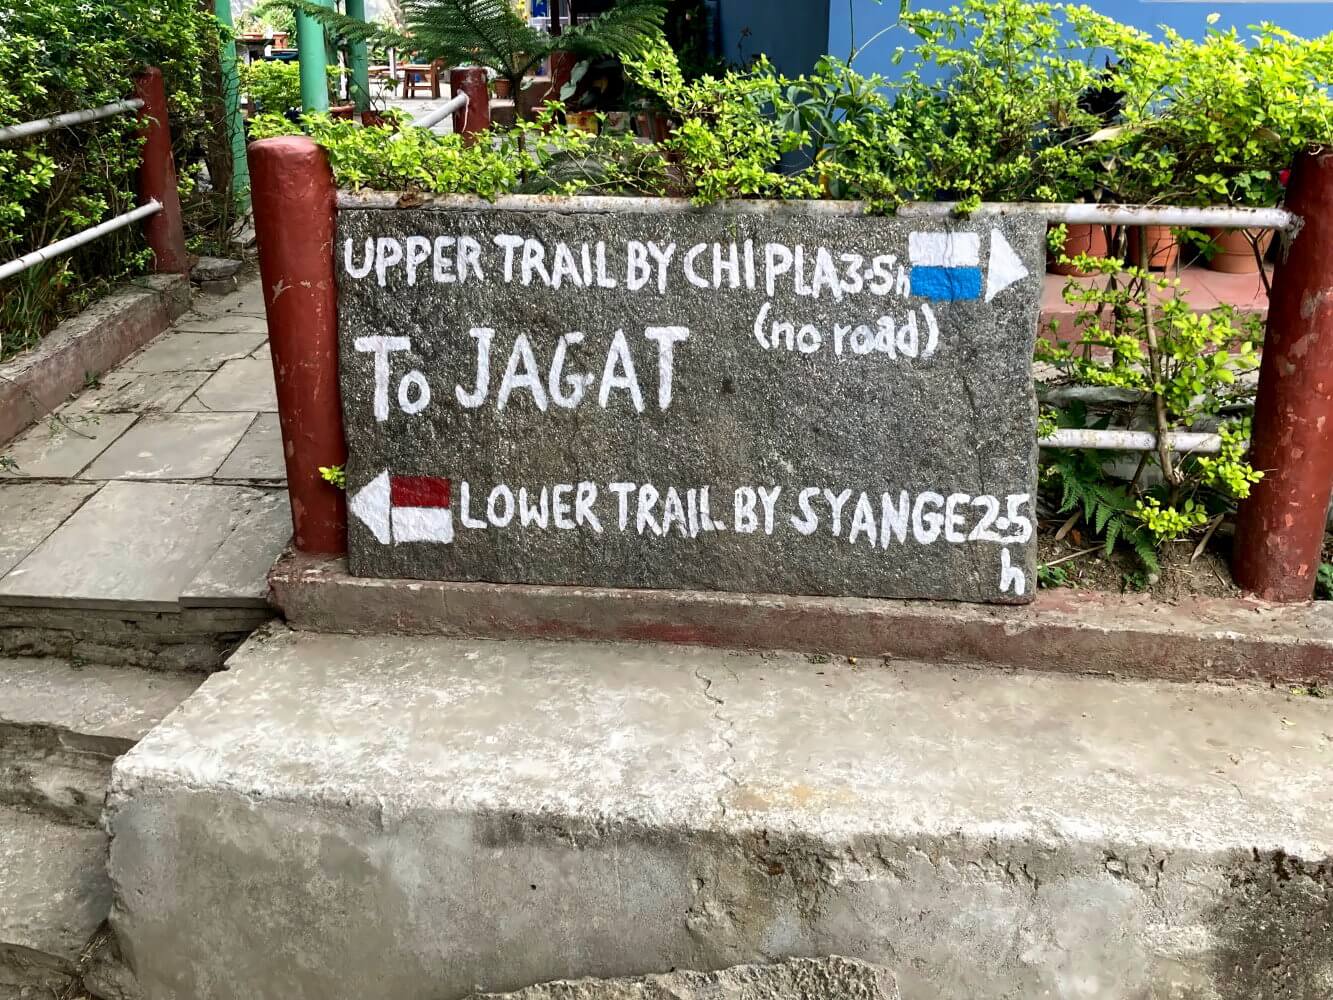
That said, the new route is a great piece of work and the NATT trails are great fun to hike for the most parts. The best sections on the Annapurna Circuit are definitely on the new NATT trails. The upper trails from Ghermu to Jagat and particularly the section from Upper Pisang to Bhraka rank among the most scenic mountain trails I have walked in Nepal. So, the NATT trails are definitely preferable to walking on the road!
The most scenic NATT trails on the Annapurna Circuit
The following NATT trails are my top-picks for the Annapurna Circuit. Please do yourself a favour and take these trails. They offer great views, little to no traffic and beautiful nature. With these trails you will have an infinitely better hiking experience!
- Ngadi – Ghermu via Bahundanda
- Ghermu – Jagat, upper trail via Tallo Chipla
- Chamje – Tal via Sattale
- Upper Pisang – Ngawal, upper trail via Ghyaru
- ⭐Top-pick: Ngawal – Bhraka, upper trail via Julu
- Muktinath – Kagbeni via Jhong
- Marpha – Kokethani via Chimang and Sauru
- Kalopani – Tatopani via Pairothapla
- Tatopani – Gorephani via Shika and Chitre
⛰️ Note: The side routes usually involve a little more elevation gain. But trust me – the views are worth it!
Can you get lost on the Annapurna Circuit?
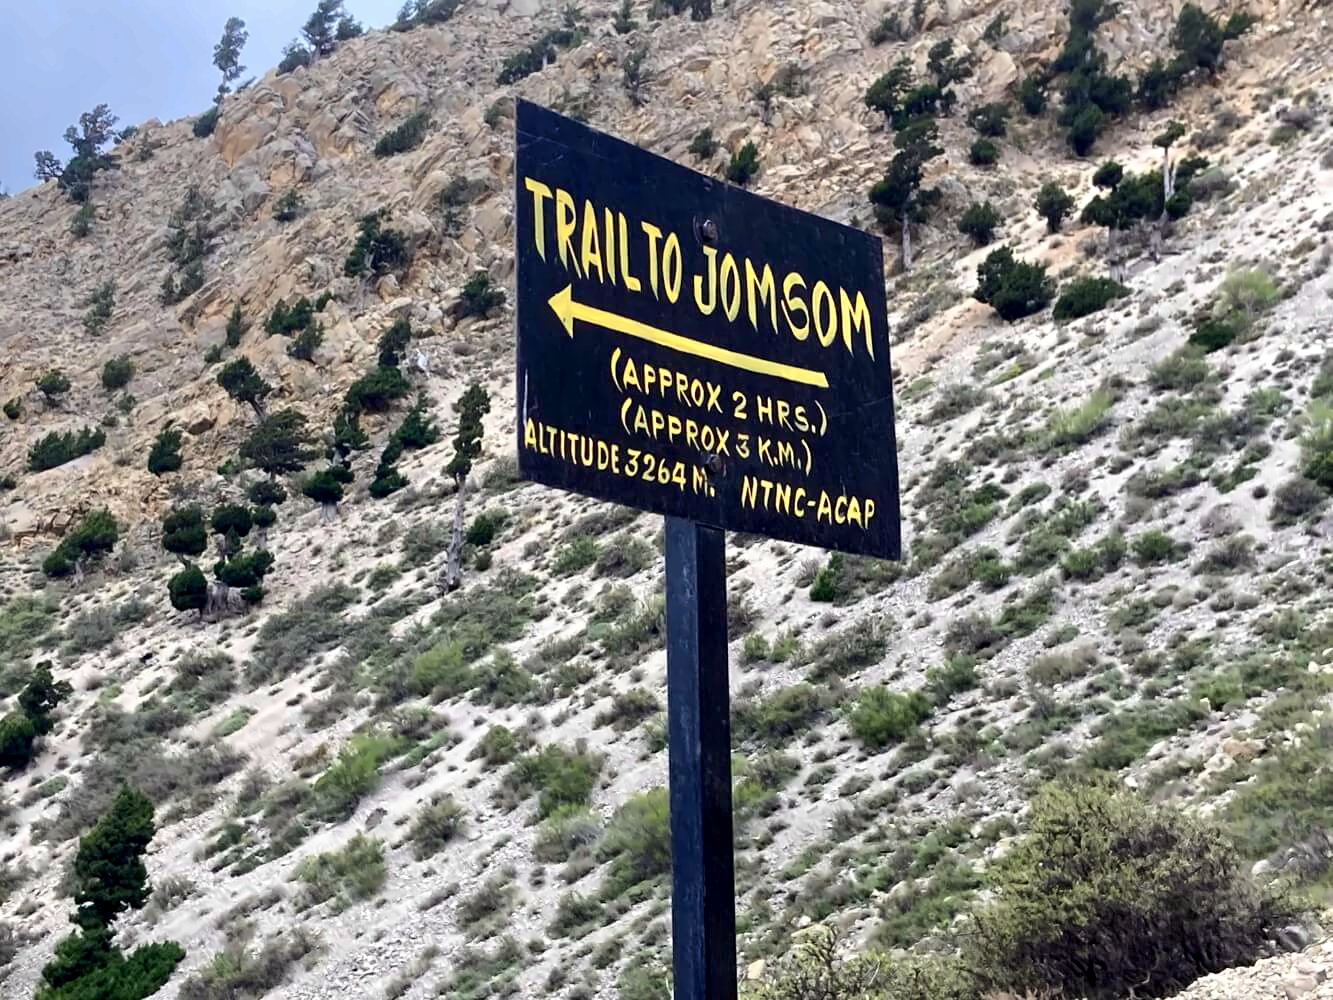
If you have some basic outdoor navigation skills it’s difficult to really get lost on the Annapurna Circuit. There’s lot of foot traffic, many teahouses and a huge number of signposts, sometimes even with walking times. The bigger junctions are almost always well marked with arrows, signposts or blazes.
Still, make sure to download an offline-map of the whole area for your app of choice and consider using the GPS track. The lesser known NATT trails are sometimes easy to miss and you will pass many unmarked secondary trails and dirt roads that you can’t always clearly distinguish from the correct path. That said, navigation is mostly straightforward.
Some navigation apps that I personally use and recommend are:
- OSMAnd
- Locus Map
- Outdooractive
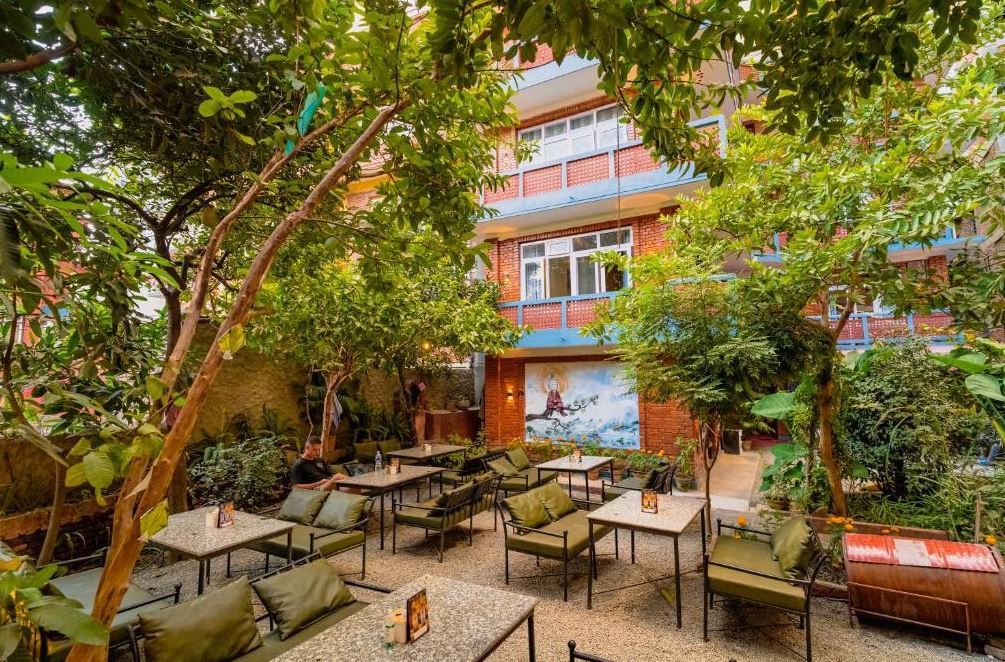
Accommodation on the Annapurna Circuit
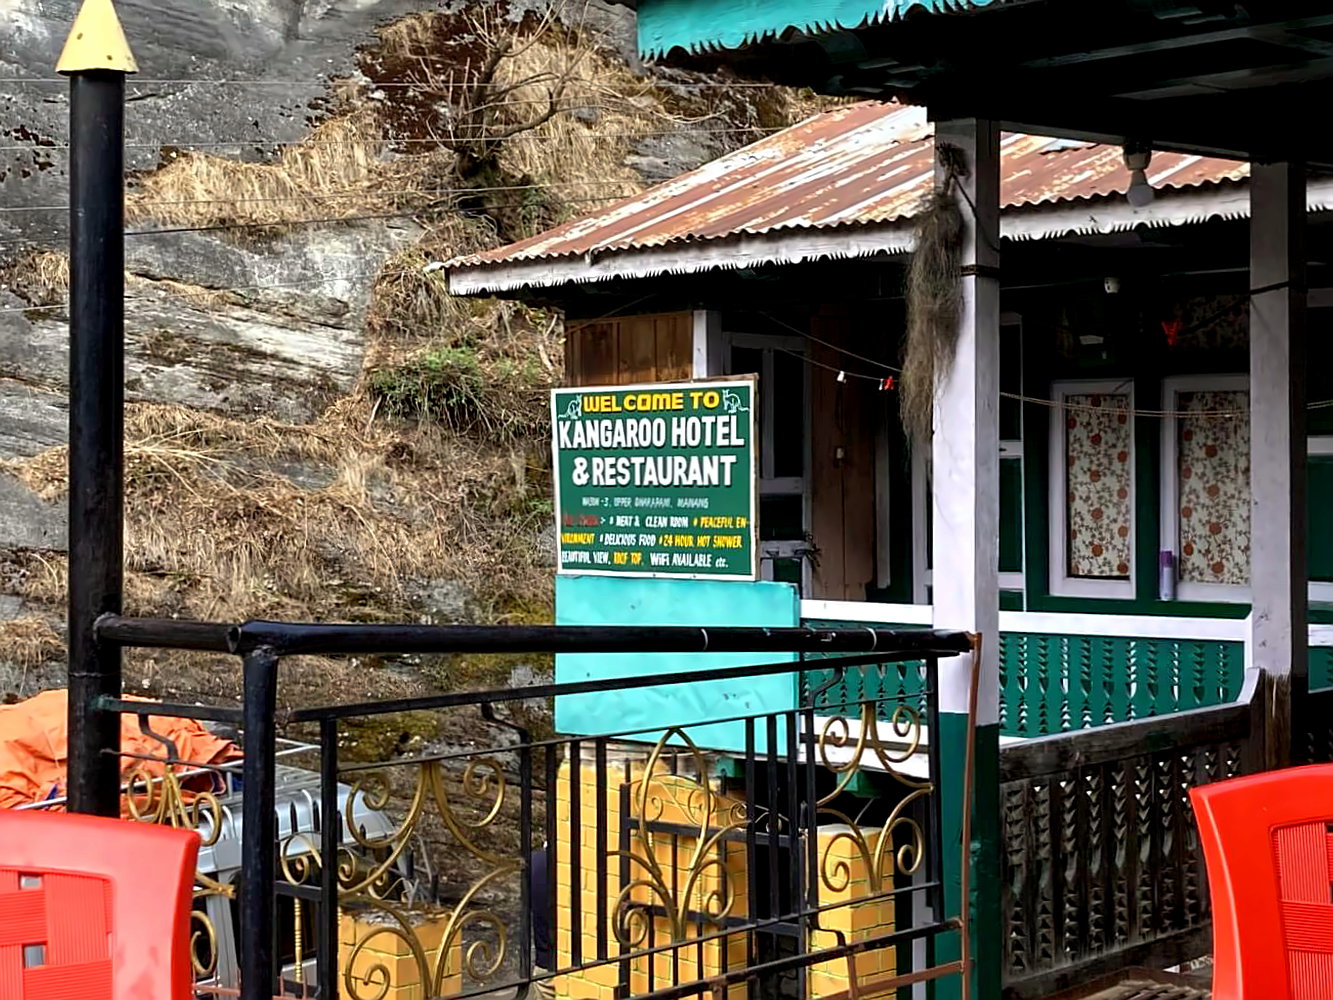
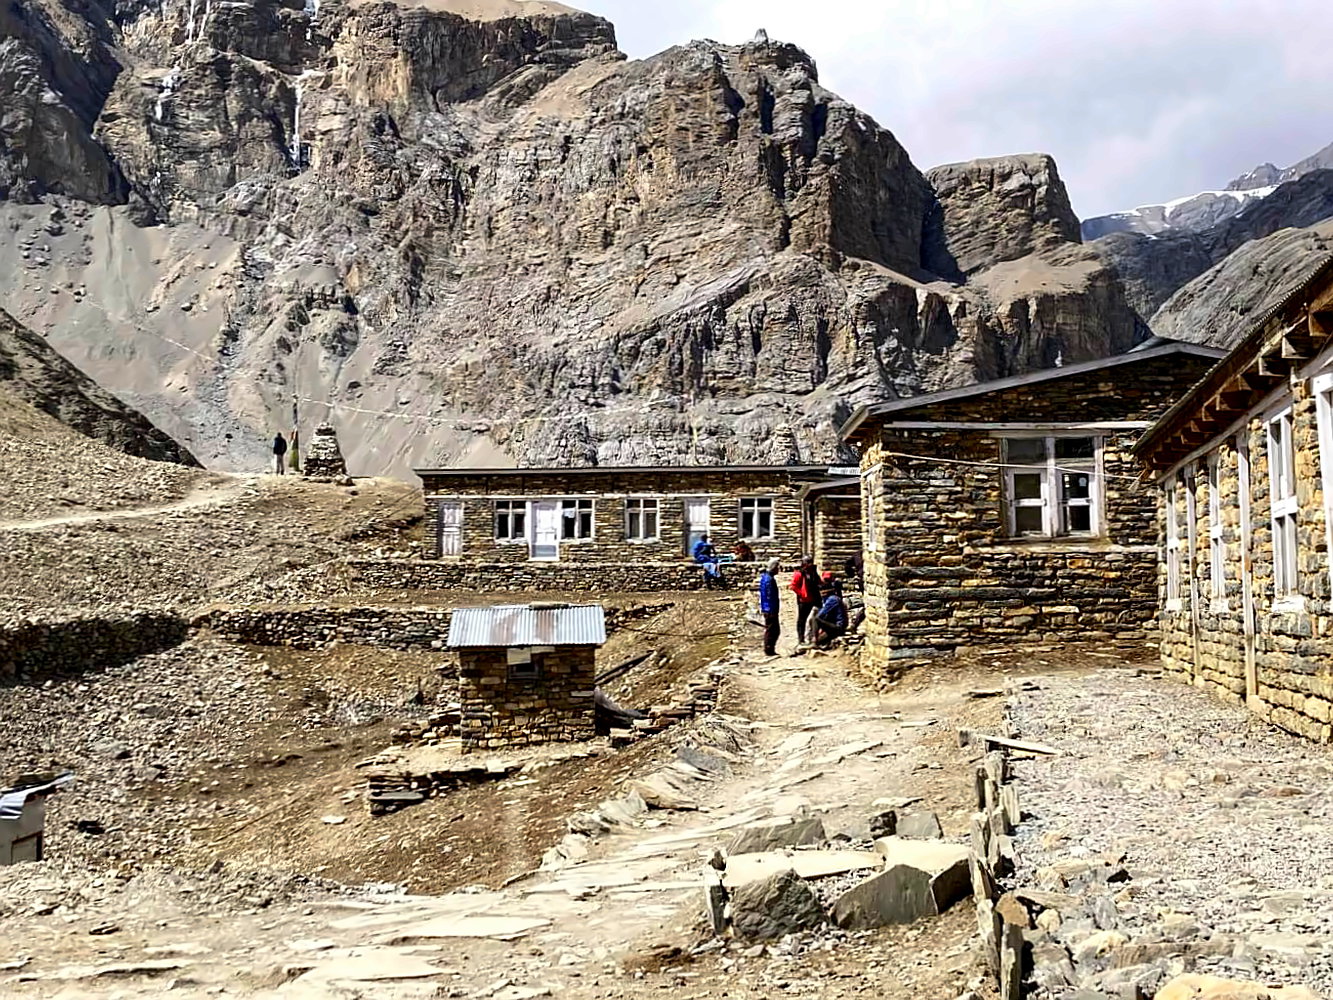
The Annapurna Circuit is a classic Nepali “teahouse trek”. At regular intervals along the route you will find lodges and hotels where you can stay overnight. Since the whole region relies heavily on tourism, there are more than enough places to stay. Some towns even consist almost entirely of lodges for tourists.
If you come as part of a commercial tour with guide, lodging will usually be pre-arranged. Most agencies have their “own” lodges, i.e. teahouses that they work together with for a long time and always send people there.
It’s also possible to book the lodges in advance on your own if you have the contact number (mostly shown in Google Maps). Just write them a WhatsApp and they will usually answer within a few hours. However many people just show up and ask if there’s a free bed. This usually works well enough for single persons.
If you’re part of a bigger group, it’s better to check before. The popular lodges in particular tend to fill up fast. If you arrive later, it may happen that all the places in the lodge are already taken. In the GPS track I´ve marked some of the most comfy teahouses.
🛏️ Also note: At Thorong High Camp (last stop before the pass) there’s a good chance that you will have to share the room with someone else as there’s only a limited number of beds.
Cost of accommodation
Once upon a time trekkers on the Annapurna Circuit didn’t need to pay for accommodation if they ordered at least two meals (e.g. dinner and breakfast) at the lodge. However, I had the impression that this tradition is slowly dying and that owners are starting to charge a small amount for accommodation. It’s usually very little though, about 500 NPR.
On my first visit in 2022 I tried to get free accomodation a couple of times, by asking the owners if it’s possible to get “room for food”. This actually worked in most places until Manang. Last time I didn’t even bother, as the room charge is usually very low and for someone coming from a Western economy the few bucks don’t make much difference.

Facilities at the lodges
The typical teahouse on the Annapurna Circuit is fairly comfortable as it’s a well frequented route. Until Manang you can expect hot showers almost everywhere. After that up to the pass it gets a bit more spartan with only “hot buckets” available, i.e. a bucket of hot water for washing.
Starting at around Chame (2.650 mtrs.), there’s usually a stove in the common room that is fired up in the evening. You will get thick fleece blankets for sleeping. If you wish, you can also get additional blankets if it is too cold. The sleeping rooms as a general rule are unheated and tend to be pretty cold at night.
You can charge cell phones and other devices in all lodges, sometimes for a small fee (100-200 NPR). Almost all lodges advertise free Wi-Fi. The connection can be good, but is often quite poor, especially at higher altitudes. So don’t rely on it 100%. From Manang to Muktinath I had no reception at all for three days.
📱 Tip: If you use a local SIM card and want to have the best possible reception in the mountains go for the provider NTC. It doesn’t work everywhere but it’s a lot better than NCell which has quite poor internet outside the city areas.

Before the trek: my reccomendation for Kathmandu
This is a really great place at good value – you can also store luggage that you don’t need for the trek. The Kwabahal Garden Hostel* is one of the most popular hostels in Kathmandu and for a reason. Highly recommended!
Kwabahal garden hostel
Can you camp on the Annapurna Circuit?
Camping is theoretically allowed on the Annapurna Circuit but not really popular as there are so many teahouses. It’s mostly interesting for people who want to do side trips without any infrastructure. For instance, last time I camped while crossing the remote Namun La pass from Kori Hill to Timang – a pretty adventurous 4-day trek that follows the old salt route from Pokhara to Manang.

🏕️ Important: If you camp, take a very warm sleeping bag, preferably down – nights avove 3.000 mtrs. are cold. In spring the comfort range of the bag should be -5° C, in fall -10° C.
Camping in the Himalayas is of course quite the experience. However, if you only do the main Annapurna Circuit without any remote side trips, personally I would save myself the extra weight and just stay in the lodges. You will need to pay for the food there but it’s just so much more comfortable to hike without heavy camping gear.

How to estimate your budget on the Annapurna Circuit
The most expensive part of the Annapurna Circuit is the flight to Nepal. Once on the trek you will find that almost everything is pretty cheap – about $20 for a simple overnight stay with basic food. While it has been getting more pricey in the last few years, the Annapurna Circuit is still a fairly inexpensive trek, especially if you don’t spend money on alcohol and other luxuries every day.
To be a bit more on the safe side, budget around $30–40 per day. This way you can treat yourself to snacks, chocolate or an occasional beer in the evening without worrying about every penny. Incidentally, beer is pretty much the most expensive thing of all. By contrast, food is comparatively cheap, especially the Nepalese national dish, Dal Bhat.
The best way to save money
If you want to save money, do as the Nepalese do and eat Dal Bhat. Dal Bhat is a protein-rich mix of rice, lentils and seasonal vegetables. The Nepalese eat it three times a day, even in the morning. It’s not only healthy though: you also get free refills. Admittedly, this can get a bit boring over time. And I couldn’t resist ordering Spaghetti or a pizza every now and then. But in terms of value for money, Dal Bhat is unbeatable.
Here are a few typical prices on the Annapurna Circuit:
| Item | Price |
|---|---|
| Cup of Lemon Tea | 80 – 100 Rupees |
| Coca Cola 500 ml | 200 – 250 Rupees |
| Can of Beer 700 ml | 650 – 700 Rupees |
| Snickers | 100 – 200 Rupees |
| Portion of Dal Bhat (+ free refills as much as you want) | 800 Rupees |
| Portion Momo 10 Pieces | 400 – 500 Rupees |
| Portion Spaghetti | 400 – 600 Rupees |
| Pizza | 600 – 800 Rupees |
| Pack of Cigarettes | 150 – 250 Rupees |
| Toiletpaper | 100 – 150 Rupees |
| Pack of Spare Batteries | 100 – 200 Rupees |
The prices are standardized by the Nepalese Tourism Board, so they are pretty much the same in all lodges. One important rule to keep in mind: the higher you go, the more expensive it gets.
Please also note: in all popular trekking areas of Nepal you will always pay “tourist prices”. There are also local prices, which are significantly lower and more akin to North India (e.g. a cup of tea for 20 rupees). But for those, you definitely have to get off the main trail into the smaller villages.
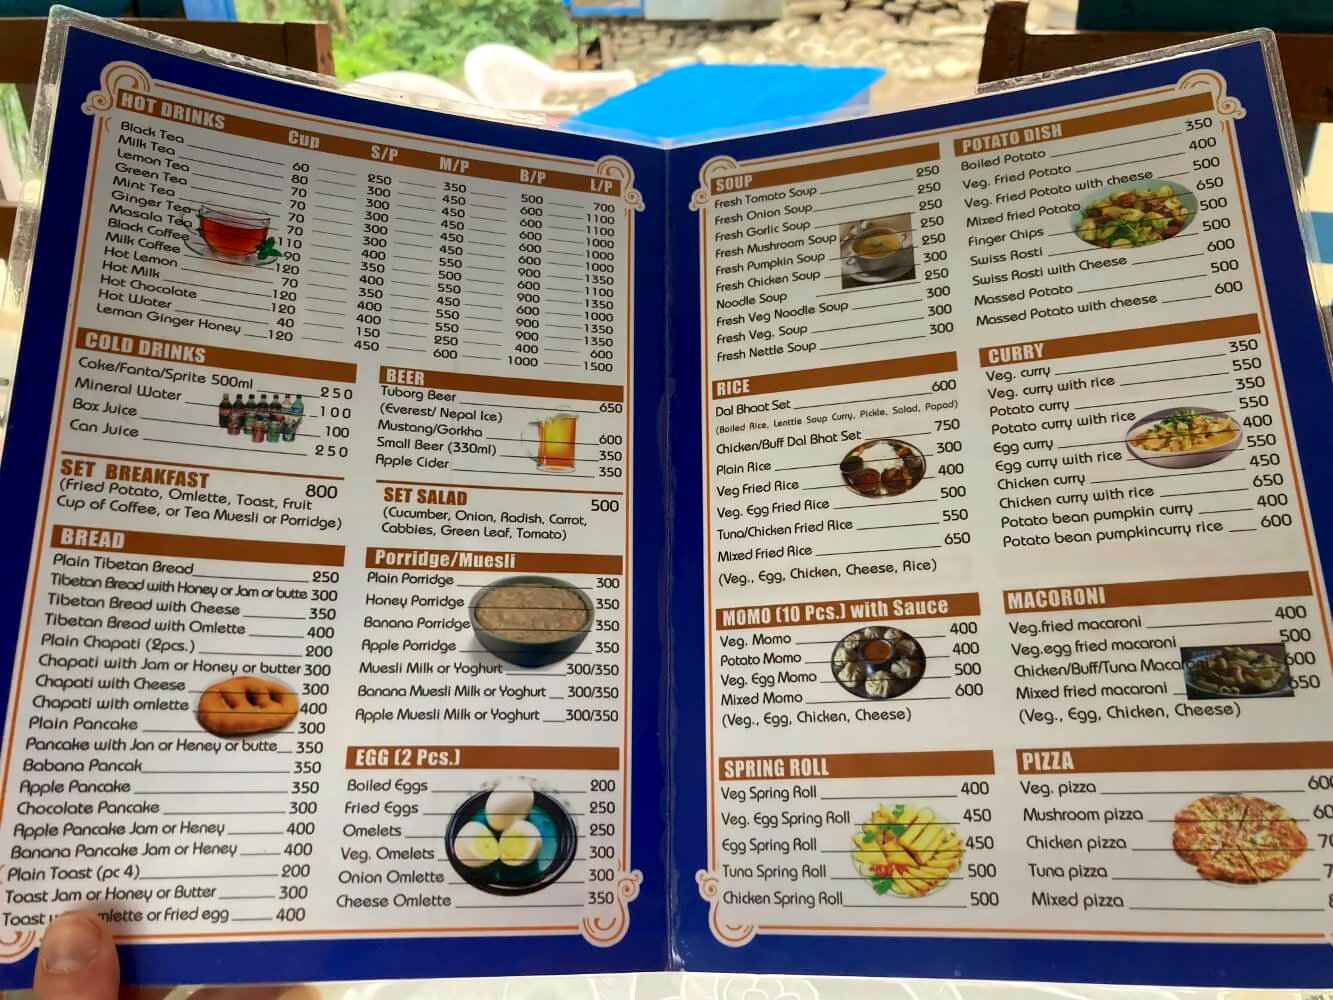
For your convenience I took a picture of a menu from a lodge. That was quite a way down, in the village of Jagat (click to enlarge).
Another possible expense is drinking water. You can buy water in the lodges, but only in plastic bottles. And while waste disposal in the Annapurna region is better than in say, the Indian Himalayas, it still leaves much to be desired. If you leave your empty plastic bottles at the lodge, there’s a good chance they will be dumped somewhere in nature or burned.
The best solution is to use filter tablets* or a water filter*. With that you can filter the tap water in the lodges and fill your own bottle – good for your budget and the environment as well. I always use this nice lightweight folding bottle:

- Gewicht: 39 g
- Leicht und einfach zu verstauen - 80 % geringeres Gewicht und Volumen als eine Hartflasche
- Lebensmittelechte Innenbeschichtung mit strapazierfähiger Außenwand
- Eingearbeitete Silberionen schützen die Flasche vor Schimmel und Bakterien.
- Frei stehendes Design mit gutem Stand
I have also marked official water points in the GPS track. The water there is supposed to be filtered and safe. However, I would still filter it myself first. Better safe than sorry and using any water source in Nepal is a risk.
Where to withdraw cash on the Annapurna Circuit
Make sure to take enough cash with you for the trek. The Annapurna Circuit is mostly a cash economy, credit cards are only accepted in few places. Aside from Kathmandu and other bigger cities you will find several banks in Besisahar.
After Besisahar, you can find ATMs in these places:
- Dharapani
- Manang
- Jomsom
- Nayapul
It’s not 100% certain that the machines will work, sometimes they are out of order or not filled with enough cash. The ATM in Dharapani worked for me. In Manang they now have a newer one of Global IME bank that is supposedly quite reliable and worked last time. In Jomsom I couldn’t withdraw money though. So it’s best that you carry a sufficient supply with you.
💳 Tipp: If you use an ATM, I recommend Siddharta Bank or Global IME if possible as they have the lowest fee for withdrawing money (around 600 NPR).
Calculating your total budget
Here’s how to work out your total budget for the Annapurna Circuit, with a daily budget of 4.000 NPR:
- First, determine how many days you plan to spend walking the Annapurna Circuit.
- Then multiply the number of days by the total sum for each day.
- After that, add a certain emergency amount, e.g. for unexpected jeep rides, etc.
- If you have a guide, you can pay 50% of the costs before the trek and the rest after, when you are back in town.
Let’s say you stay for 20 days, that would be 20 x 4.000 rupees = 80.000 rupees. Then another 20.000 rupees for emergencies. In total, you will need 100.000 NPR (about 700 Dollar). And yes… I also found it annoying to walk around with a huge bundle of bills like a walking ATM. Unfortunately, there’s no way around it.
To be on the safe side, it’s best to distribute the money a bit, e.g. parts deep in the backpack, another on the body, the rest in a belt bag*. Fortunately, you don’t have to worry too much about theft or the likes. Nepal is a safe travel destination (see also the notes below).
💰 Note: ATMs have a daily limit for withdrawing money, it’s around 30.000 NPR. So use every opportunity to withdraw money before you go trekking.
Annapurna Circuit: Guided or self-guided?
I did the Annapurna Circuit unguided and without porter to carry luggage. If you have sufficient experience this is quite easy to do (and still completely legal, see below). The trail is well marked, there are plenty of other people hiking and you are never really far from civilization.
However, many people still choose to go with guides and/or porters. If you have not yet done any longer hiking tours, particularly at high altitudes, this may make sense.
Advantages of individual hiking
- You’re free to plan your route and pause for breaks or overnight stops whenever you wish.
- No additional costs for guides.
- Taking responsibility for everything and communicating along the way brings you closer to locals.
Advantages of hiking with a guide
- Offers peace of mind because the guide is familiar with the area, arranges accommodation, and assists with any issues.
- You support the trekking economy, as many people make a living from tourism.
- If you take porters you have to carry less.
Personally, I really enjoyed setting out on my own. Not only could I hike as long as I want every day. It was also a good way to connect with people, simply because you have to take care of everything yourself. In contrast, in guided groups I often noticed that there was relatively little interaction with the locals, since the guide handled all of that.

Here’s what you can expect from guides and porters:
Guide
A trekking guide usually speaks English (some even speak other European languages like German, French or Spanish). His job is to enhance your experience, making the trip both more enjoyable and more informative. He knows the area, takes care of accommodation and will explain the local culture, flora, fauna and the special features of the landscape. The guide carries only his own backpack, not yours—except in emergencies, such as an accident.
💰 Cost: $25 – 35 / day
Porter
Porters are usually locals or youngsters at the beginning of their guide-career. Their job is to carry luggage, often they don’t speak much English, since the guide handles communication with the customer. If you take one, please be considerate and don’t overburden them. I’ve seen tourists treat their porters as if the Empire never ended, making them carry 20 to 30 kilograms. This is way too much – 15 kg per porter should be the maximum.
💰 Cost: $15 – 20 / day
Porter-Guides
Most guides start out as porters – that’s the usual way in Nepal to become a trekking guide. Those that have already worked their way up the hierarchy a bit work as so-called porter-guides. They carry some of your luggage, but also speak some English and know their way around the area. Porter-guides are a good choice for solo trekkers who don’t want to hire a whole crew but still want someone at their side.
💰 Cost: $25 – 30 / day
🗺️ Tip: If you just need a reliable agency to take care of everything, a good choice is the Kathmandu based Ammonite Adventure*. I trekked with them on the Manaslu Circuit and it was a great experience, even for me as a dedicated solo traveller. I cannot recommend them enough!

Annapurna Circuit with local guides
10 or 12 days – includes guide, permits & all logistics arranged
Check out 10-day trek* Check out 12-day trek*Is solo trekking still allowed on the Annapurna Circuit?
This is still a big question that is on many people’s minds: Is it even allowed to trek on the Annapurna Circuit on your own, i.e. without an officially licensed guide?
Short answer, based on my last treks in the Annapurna region in fall 2025: Solo trekking is still possible. No one will raise any objections if you trek without guide.
Just a short recap on why this issue still persists. On April 1, 2023, Nepal Tourism Board issued a statement that said solo trekking/ individual trekking was from now on officially banned in Nepal.
That’s the screenshot of the Nepal Tourism Board’s press release:

As a justification they cited safety concerns. However, right from the beginning it drew a lot of criticism, some people accusing Nepal Tourism Board of a cheap money grab.
📌 Important: This so-called “rule” was never actually enforced on the ground. It never amounted to more than the above press release – people were trekking solo on Annapurna Circuit all the time. I myself visited Nepal one year later, in 2024, and had no problems whatsoever.
As of 2025, you will still find some websites on the internet that tell you, that you need a guide. Please ignore them – the whole story can now safely be classified as “fake news”. Nowadays, you don’t even need a paper copy of the permit, a digital e-permit is sufficient (see below).
Read more: Ban on solo trekking in Nepal: What you need to know
Of course, you never know, what happens in the future. To make sure, you can do the following:
- Before the trip, check with the Annapurna Circuit Facebook group or one of the other Nepal groups to find out the current situation.
- When you’re in Nepal and receive important information from an official, make sure to get their phone number. That way, if you run into trouble at a checkpoint, you’ll have someone to contact.
- Be cautious with information from agencies and local guides: they have a financial interest in you as a customer and many will tell you that you need a guide.
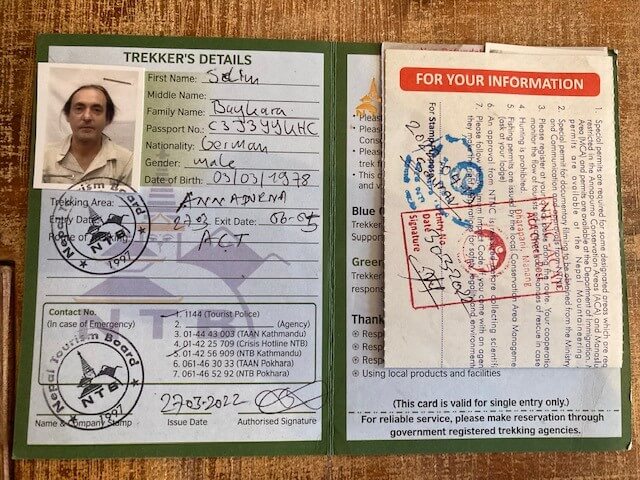
TIMS permit not required
One thing has changed: As an individual unguided trekker, you no longer need a TIMS permit. In the past, this permit (Trekkers Information Management System) was needed in addition to the ACAP Permit. Nowadays solo trekkers only need the ACAP permit.
How to get the permit for the Annapurna Circuit
Getting the permit for the Annapurna Circuit is a very straightforward procedure these days. A few years ago you still needed to go to the office of the Tourism Bureau to pick up your permit. Nowadays you can just get a digital permit online and pay with a credit card – it takes about 5 minutes of your time.
- Visit the website e-Permit and click on the button “Apply Permit”.
- Select Annapurna Conservation Area Project (ACAP) as area and fill out the other necessary fields.
- Upload a photo of yourself (you can just take a selfie with your smartphone).
- Enter your credit card credentials and pay 3.000 NPR.
- The e-Permit will be sent to your email adress immediately.
That’s pretty much it – it’s as easy as it gets. You don’t even need to print the permit out, just show the PDF file on your smartphone to the officials at the checkpoint.
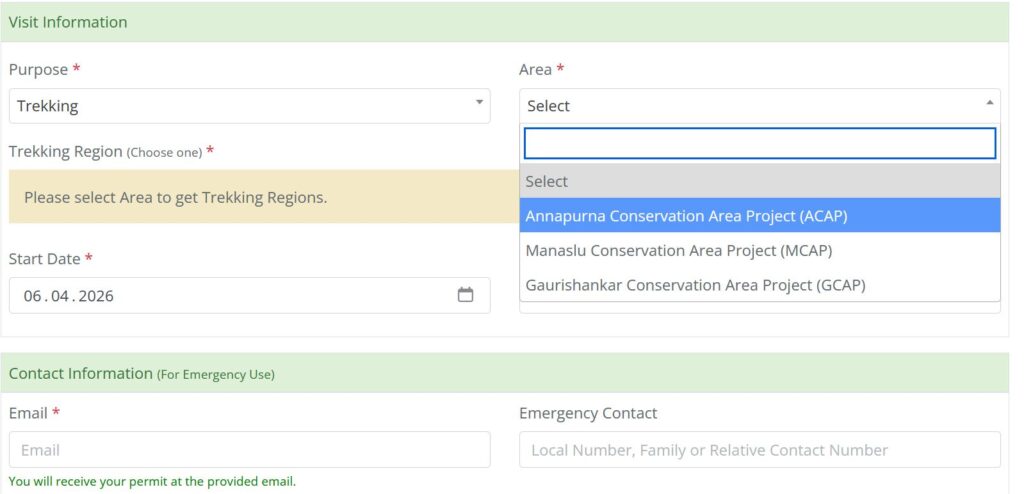
Of course you can still go to the tourist office, e.g. in Kathmandu (location on Google Maps) and get a paper copy. But with the e-Permit I think the only reason to do so, would be if you don’t want to or cannot pay with a credit card. Otherwise it’s just easier to use the digital version.
📌 The TIMS card still exists, by the way. But it’s only issued to and used by licensed trekking agencies. If you trek without a guide or agency you can simply ignore it.
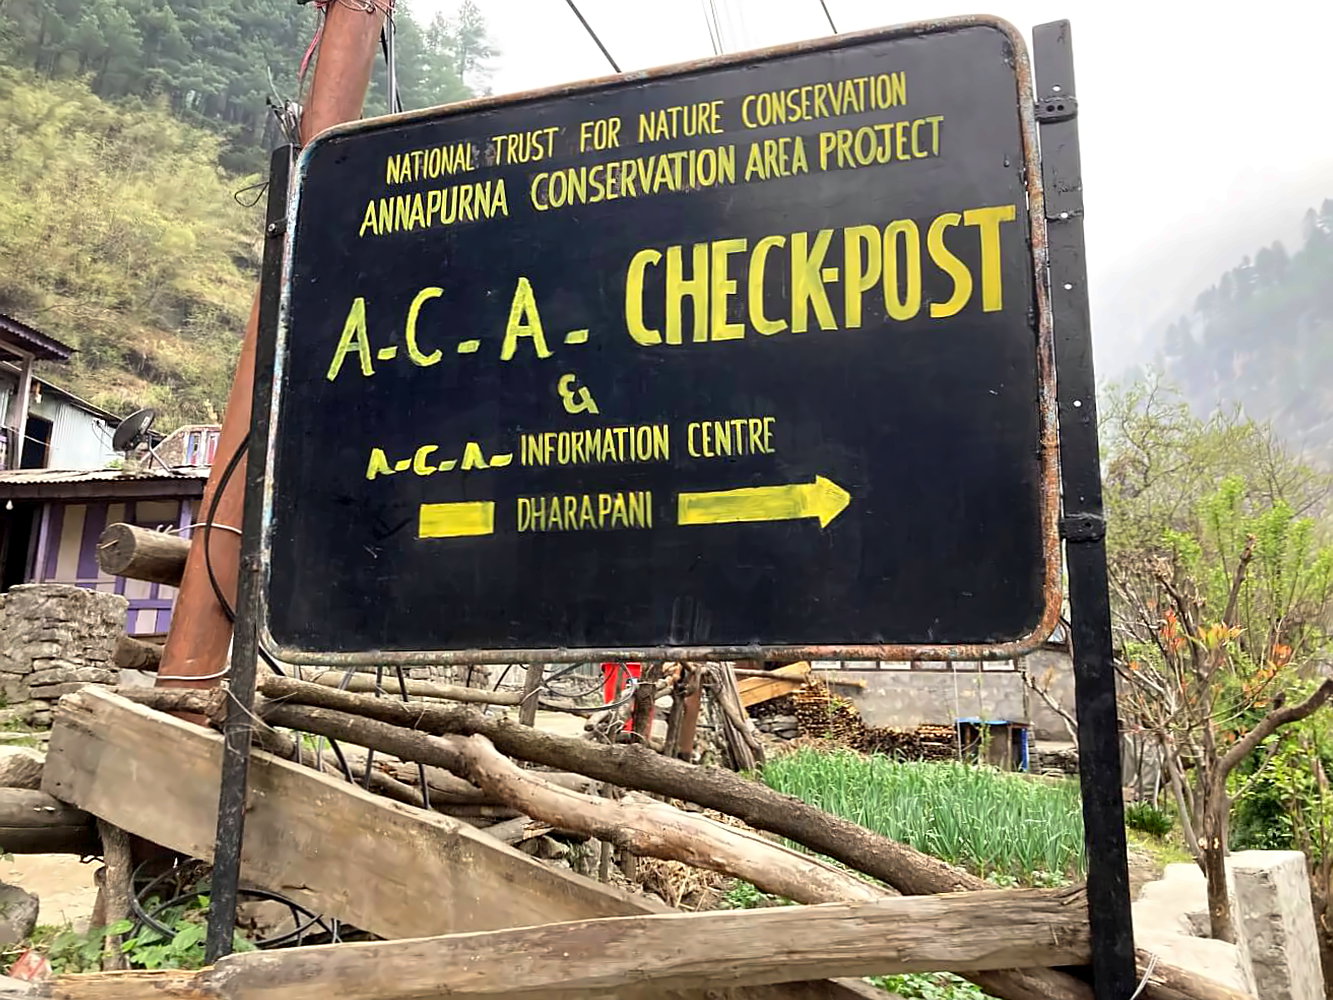
Checkpoints on the Annapurna Circuit
Checkpoints are located at various points along the route. Sometimes officials wave you through. At other times, I had to approach the checkpoint myself. Overall, the procedure felt fairly relaxed and many checkpoints were completely unattended. Still, I wouldn’t hike without an ACAP permit—sooner or later, you will be checked.
Visa for Nepal
Speaking of bureaucracy: To enter Nepal, you also need a visa, but you can get it directly at the airport (Visa on Arrival). The costs depend on how long you want to stay in the country:
- 15 days – 30 USD
- 30 days – 50 USD
- 90 days – 125 USD
Immediately after arrival at Tribhuvan International Airport in Kathmandu, you will be directed to the appropriate counter by the officials. Payment is made in cash – either in dollars or in Nepalese rupees, so you will need to go to an ATM first. However, there are plenty of ATMs in the arrivals hall.
My tip: To avoid waiting times, you can also apply for the visa online in advance (select: Visa on Arrival). This speeds up the process a bit because you don’t have to fill out the paper forms first. I didn’t know this beforehand and had to wait in line for half an hour.
How difficult is the Annapurna Circuit?
The Annapurna Circuit is technically speaking an easy – moderate trek. Mostly you hike on village trails or wide dirt tracks without exposure or particularly steep climbs. As the trek mostly follows the natural course of the valley, the ascend is also very gradual.
The major challenge is the altitude. Most foreigners (myself included) are not used to these types of altitudes. From about 3.500 meters onward you will notice a major shift: breathing becomes more difficult and you walk slower than you are used to. This takes some time to get accustomed to.
The Himalayan terrain is also prone to landslides and rockfalls, particularly during and shortly after the monsoon season. Sometimes, parts of the trail may be damaged. The locals will usually repair these sections if they know that trekkers use them, however it may take some time. A good idea is to always check with the lodges whether the next section is safe to walk.
Do I need to train for the Annapurna Circuit?
This is a question that comes up sometimes: Do I need any physical preparation for the Circuit? Having done 25+ high-altitude-treks in the last few years here’s my assessment:
- If you already live an active lifestyle and hike/do cardio regularly, no preparation or training is necessary for the Annapurna Circuit. You should have sufficient fitness level to walk for 5-8 hours/day for a period of 2+ weeks.
- If you lead a rather sedentary life (e.g. office job), it makes sense to start a targeted fitness regime about 3 months prior to the trip.
- A simple and inexpensive method to build up endurance is running: about 3 times a week for 30-60 minutes. If in doubt, do less and slowly increase. That’s excatly what I do as I tend to sit a lot at work. If you do this regularly for 3 months, you won’t have any problems.
- If running isn’t an option, you can also go cycling or take longer walks/hikes instead. The important thing is to get your body used to covering longer distances in one go.
- There is no need for special “altitude training”, e.g. sleeping in a low-oxygen altitude tent. Your body will automatically adjust to the altitude, you just have to take your time. See notes below on acclimatization.
Always pay attention to weather and conditions
One more thing: Always check the daily weather report and pay attention to local forecasts. Thanks to the internet this is nowadays quite easy to do. If the forecast is too bad, consider taking a rest day, particularly before Thorong La. The pass is a simple high-altitude-walk in good conditions. In bad conditions such as snow, freezing rain or strong winds, it can be quite different.
Generally speaking, bad weather above 4.000 meter is very unpleasant at the least and can be downright dangerous. The route to Thorong La is completely exposed to the elements. In 2014 over 40 people froze to death here in a snowstorm. It doesn’t need to be this bad but in bad conditions there’s a real possibility of being stuck at high altitudes such as happened in fall 2025.
Some more tips:
- Enquire about the condition of the trails locally and adjust the route if necessary.
- Start early to allow extra time in case of unforeseen problems.
- Before setting out, make sure you’re fit enough for the daily mileage and the elevation gain you’ll be covering.
- Always take warm, windproof and waterproof clothing for possible sudden changes in the weather.
- Eat and drink enough (2-3 liters/day).
- When in doubt, don’t push ahead but always return to the last safe position.
- Don’t go alone if you have little experience in the mountains.

Preventing altitude sickness in the Himalayas
👨⚕️ Disclaimer: I’m not a doctor with medical qualifications. The following is based on my experiences of doing 25+ solo high-altitude-treks above 4.000 mtrs. in the last few years. I didn’t have issues with altitude a single time. I will also add some notes from the experts at the altitude clinic in Manang.
What is altitude sickness?
Just a brief general explanation: altitude sickness is a disorder of the body caused by poor adaptation to high altitudes. This is usually the result of gaining altitude too quickly above 3.000 meters. The typical symptoms are:
- headaches
- dizziness
- fatigue
- loss of appetite
- sleep disorders
- In severe cases: shortness of breath, confusion, and even coma
The cause of these symptoms is not lack of air as is sometimes assumed but the lower air pressure. As the air pressure drops with increasing altitude, the oxygen pressure in the air also decreases. The result is that less oxygen enters your blood with each breath. A typical sign is shortness of breath and an increased heart rate.
📌 The best way to prevent altitude sickness: Ascend slowly, not more than 500 mtrs. of elevation gain per day.
I don’t want to go into medical stuff too much here. You can find a very nice article on the altitude on my colleagues’ Dusty Boots Blog. Just this: it’s quite normal to feel a bit off at certain altitudes. The exact altitude varies from person to person. For me, it starts at about 3.200 meters. Other people notice it earlier or later.
How does the altitude affect you?
Besides getting short of breath and feeling my heart race, I noticed high altitude in the Himalayas in a way that sounds a bit ridiculous: I had to pee constantly. Anything I drank seemed to go straight through me! I have no idea why that is. But after talking to other trekkers, it turned out most went through the same thing.
Another thing I experienced was poor sleep at the start—I kept waking up throughout the night. This went on for about a week, after which it gradually improved. I only had a headache one evening in Bhraka, which was gone by the next morning. However, I remained short of breath for a long time, even the smallest of hills felt exhausting.
Fancy an adventure at Everest? Then check out my big guide to the infamous Three Passes Trek:
Why altitude sickness is relatively common on the Annapurna Circuit
One thing I noticed right away: altitude issues on the Annapurna Circuit are actually pretty common. Many trekkers climb too quickly, even though everyone knows you shouldn’t. Often it’s just a matter of time—people have only a few days for the trek, so they try to cover too much distance in a day or skip sections by car. That’s a recipe for feeling the worst effects of altitude.
Also, some people just keep walking, whether they feel good or not, because they have to be back in town by a certain date. This is especially true in guided groups, where the schedule is often very tight. Then there’s the group dynamic—you don’t want to slow everyone down or split off. So many just keep quiet about not feeling well and go along with the group.
I saw some people having problems with altitude on Annapurna Circuit. The toughest was at over 4.500 meters – things could have gone badly if it hadn’t been for a spontaneous rescue. Since I’d already felt the symptoms of altitude sickness a few years earlier on Armenia’s highest peak, I at least had an idea of what to expect and was a bit more careful.
Some cases of altitude sickeness I saw personally:
- In Manang a German couple had walked up from the Dharapani in 4 days. The girl had splitting headache, the guy severe double vision. They had to turn back – trip over…
- On the Thorong La, an elderly lady collapsed in the thin air and passed out. Her porter-guide needed to rush down to Muktinath to organize the rescue. I never learned what happened to her.
- On the way from Manang to Ice Lake (4.600 m) I met a Spanish girl in very serious condition – actually I was afraid that she might pass out and die. The girl was a picture of misery: shivering, crying, huddled in the freezing wind. No longer able to walk alone or even speak a clear word, left alone there by her friends. I helped her down the mountain quickly, luckily that helped. 2 days later she was fine again.
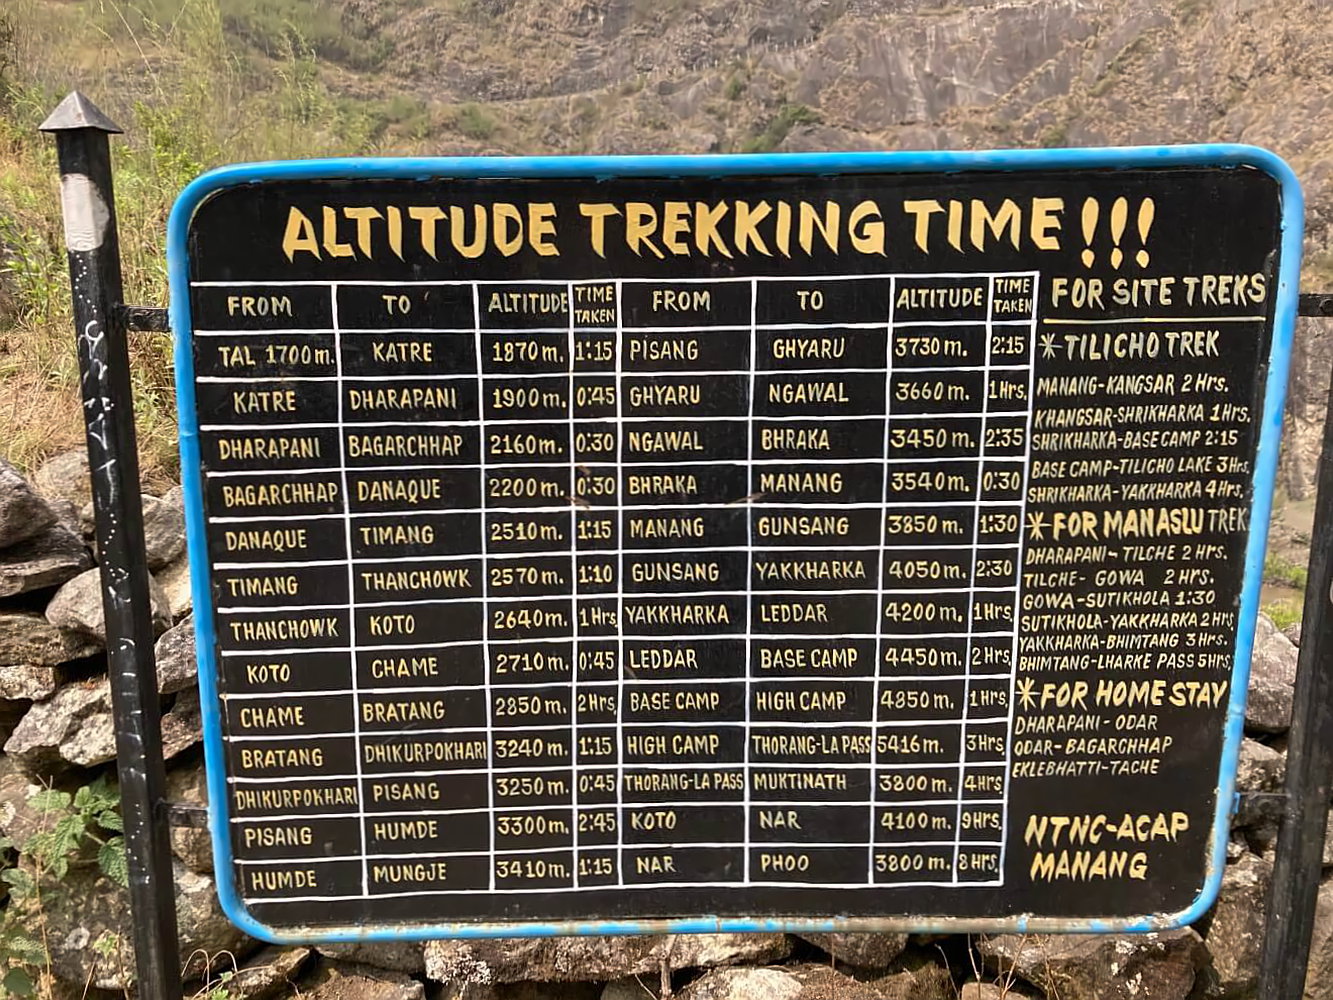
Check out this useful altitude chart with daily mileage and elevation gain:
How to avoid altitude sickness on the Annapurna Circuit
The good news in all of this is: It’s very easy to avoid serious symptoms of altitude sickness. You just have to follow one simple rule: gain altitude slowly and give your body enough time to get used to the thin air.
Let’s take a look at what the experts have to say on the subject:
- Gradual ascent: From an altitude of 3.000 meters onwards only ascend 300–500 meters per day.
- Rest day: As soon as you reach an altitude of 3.500 meters take at least one additional rest day for acclimatization – preferably 2-3 days.
- Hydration: You should drink enough – around 3 liters per day.
- 2nd Rest day: Take another rest day at about 4.500 meters (most people don’t do this)
- Mindfulness: Listen to your own body. A slight headache and a bit of nausea are no cause for concern. But if it gets worse, it is better to descend to a lower altitude.
- Group dynamics: If you are in a group, let your friends know in good time if you feel unwell and don’t let yourself be talked into continuing. If in doubt, it’s better to turn back.
- In an emergency: If you have serious problems, descend as quickly as possible.
Another recommendation was: avoid alcohol and don’t smoke cigarettes. The beer is relatively expensive anyway but I will admit that I’m a smoker. Most guides and porters also smoke and I had a cigarette with some guys on Thorong-La to celebrate the day – not a big deal. On the other hand, I was sufficiently well acclimatized at the time.
Surprisingly, being physically fit has little impact on acclimatization. On the contrary, very fit people often encounter altitude sickness more often because they tend to walk faster and gain elevation too quick. Of course, that doesn’t mean that being unfit is an advantage. It’s a good idea to be in good shape, if only to make the walking more comfortable.
Plan for rest days
The generally accepted advice is to stay in Manang for about 2-3 days and to make day trips for acclimatization. There are many nice options which you will find in my article about Manang. The classic side trip is the day hike to Ice Lake. Check out this article for more inspiration: 13 stunning side trips to discover on the Annapurna Circuit.
These day hikes are not only nice from a scenic standpoint but they serve a vital function: They help you acclimatize. By climbing to an elevated viewpoint and returning to the lodge you get used to progressively higher altitudes. This principle is summed up nicely by the classic rule: “Walk high, sleep low.” Climb a few hundred meters during the day and spend the night at a lower altitude.
📌 Only do day hikes on rest days if you are feeling well. Generally, acclimatization works better when you’re moving and physically active. However, if you are tired and feeling unwell in the first place, don’t push yourself but use the day to rest.

Diamox for better acclimatization?
Many people take Diamox for better acclimatization or to alleviate symptoms. It’s a well-known medication in pill form, you can easily get it in Kathmandu and Manang for a few bucks. It’s particularly popular with groups on a tight schedule.
- For prevention, half a tablet in the morning and evening is recommended.
- For acute cases, take one tablet or more as needed.
I personally never take Diamox and get by just fine. Carrying a few pills for emergencies is not a bad idea though – if only to help other people who might have troubles.
Here’s how I acclimatized
I followed the rules outlined above quite closely. In fact, I ended up moving a bit slower than recommended. My acclimatization plan was as follows:
- Starting in Upper Pisang (3.300 m) I covered a maximum of 500 meters of elevation gain/day.
- Exception: trail to Thorong High Camp (4.925 m), about 700 meters elevation gain.
- Before reaching Manang (3.540 m) I spent 1 night at Ngawal (3.670 m) and 1 night at Bhraka (3.439 m).
- On my trip to Tilicho Lake from Manang I spent 3 nights above 4.000 meters
- Until the day of the pass crossing I had been trekking for 14 days.
Here’s the interesting part: I still wasn’t fully acclimatized. I didn’t have any noticeable symptoms, but I was definitely not as fit as usual above 4.000 meters. From 4.500 meters upwards, I felt like an old man and had to consciously focus on my breathing.
I only really felt well acclimatized after I had crossed the pass. On the way to Annapurna Base Camp and Mardi Himal two weeks later, walking above 4.000 meters was no longer a problem and felt completely normal.
This is something I confirmed during subsequent trips in Ladakh and Himachal Pradesh, where I was trekking for several months at a time. True acclimatization takes quite long – think weeks, not days. Don’t necessarily expect to feel in top form if you follow the above rules and take a few rest days. This only helps to prevent the dangerous symptoms.
Best time to travel around Annapurna
Back to the more pleasant things in life: the best time for the big trip. That’s relatively simple, the travel times in Nepal are clearly defined. There are two main trekking seasons in the Himalayas. These are the dry periods before and after the annual monsoon rains (mid June – end of September):
- 🌸 Pre-monsoon: spring (mid March to mid May)
- 🍁 Post-monsoon: autumn (mid October to mid December )
In spring, you can expect the Annapurna Circuit to have warmer temperatures and blooming rhododendron forests. On the other hand, after mid May it can get hazy at around 10:00, especially in the southern foothills which impacts visibility. Also rain showers tend to become more frequent as the monsoon approaches.
Autumn is peak season and brings bright blue skies with zero rain and almost limitless visibility. But it’s also a lot busier then and it can get crowded on the trails and at the lodges. At higher altitudes, it is also quite a bit colder than in spring. And the days are shorter.
📌 For the past couple of years monsoon has lingered well into October – the first half of the month can be quite rainy and cloudy. So it’s generally best not to start the trek before mid October.
I have visited the Annapurna Circuit in both spring and fall. Both seasons have their advantages. The warmer temperatures and longer days in spring are definitely a plus and from Pisang to Tatopani, I had clear blue skies and good mountain views almost every day. However the haze in the southern foothills was annoying.
If I had to choose again, I would trek the Circuit in the first half of November. It’s not as crowded as October and the views are truly incredible. However it’s definitely colder, in particular around Manang. Expect freezing temperatures during the night, well below zero degrees at Thorong High Camp and the pass. Bringing a sleeping bag is recommended if you’re a cold sleeper.
Getting to the Annapurna Circuit
To get from Kathmandu to Besisahar, where the Annapurna Circuit starts, you have 3 options:
- 🚌 Local bus: departs from the Gongabu New bus station north of Thamel (Google Maps)
- 🚍 Tourist bus: departs from Sorhakhutte bus stop right next to Thamel (Google Maps)
- 🚙 Jeep: Either private or shared, can be arranged through travel agent or your hotel.
Personally I recommend to take a tourist bus. They’re slightly more expensive but don’t have as many stops as the local busses and they are more comfortable. The local busses have pretty hard seats and the road is quite bumpy in parts.
- A single ticket for the tourist bus costs around 1.000 NPR.
- Expect around 9-10 hours drive to Besisahar.
- Start early, at around 6:00 am. That way you can still walk a bit on the first day if you’re lucky.
- From Besisahar you can also organize jeeps to take you further into the mountains if needed. I paid 3.000 NPR for a shared jeep to Chame.
📌 To buy a ticket for a tourist bus, use the online service BusSewa. It’s very straightforward, just enter start and destination and choose a bus. Payment is via credit card. Take a luxury or sofa bus if possible – they are the most comfortable. 2 bus companies I can recommend are Yeti Travels and Baniya Travel.
Gear list for the Annapurna Circuit
Many trekkers on the Annapurna Circuit carry heavy 60+ litre backpacks. That’s not necessary as you don’t need camping gear or bring much food – everything is provided by the teahouses. In fact, that’s the beauty of the teahouse trails in Nepal: You can hike among the most stunning mountain scenery in the world and only need very little actual gear.
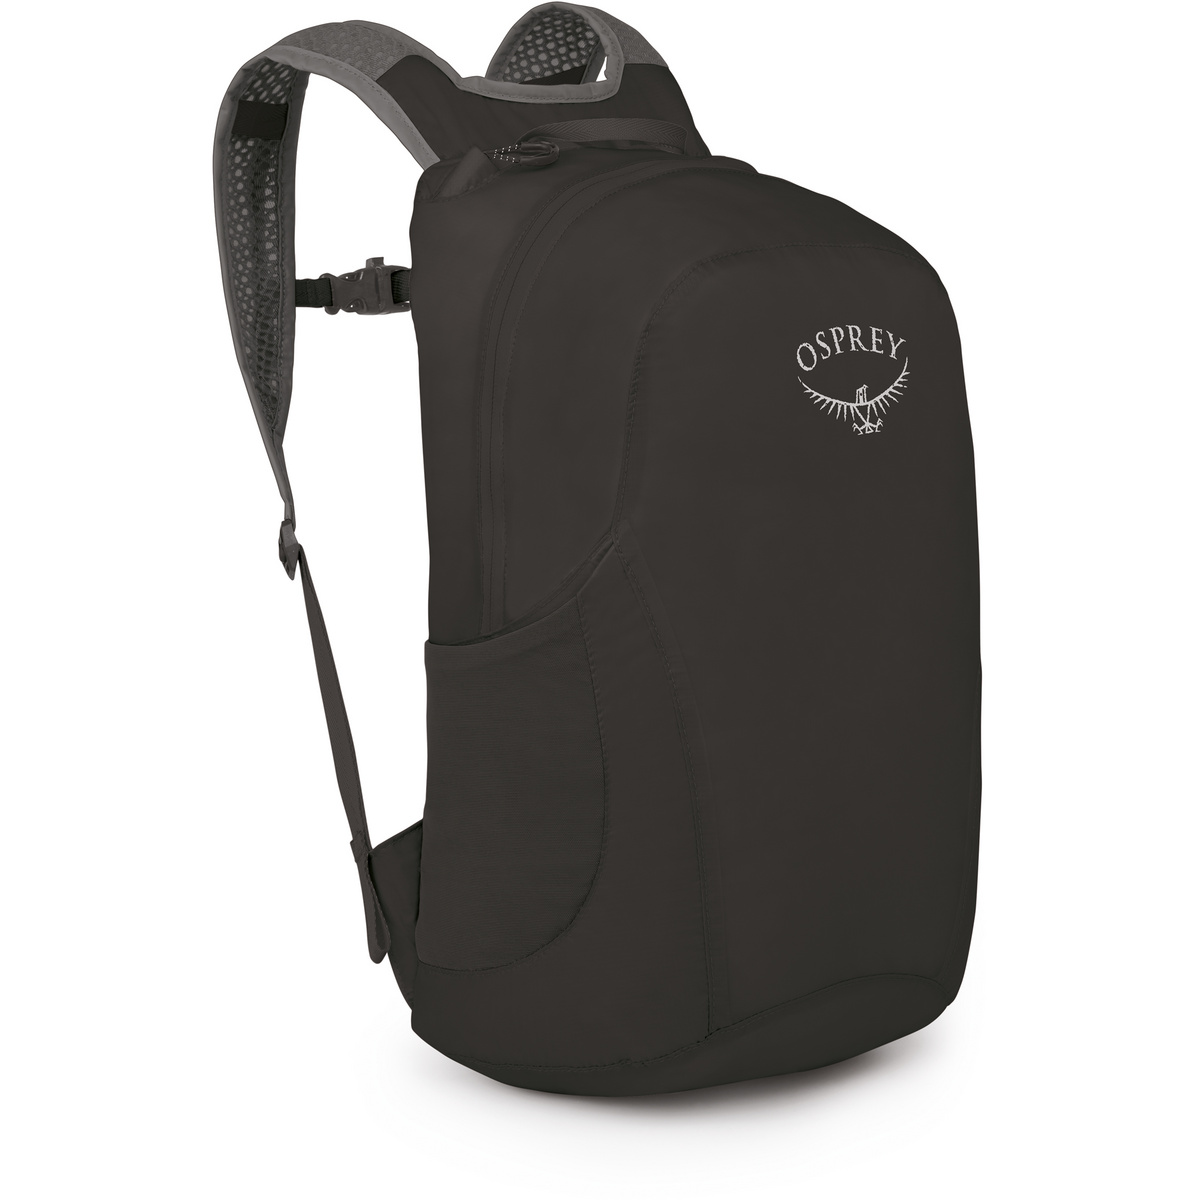
I would recommend to use a backpack with 50 litre max, 40 litre is better. Last time I brought the excellent Osprey Talon 44* and I even had camping gear with me. It’s a really great pack and a good middle ground between an ultralight and a classic trekking backpack.

- Gewicht: 1.400 g
- exzellenter Leichtrucksack mit Frontzugriff
- gepolstertes Tragesystem für optimale Gewichtverteilung
- viel Stauraum für mehrtägige Touren
- höhenverstellbarer Rücken
Another tip: don’t bring too many clothes. You can wash along the way and many lodges offer a laundry service. In Manang my laundry was ready within half a day.
I recommend to organize your clothing this way:
- 🥾 1 set of hiking clothes: T-shirt, trousers, fleece pullover or down jacket if necessary, sun protection
- 👕 1 set of after-hike clothes for the lodge: long-sleeved shirt, long underwear, comfortable shoes, extra sweater if necessary, scarf/hat for cold evenings
Many people bring way too many casual clothes. Of course that’s a personal choice. But when you think about it – you don’t really need that much. More than 2 T-shirts is pointless as you can only wear one at a time. If needed you simply wash the other one during that period. The same applies to underwear. And for sweaters or larger items: one is enough as you don’t usually move around much in these clothes so you can easily wear them for the whole trek.
I had the following with me:
Clothing
- 1 merino shirt for hiking during the day
- 1 long merino shirt for changing in the evening + for sleeping
- Light fleece pullover for during the day in cooler temperatures
- Down jacket for breaks during the day/ evening in the lodge
- 1 pair of trekking trousers (zip-off)
Recommendation for fleece jacket: Patagonia R1 Air Hoody

- Gewicht: 366 g
- Atmungsaktiv und geruchshemmend
- Hoher Tragekomfort
- Kapuze bietet zusätzliche Wärme am Kopf
- Vielseitig einsetzbare Mid-Layer-Schicht
Outer layer:
- 3-layer Goretex rain jacket, can also be worn as an insulating jacket in windy conditions
- Rain trousers, can also be worn as casual trousers in the evening
Base layer recommendation: Merino Icebreaker 200

- Gewicht: 219 g
- Hochwertiges Langarmshirt aus 100% Merinowolle
- Sehr angenehmes Tragegefühl auf der Haut
- Versetzte Nähte an den Schultern für mehr Komfort
- Hohe Geruchsresistenz
Additional clothing:
- 2 pairs of merino underpants
- 1 long merino underpant for sleeping
- 1 trekking shirt
- 2 pairs of trekking socks
- 1 pair of warm wool socks
- Pair of warm gloves
- Sun hat
- Buff, used as a scarf on cold nights and for cool temperatures
- 1 pair of slippers
Recommendation for casual shoes: Exped Camp slippers

- Gewicht: 150 g
- Warme und bequeme Camping- und Hüttenschuhe
- Sehr weiches Fussbett
- Rutschfest, schnell trocknend und atmungsaktiv
- Kleines Packmaß
I used these clothes both in spring and fall and layered them depending on the weather. That worked really well. During the day the sun was usually out, so I could walk around in just a shirt or a fleece at higher altitudes. In the evenings at the lodge, I sometimes threw on my down jacket.
For the pass, I added a buff, fleece, gloves, and my Gore-Tex jacket – that was more than enough. One thing to keep in mind: I crossed Thorong La only in spring. In the fall, the pass will almost certainly be very cold (well below 0° degrees, even colder in the early morning).
🎒 A small and very light daypack that is well suited for day hikes is the Osprey Ultra Stuffpack*. When you don’t need it, you simply roll it up and put it in your main backpack – it weighs just under 100 grams.
- Gewicht: 115 g
- Zwei elastische Seitenfächer
- Gepolsterte Schulterriemen aus Mesh
- Verstellbarer Brustriemen
- Ideale Ergänzung für Fernwanderungen
Sleeping equipment
- Spring: Katabatic Gear Palisade* (30° F, – 1°C)
- Fall: Katabatic Gear Sawatch* (15° F, – 9°C)
Hygiene & Health
- First-aid kit (plus small packet of Diamox)
- Plasters/blister plasters
- Sunblock (SPF 50+) & lip protection
- Disinfectant for hands
- Toilet paper & zip-lock bags (for garbage)
- Toothbrush/toothpaste
- Hand towel (microfiber, quick-drying)
There is no toilet paper in the lodge toilets, but it can be purchased in pretty much every shop. Medication is safely available in Manang, either in the shops at main street or at a small clinic located between the museum and Hotel Himalaya Sing (Google Maps). You can get common remedies for colds and other minor illnesses there, as well as Diamox for altitude sickness symptoms.
Equipment
- Trekking poles
- Polarized sunglasses (UV protection factor 3 or higher)
- Filter and tablets for water purification
- Physical map of the region
- Smartphone with offline map/GPS device
- Power bank
If you are navigating with a smartphone, always make sure that you have enough power. A power bank is therefore essential. Since you can charge it at the lodges, the power bank does not have to be overly large. I like to use the light and compact Anker Powercore.

- Gewicht: 200 g (inkl. Micro-USB-Kabel + Beutel)
- Kompakte + leistungsstarke Powerbank, ideal für Rucksackreisende
- hochwertige Verarbeitung
- ca. 4-5 Aufladungen von Smartphones
- Vor Überspannung und Kurzschluss geschützt
📌 Check out my tried-and-tested gear list for multi-day hikes. It includes exact weights and plenty of useful tips. I used this list almost unchanged for the Annapurna Circuit. Also take a look at my monthly updated selection of the best current outdoor deals and bargains.
Choosing the right hiking boots
As always, opinions vary when it comes to hiking boots. Many people I met were wearing heavy mountain boots. In my view, that’s overkill, since most of the trails are fairly easy. The first time I wore Garmont Dragontail* approach shoes, the second time simple trailrunners from Columbia – both were perfectly adequate.

If I would do the trek another time, I would definitely opt for trailrunners again. I used these shoes in pretty rough conditions, crossing the almost 5.000 mtr. Namun La pass in snow. So, I’m pretty confident you can use trailrunners for Thorong La as well. For safety purposes it’s a good idea to bring some microspikes/mini-crampons for better grip on snowy trails (around 1.000 NPR in Thamel or Pokhara).
Do you need a sleeping bag for the Annapurna Circuit?
This question bothered me for quite a while. Some blogs suggested bringing a sleeping bag rated down to -10 °C and I even thought about renting a heavy winter bag in Kathmandu. In the end, in spring I just used my lighter down quilt (comfort range -1 °C), and it worked perfectly fine.
The second time in fall I was also camping, so I brought the -10 °C down quilt. I used this in some of the lodges as well, e.g. in Manang and I was very glad to have the extra layer of down. The nights above 3.500 meters were very cold. Of course it all depends a bit on your personal tolerance for discomfort. But in fall bringing a warm sleeping bag/quilt is definitely not a bad idea.
Safety and cultural aspects
Nepal is a safe country to travel. The Nepalese are friendly and relaxed, the hassle-factor is relatively low. Actually, my meetings with the local population were always the highlights of the trips. So don’t worry too much about crime etc. I`ve been to Nepal 3 times now, always for several months and never had any even remotely negative experience. I think it`s very unlikely that something bad will happen to you.
Begging is an issue but it’s not as bad as India. Many Nepali are quite diffident to approach you and not nearly as brash as Indian beggars. Sometimes a few children asked for chocolate and sweets. But if I shook my head, I was left alone relatively quickly. I was directly asked for money maybe two or three times.
Thamel, the famous tourist district of Kathmandu, is of course a bit different. Various vendors will approach you quite often, trying to sell you trinkets, souvenirs, jewellery or hash. It’s best to simply ignore these people or just shake your head briefly. Don’t talk to them. Also, don’t enter those tiny dark alleyways between the main roads during the middle of the night. There are quite a few shady characters roaming around Thamel during the small hours of morning.
Communication
The level of English in Nepal is quite good, particularly on a popular trail like the Annapurna Circuit. You will be able to talk to many Nepali, particularly in the lodges. But I kept meeting locals with whom I could talk even on the trails. Some of them even know a few words of German, French or Spanish. So it’s quite easy to communicate with local people.
Of course there are many friendly backpackers as well and chances are, you will walk together for a time with some of them. I met a girl from Belgium and one traveller from Pakistan at the café in Bhratang and we spend a few days hiking as team until Manang – great experience! I never once felt lonely in the Annapurna region.
Read more: 5 unexpected lessons I learned in 2 months in Nepal

Final Tips
Here are a few final tips and information that might help you:
- Currency: Nepalese Rupee (NPR). For 1 Dollar you get about 140 NPR.
- Time difference to Europe: + 03:45 hours/+ 04:45 hours (depending on summer or winter time)
- Water: Do not drink tap water unless you have filtered it or treated it in some other way.
- Hygiene: Use hand sanitizer regularly, especially before eating.
- Toilet paper: Not usually available in the lodges. However, you can buy it in every village along the way.
- Provisions: You don’t need to carry huge amounts of water and food, as you will come across villages with lodges and restaurants every 2-3 hours at the latest.
- Planning: Allow yourself enough time for the trek and plan at least 1-2 buffer days for bad weather, health issues, traffic jams etc.
- After the trek: Consider staying a few days in Pokhara. Nepals famous lake-city is a great place to unwind and relax. The nature is stunning, the mountain views are amazing. Also, you can easily get to Chitwan National Park.
- Kahmandu: Another option would be Kathmandu. There is an incredible amount of culture to see and experience and the city is much better than its bad reputation.
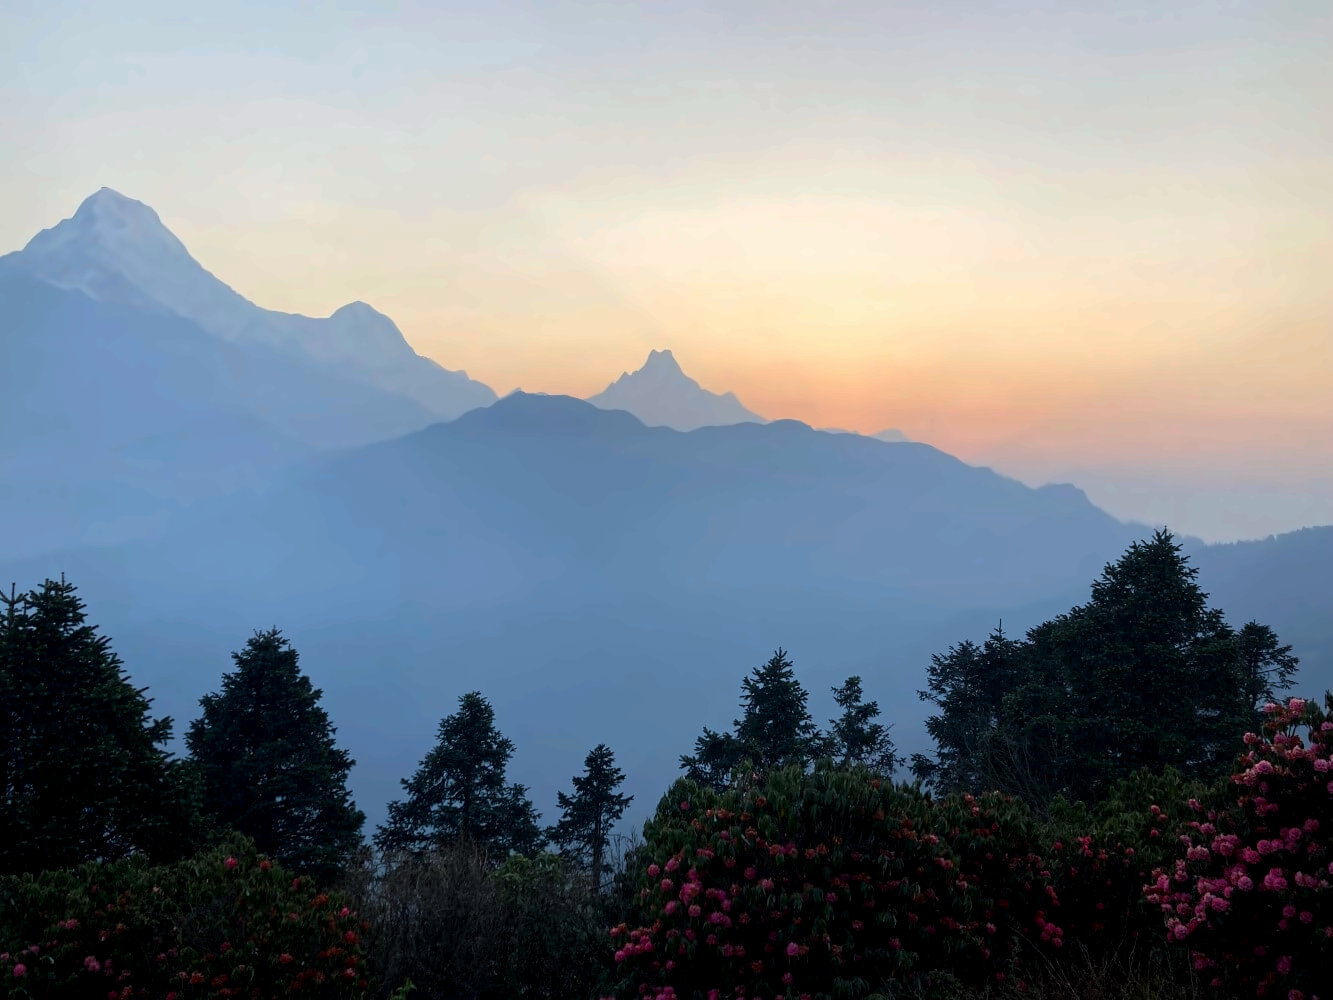
My verdict on the Annapurna Circuit
Is the Annapurna Circuit the best trek in the world as you hear so often? I think that’s the wrong question. The world is big, there are countless other exciting trails—perhaps even more thrilling because they are less developed and still retain the charm of the undiscovered. But that doesn’t take away from a blockbuster like the Annapurna Circuit. The better question is whether this trek is still worth doing today. My answer: definitely!
In terms of landscapes the trail follows an almost perfect dramatic arc. After the gentle start in the Nepalese foothills the scenery becomes more breathtaking each day before it reaches the peak with the crossing of a true Himalayan high-altitude pass. Afterwards, the route gradually returns to civilization, culminating in the blooming rhododendron forests around Poon Hill. That’s a truly cinematic experience that’s hard to beat.
Of course, the roads are a challenge and it’s difficult to predict what the future will bring. So far the NATT trails offer a solution that works relatively well. I only hope ACAP will use the tourist dollars wisely to expand these trails, maybe even explore new routes. It would be a shame if this legendary trail someday disappeared completely beneath an asphalt road. As of now, I can only say: If you’ve never hiked before in Nepal or the Himalayas and fancy doing the Annapurna Circuit, go for it. Chances are you’ll go home with a bunch of unforgettable memories!
Found this article helpful?
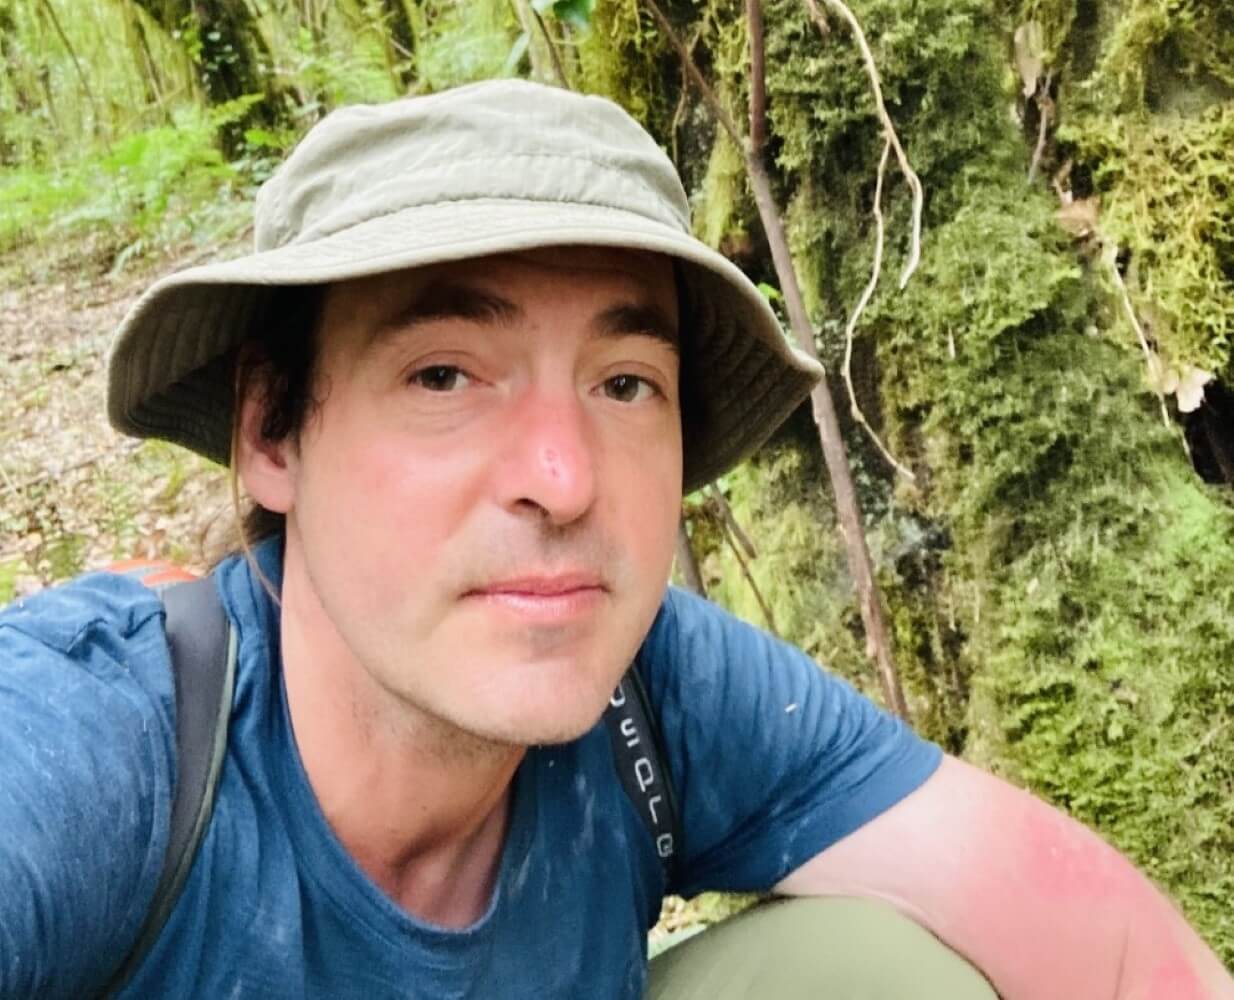
If you enjoyed this guide, you can buy me a virtual coffee:
Your support helps keep guides and stories like this freely accessible for everyone — independently researched, ad-free and driven by passion not algorithms.
Do you have any questions about the Annapurna Circuit? Anything missing in the article? Or do you know other exciting treks in Nepal? Let me know in the comments – I look forward to hearing from you!
Disclaimer: This article contains affiliate links marked with an asterisk * that lead to online retailers such as Amazon. If you click on such a link and buy something, I will receive a small share that helps finance this blog. This is the best way for you to say thank you if you liked the post. Of course, there are no additional costs for you.